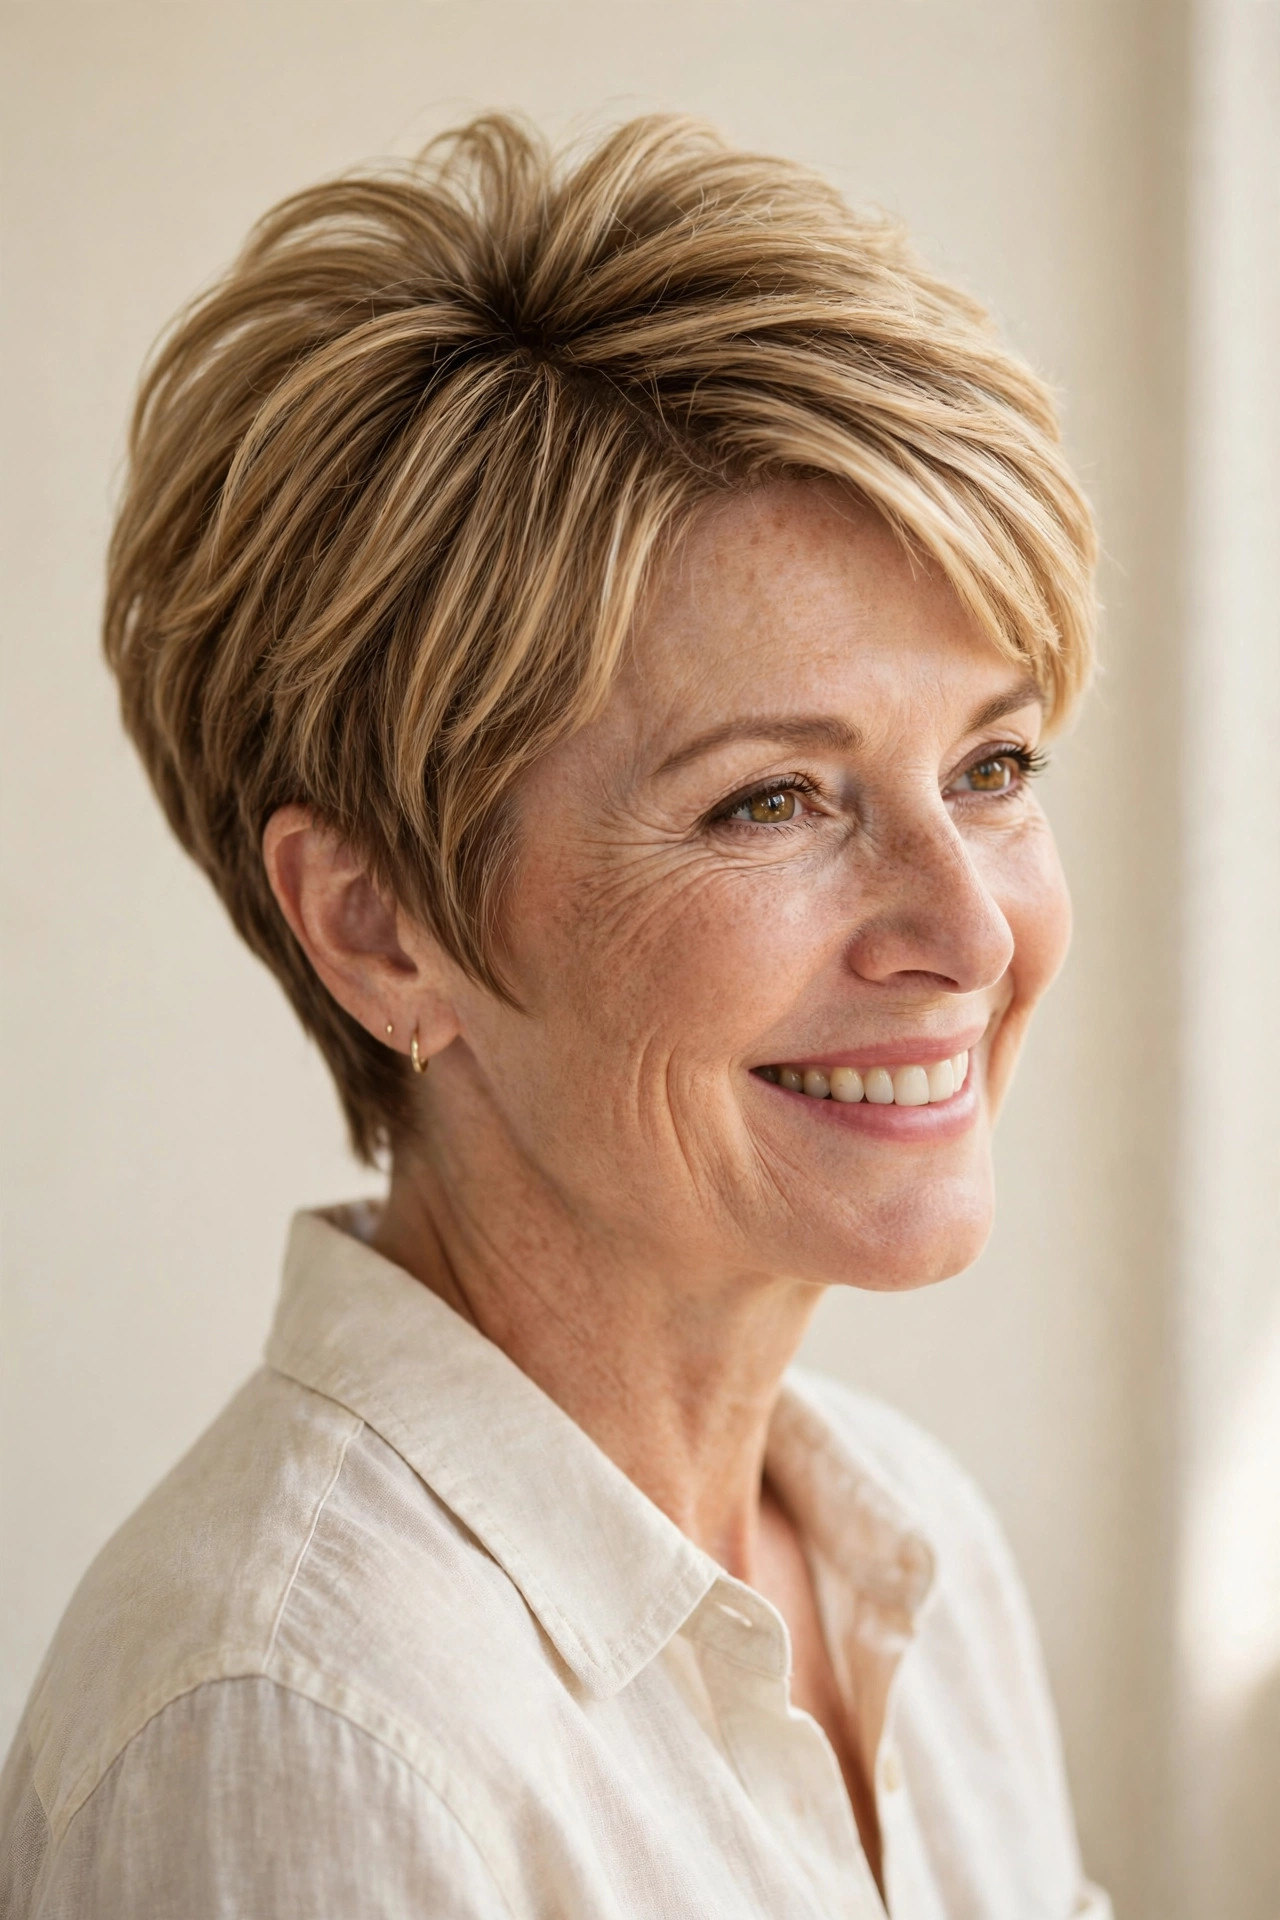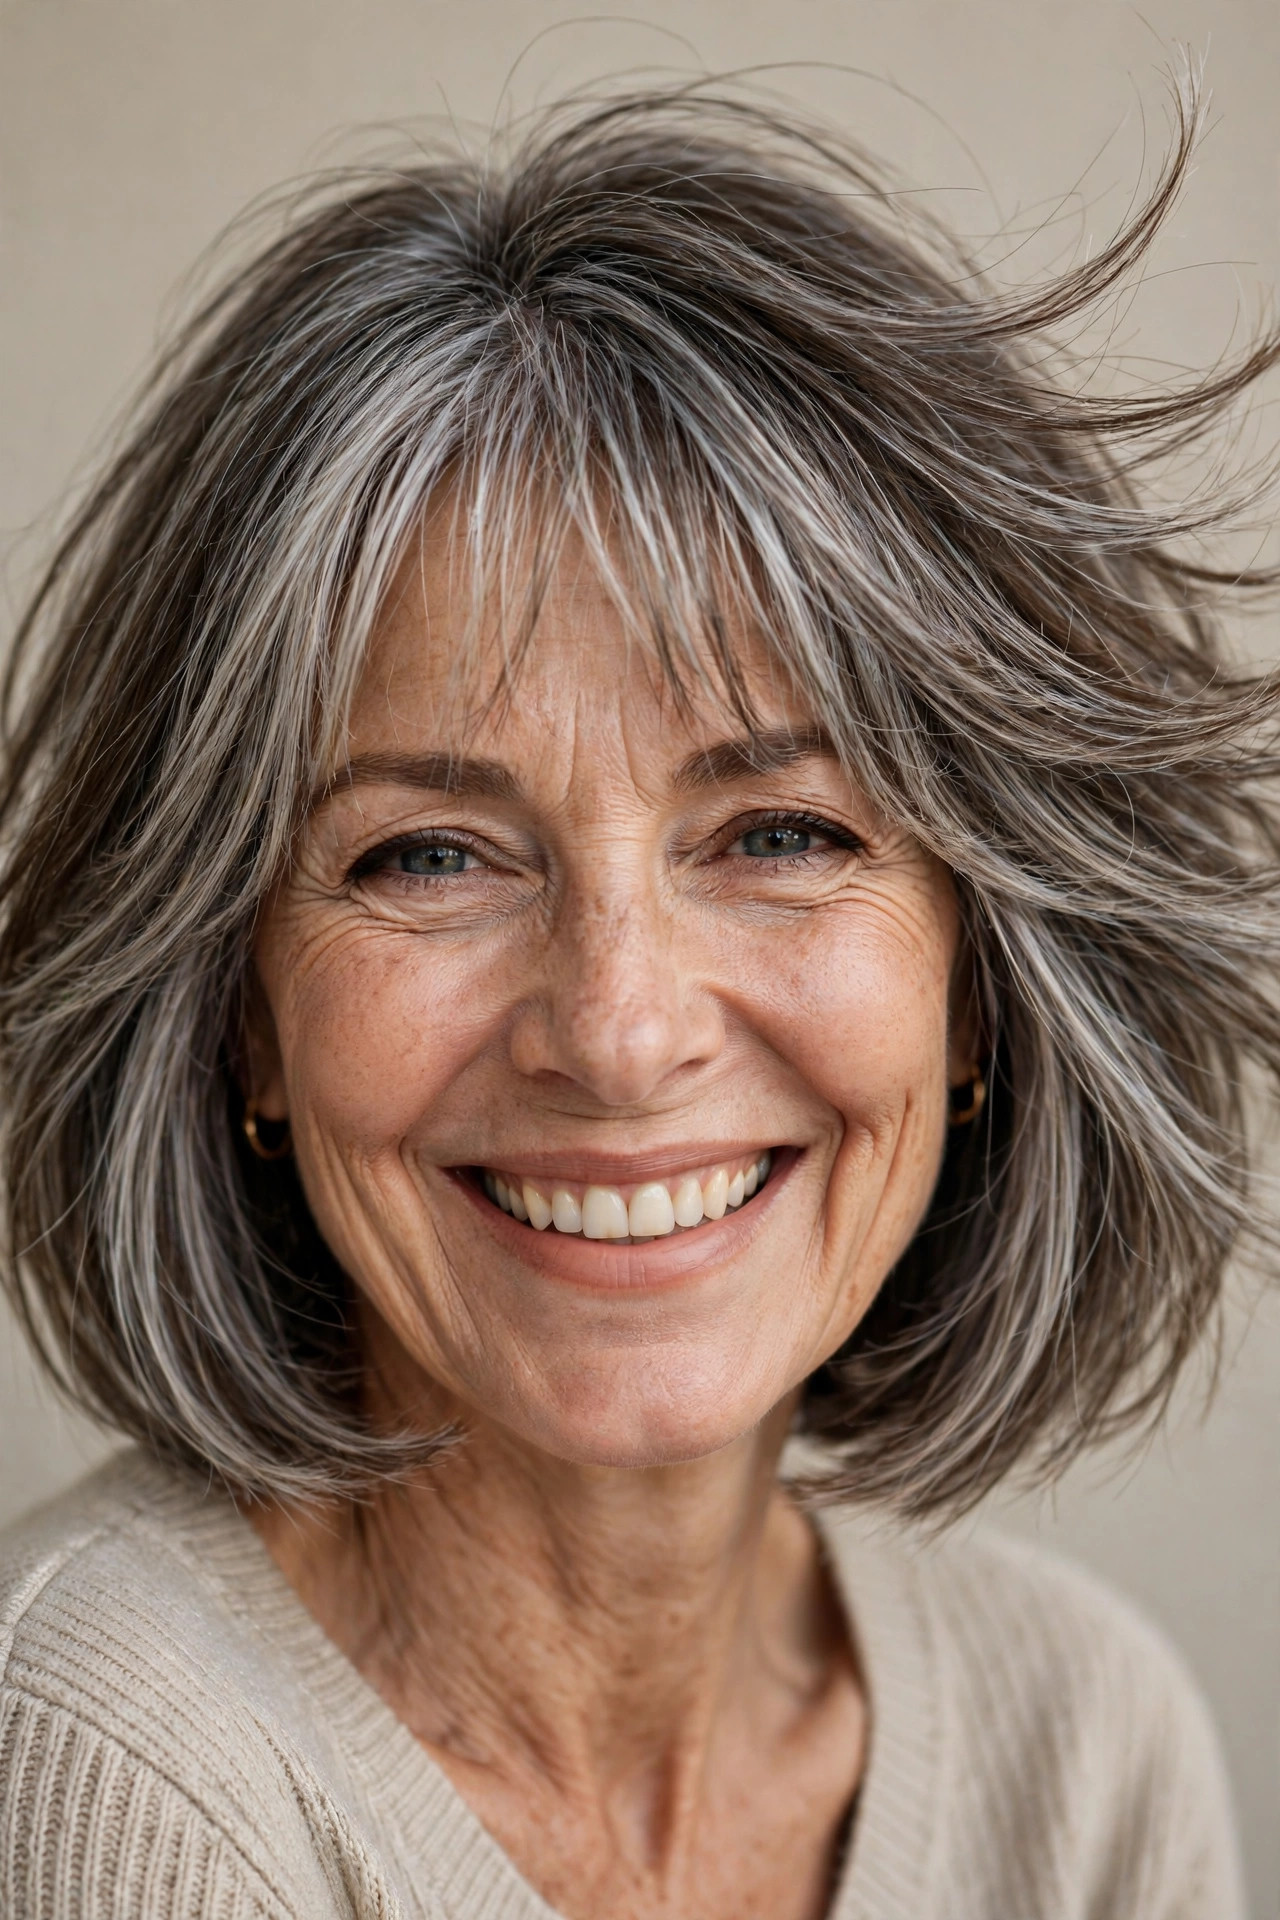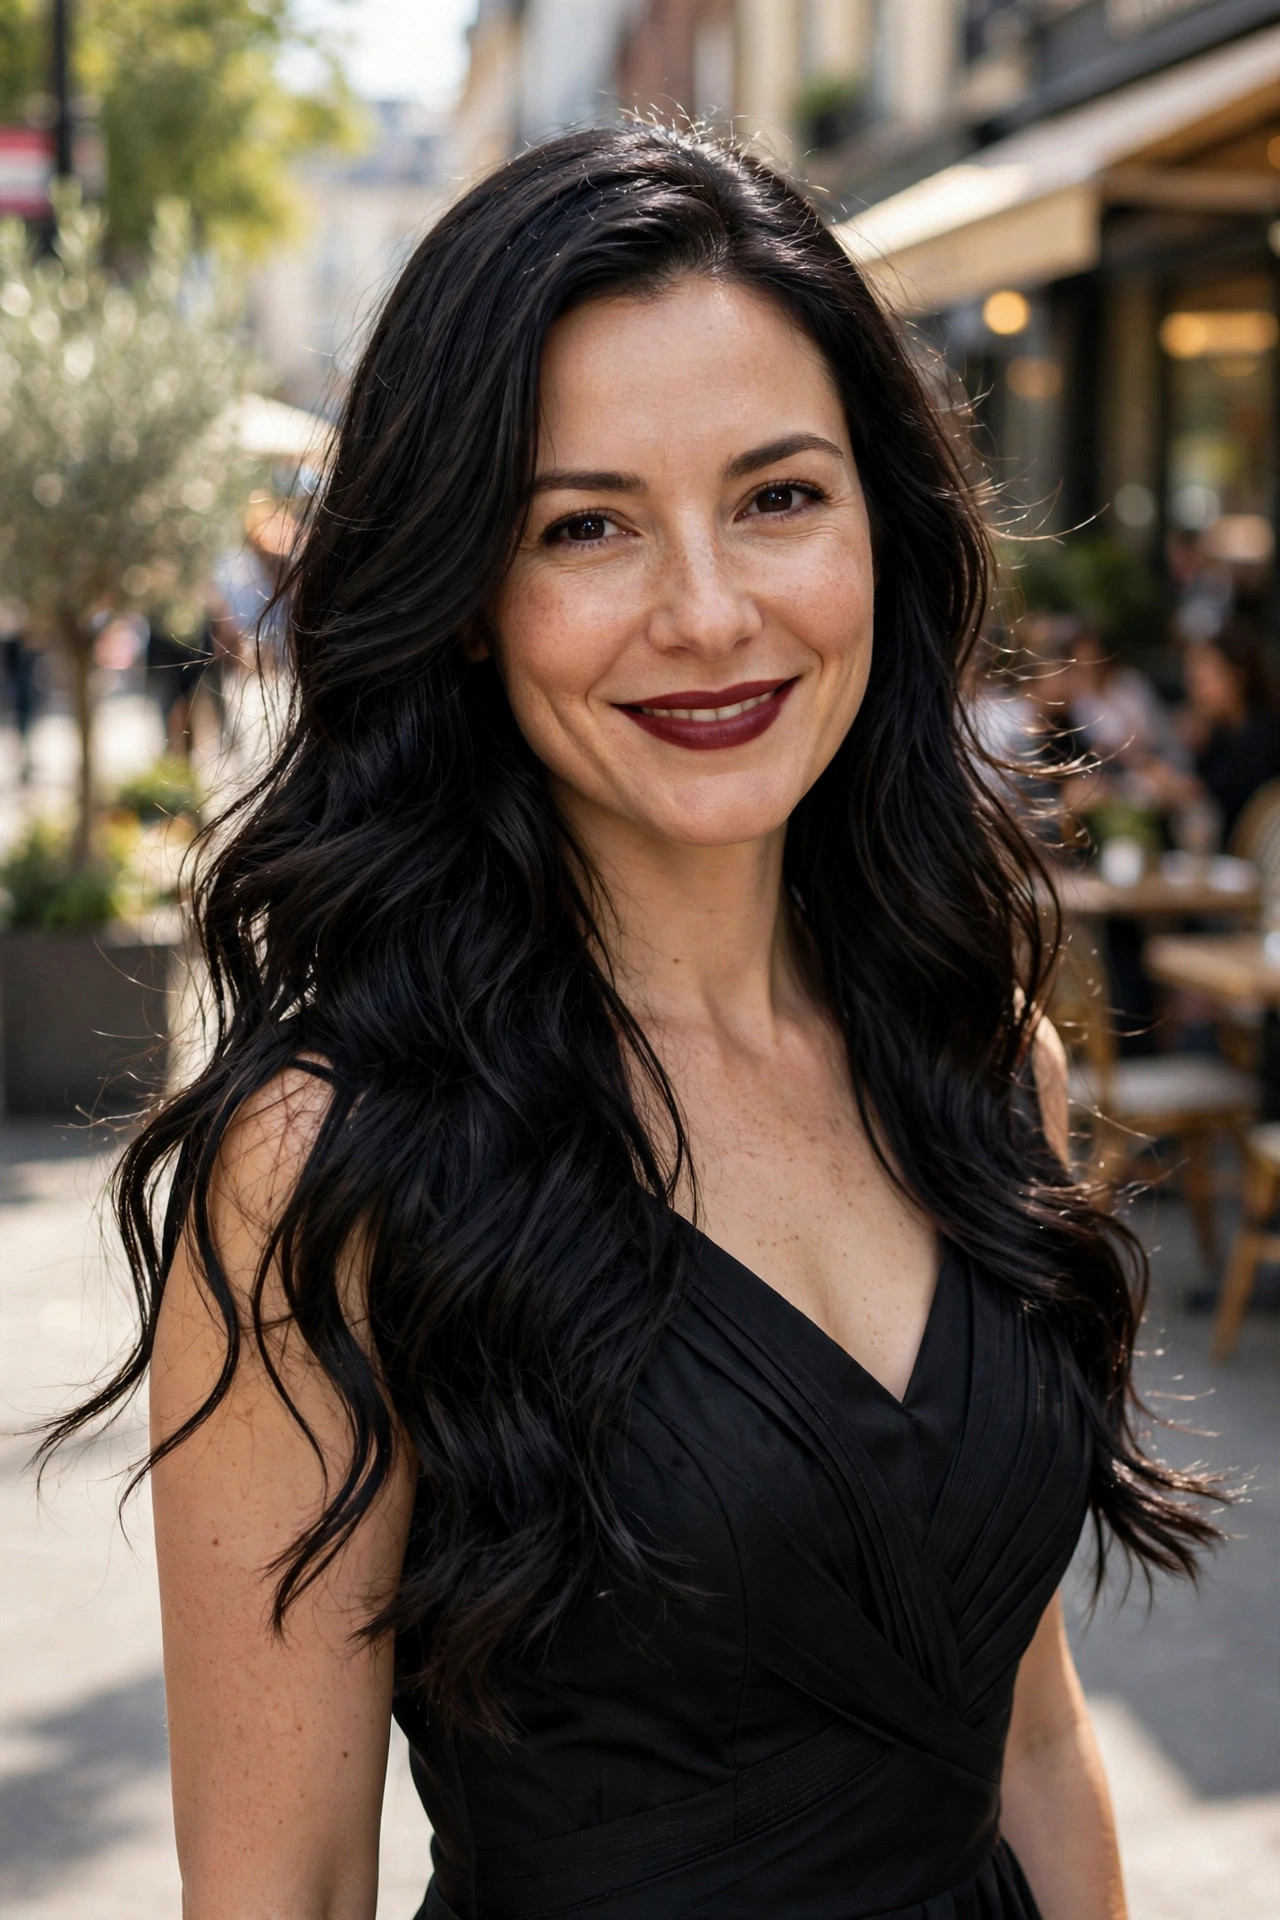
There is something instantly joyful about christmas hairstyles with bows, and this collection gathers twenty-one sweet ways to wear them through every party, dinner, and family photo this season. From plush velvet to glossy satin and cheerful plaid, a well-chosen bow can turn even the simplest ponytail, braid, or bun into a festive finishing touch without hours in front of the mirror. Whether your hair is long, short, curly, straight, thick, or fine, you will find a style here that feels like you, only a little more celebratory. Each idea below comes with simple styling notes, so you can recreate the look at home, swap bow colours to match your outfit, and head out the door feeling polished, pretty, and ready for every holiday moment ahead.
Velvet Bow Half-Up Waves
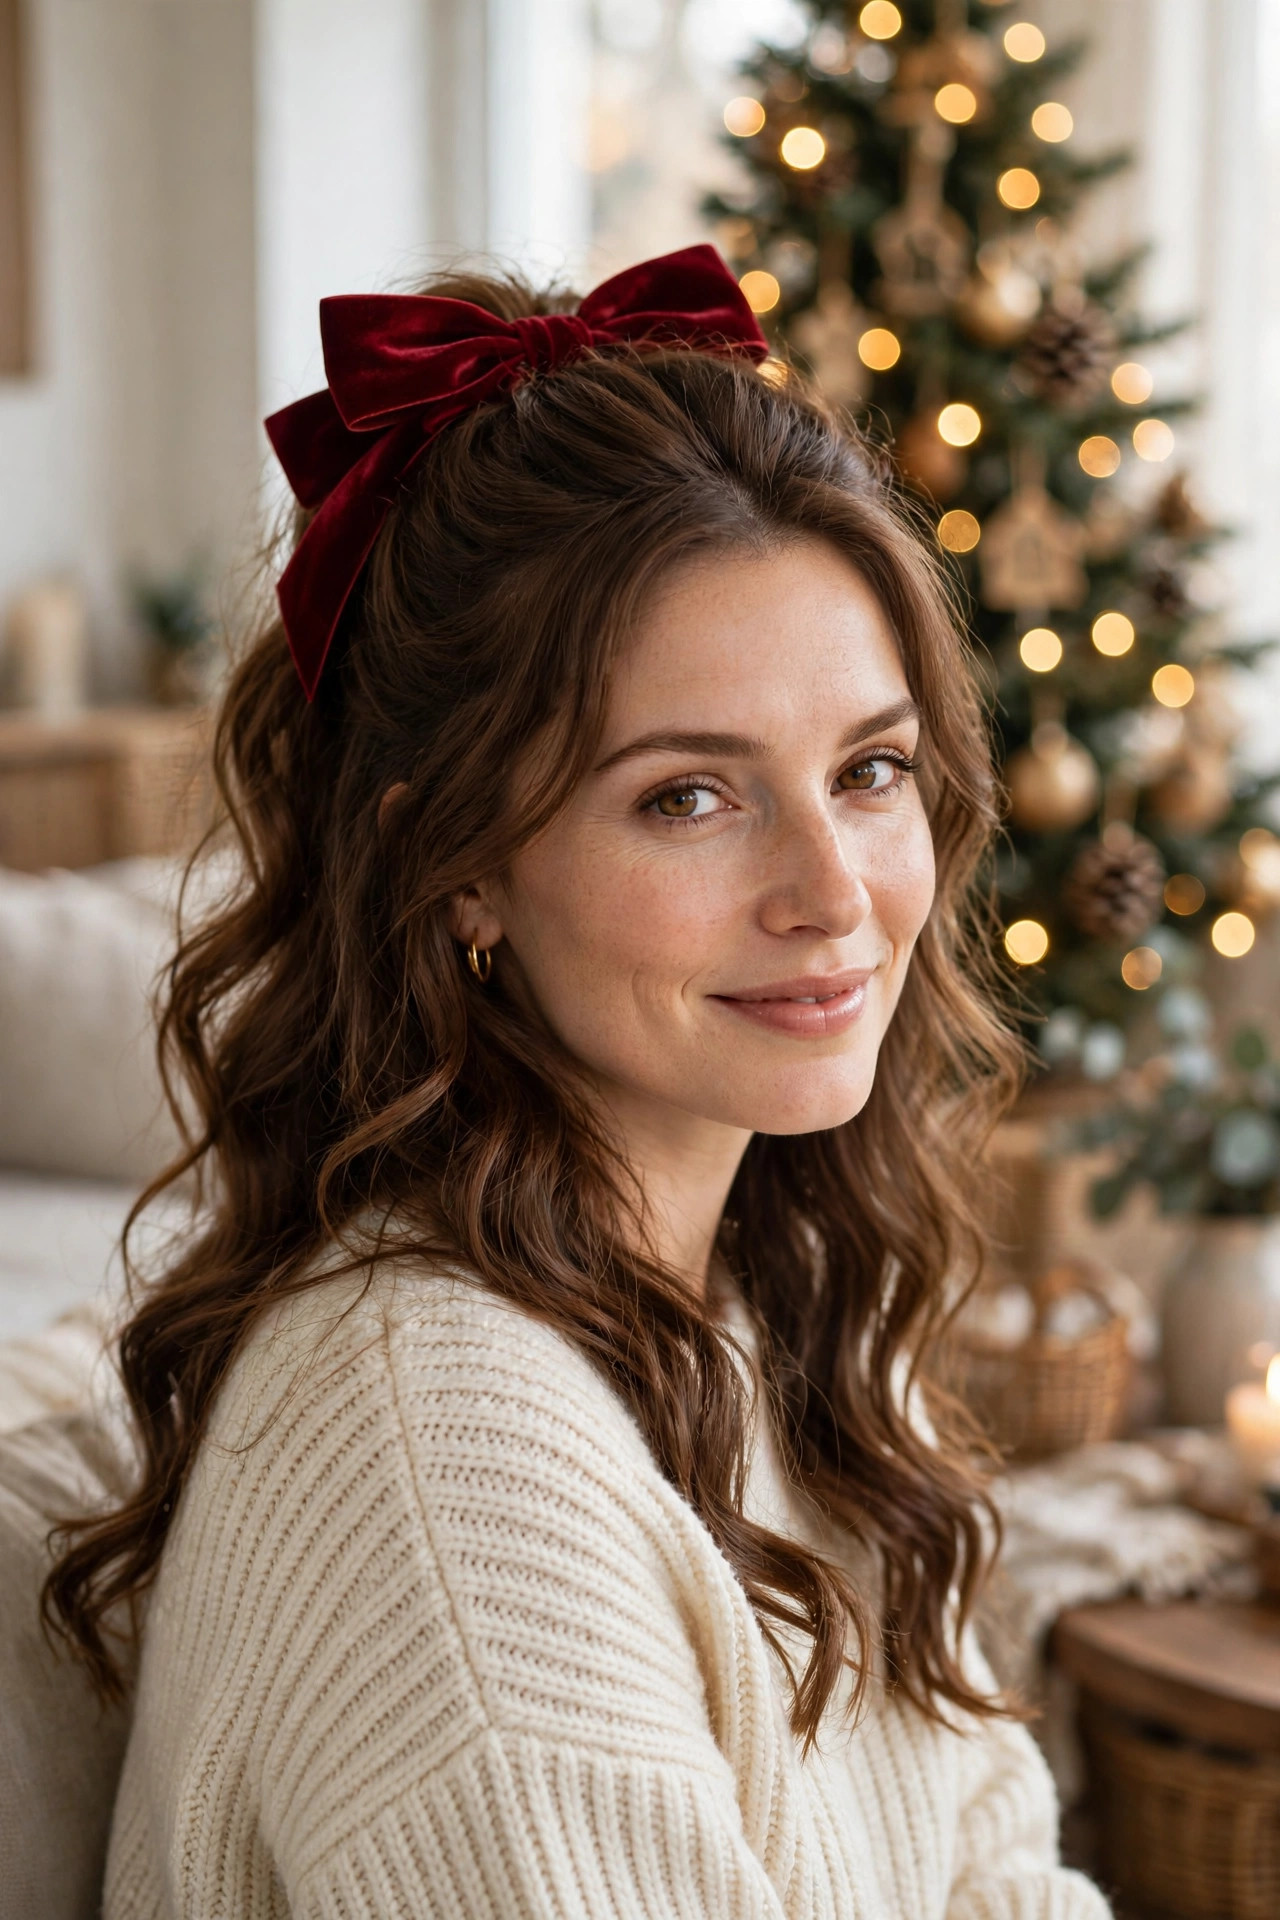
- Curl hair in large sections with a wide barrel iron
- Tease the crown lightly for soft volume
- Gather only the top half and secure it neatly
- Clip the velvet bow over the elastic to hide it
This half-up style is the easiest way to look instantly festive, because it keeps your length on show while the bow does all the talking. Start by curling your hair in large, loose sections and brushing them out gently so the waves fall soft rather than tight and springy. Gather just the top section from temple to temple, smooth it back without pulling it flat, and secure it with a small clear elastic. Placing a plush velvet bow directly over that elastic hides the mechanics and gives the look a polished, gift-wrapped finish that photographs beautifully from every angle.
The real charm of this look is how forgiving it is on busy party mornings, since slightly imperfect waves only make it prettier. If your hair is fine, a light volumizing mousse at the roots and a quick backcomb at the crown will stop the top section from falling flat by dessert. For thick or curly hair, smooth only the gathered section and let your natural texture carry the lengths. Swap the bow colour to match your dress, add a touch of shine spray, and you have a sweet, romantic style that moves gracefully from family dinner to late-night dancing.
Satin Bow Low Ponytail
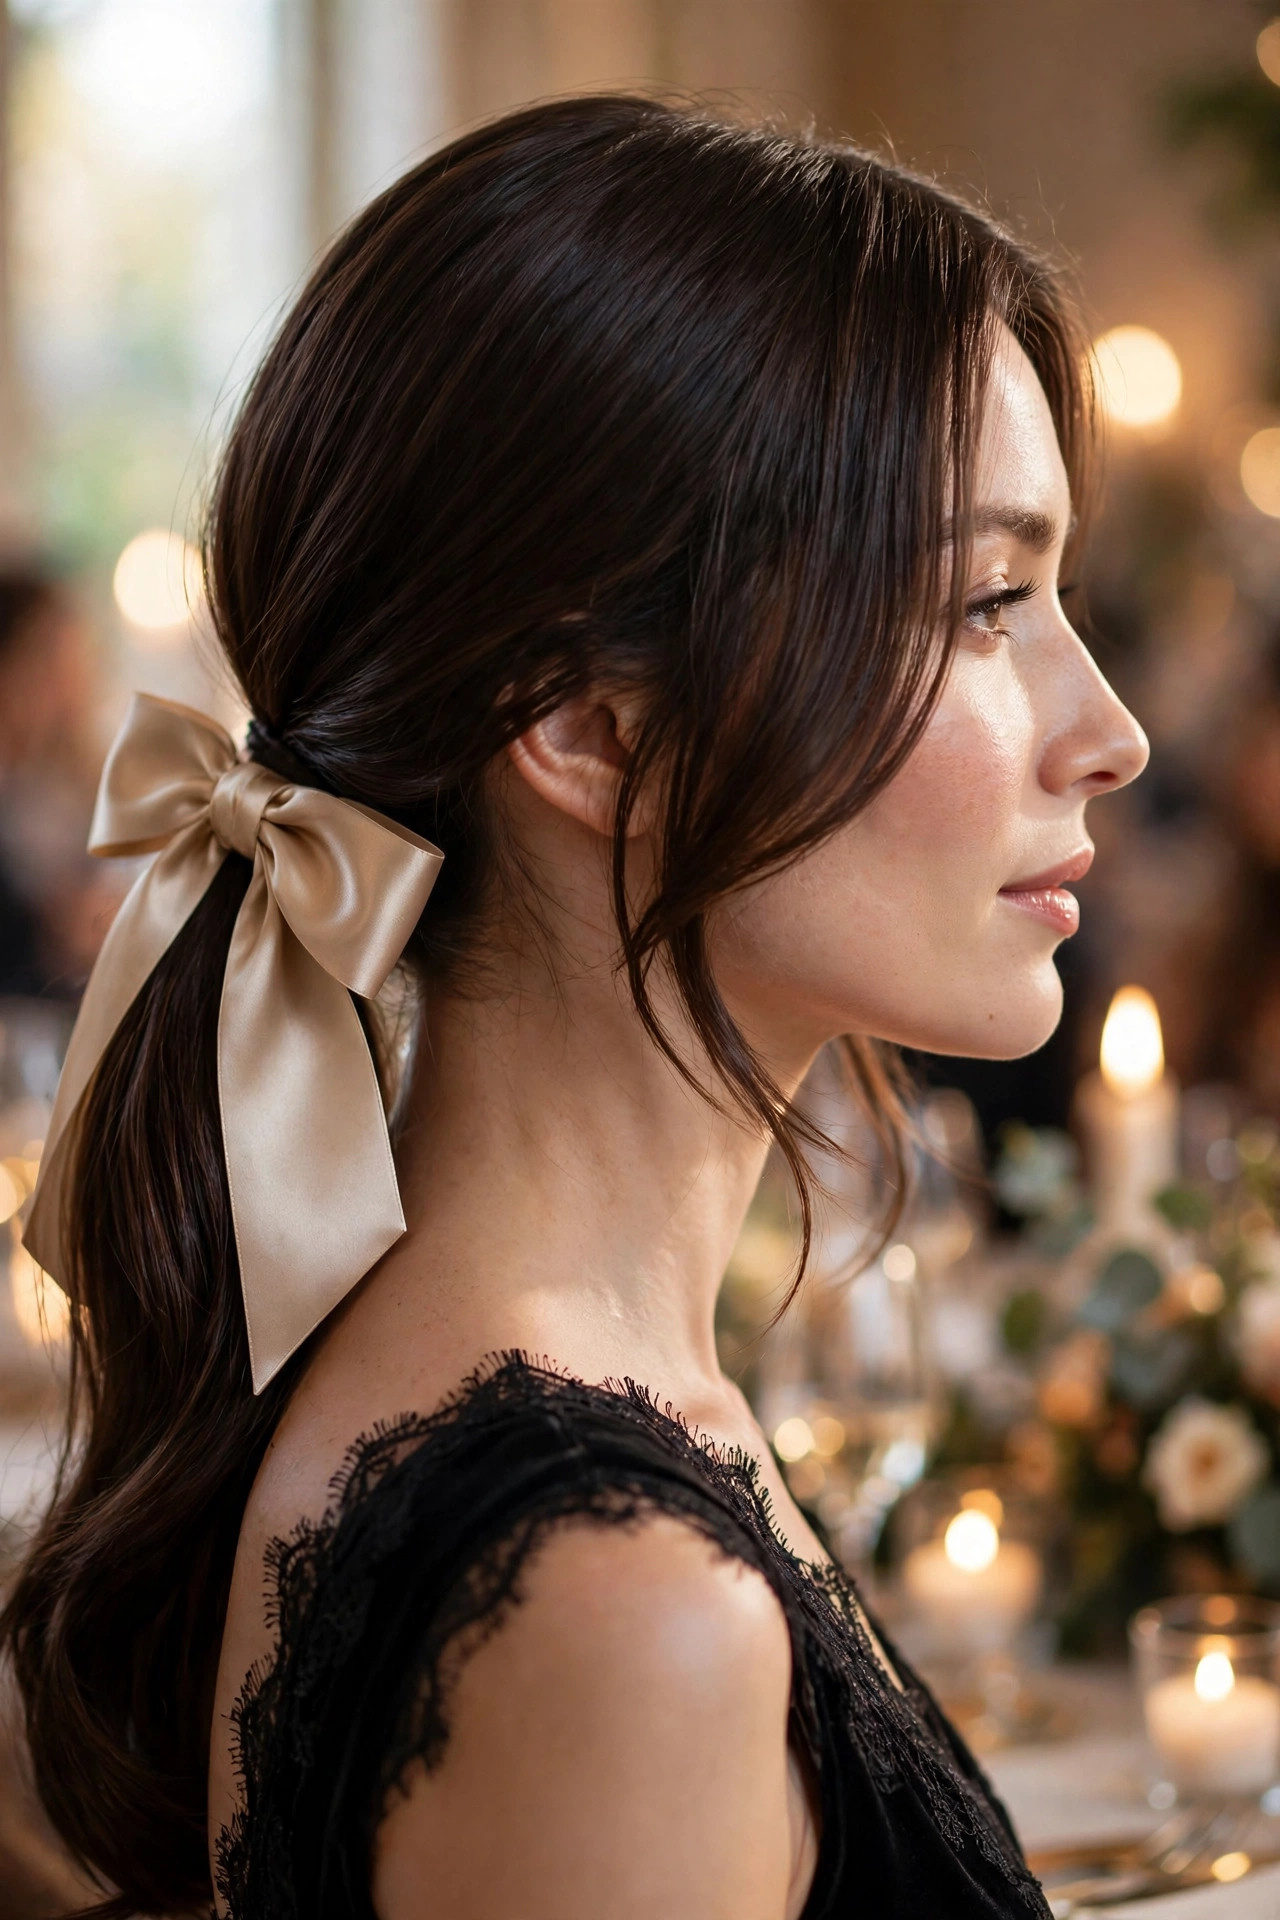
- Smooth hair with a paddle brush and serum
- Secure the ponytail low at the nape
- Wrap a strand around the elastic base
- Tie the satin bow neatly on top
A low ponytail sounds simple, yet finished with a glossy satin bow it becomes one of the most elegant looks of the season. Begin with smooth, brushed hair and a drop of serum through the lengths to tame flyaways without making the hair look stiff or greasy. Gather everything low at the nape, keeping the part neat, and wrap a small strand around the elastic for a salon-clean base. The satin bow then sits like jewellery at the back, catching the light whenever you turn your head at a dinner table.
This style suits almost every face shape, because the low placement lengthens the neck and the soft front layers keep it from feeling severe. If you have short or medium hair, clip-in length is unnecessary; simply embrace a slightly shorter tail and choose a smaller bow so the proportions stay balanced. For a formal evening, keep the ponytail sleek and straight, while a gentle bend through the ends makes the same style feel relaxed enough for a cosy gathering at home with friends. Patience here pays off beautifully in the final photographs.
Plaid Bow Bubble Braid
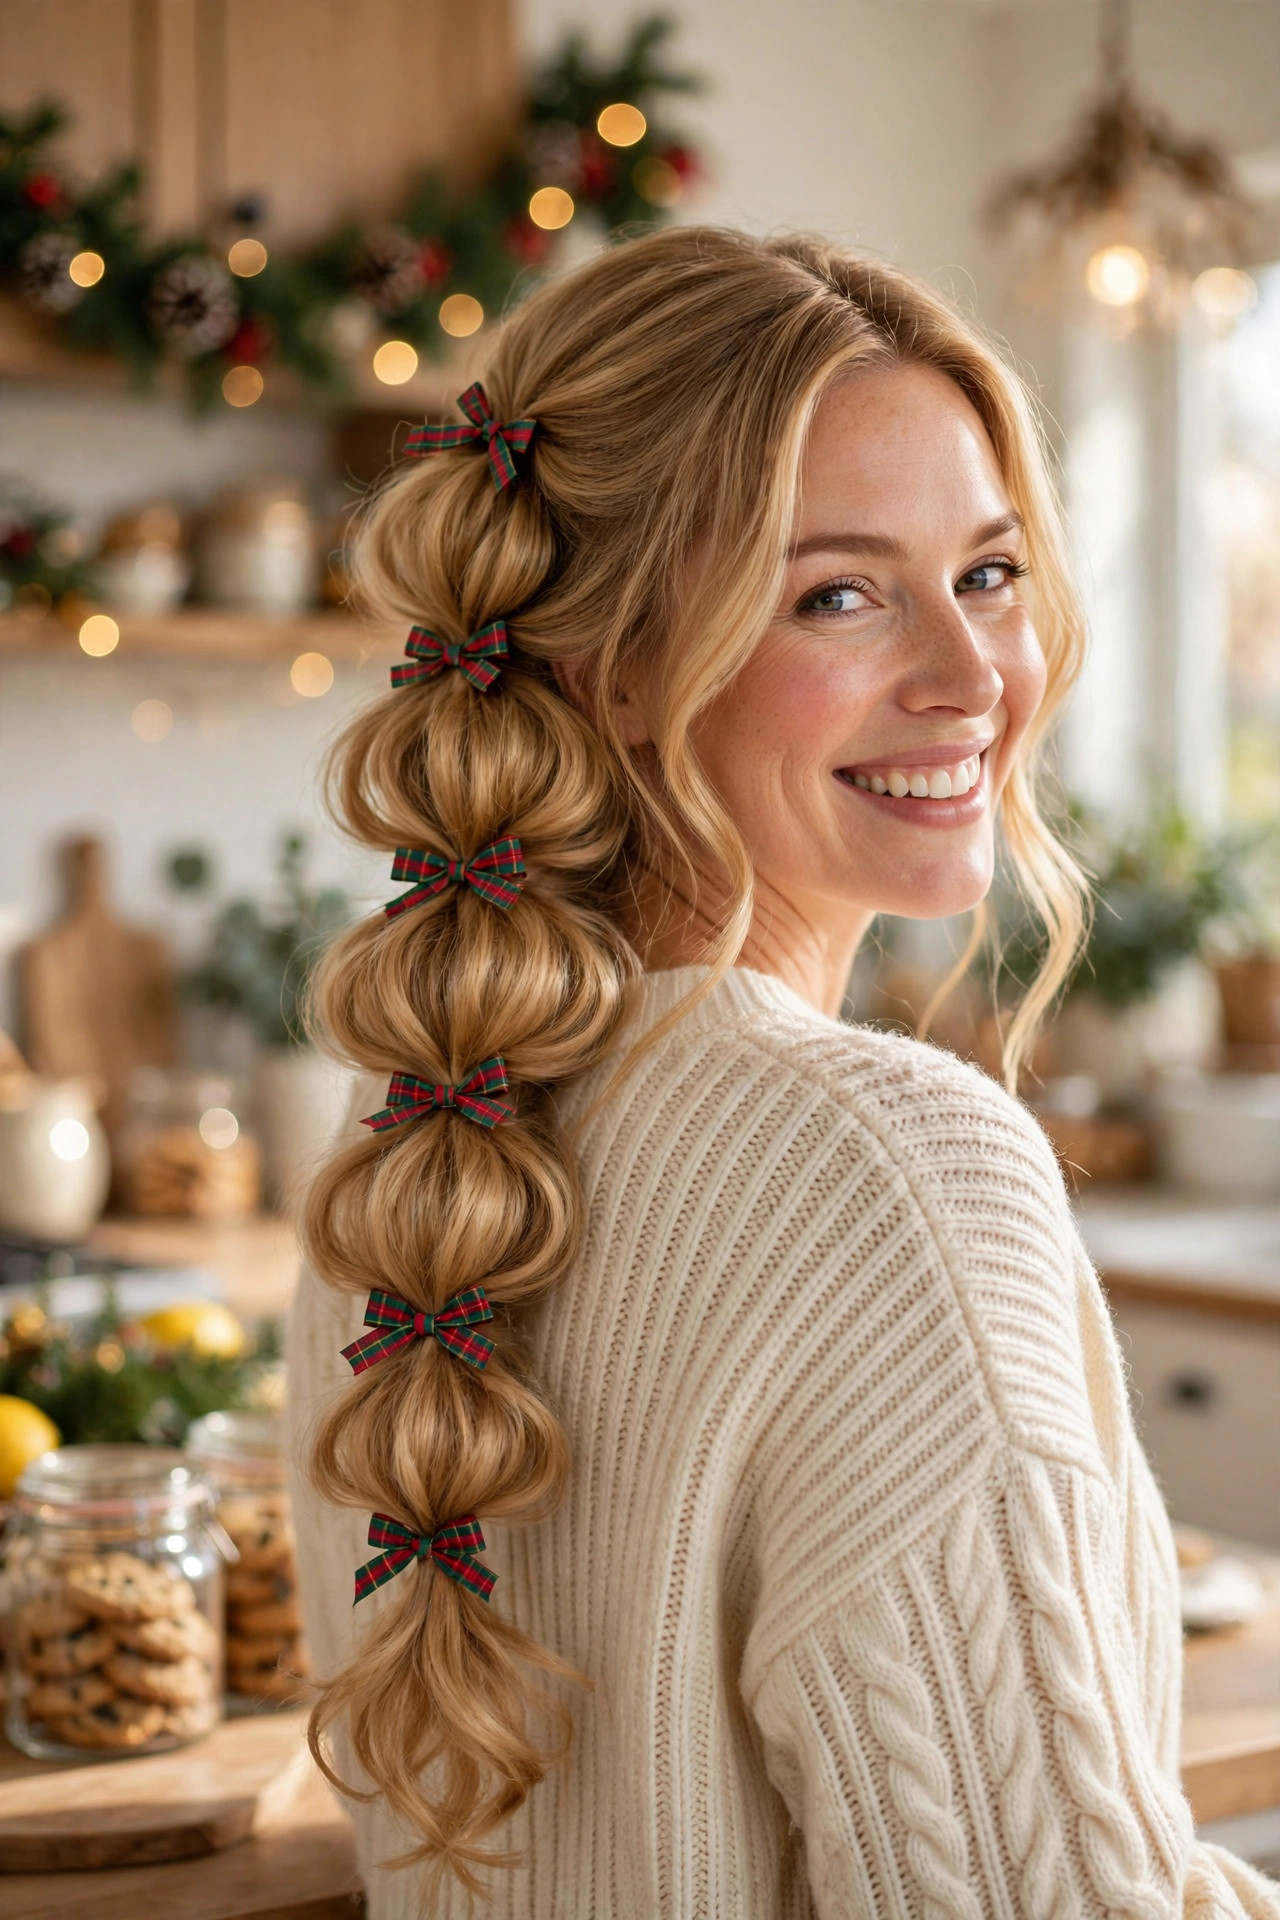
- Make a high or mid ponytail first
- Add elastics every few inches down
- Gently pull each section wide for bubbles
- Tie tiny plaid bows between sections
Bubble braids are wonderfully playful, and threaded with plaid bows they feel made for Christmas morning photos and casual parties alike. Start with a secure ponytail, then place small elastics at even intervals down the length, pulling each section outward until it puffs into a soft, rounded bubble. The trick is to pancake gently and evenly, so no single bubble looks larger than the rest, and to keep the top section slightly tighter for structure. Tiny plaid bows tied at each elastic turn a simple ponytail into a storybook style.
This look is a lifesaver for second-day hair, because texture and grip actually help the bubbles hold their shape for hours. A spritz of dry shampoo at the roots adds lift, while a light-hold spray keeps flyaways under control without gluing the bubbles stiff. It works beautifully on long and medium hair, and on layered cuts the shorter pieces can be tucked in with pins. Pair it with a cosy sweater and you are ready for tree decorating, market strolls, and plenty of compliments. A quick mirror check before leaving saves later fixes.
Burgundy Velvet High Ponytail
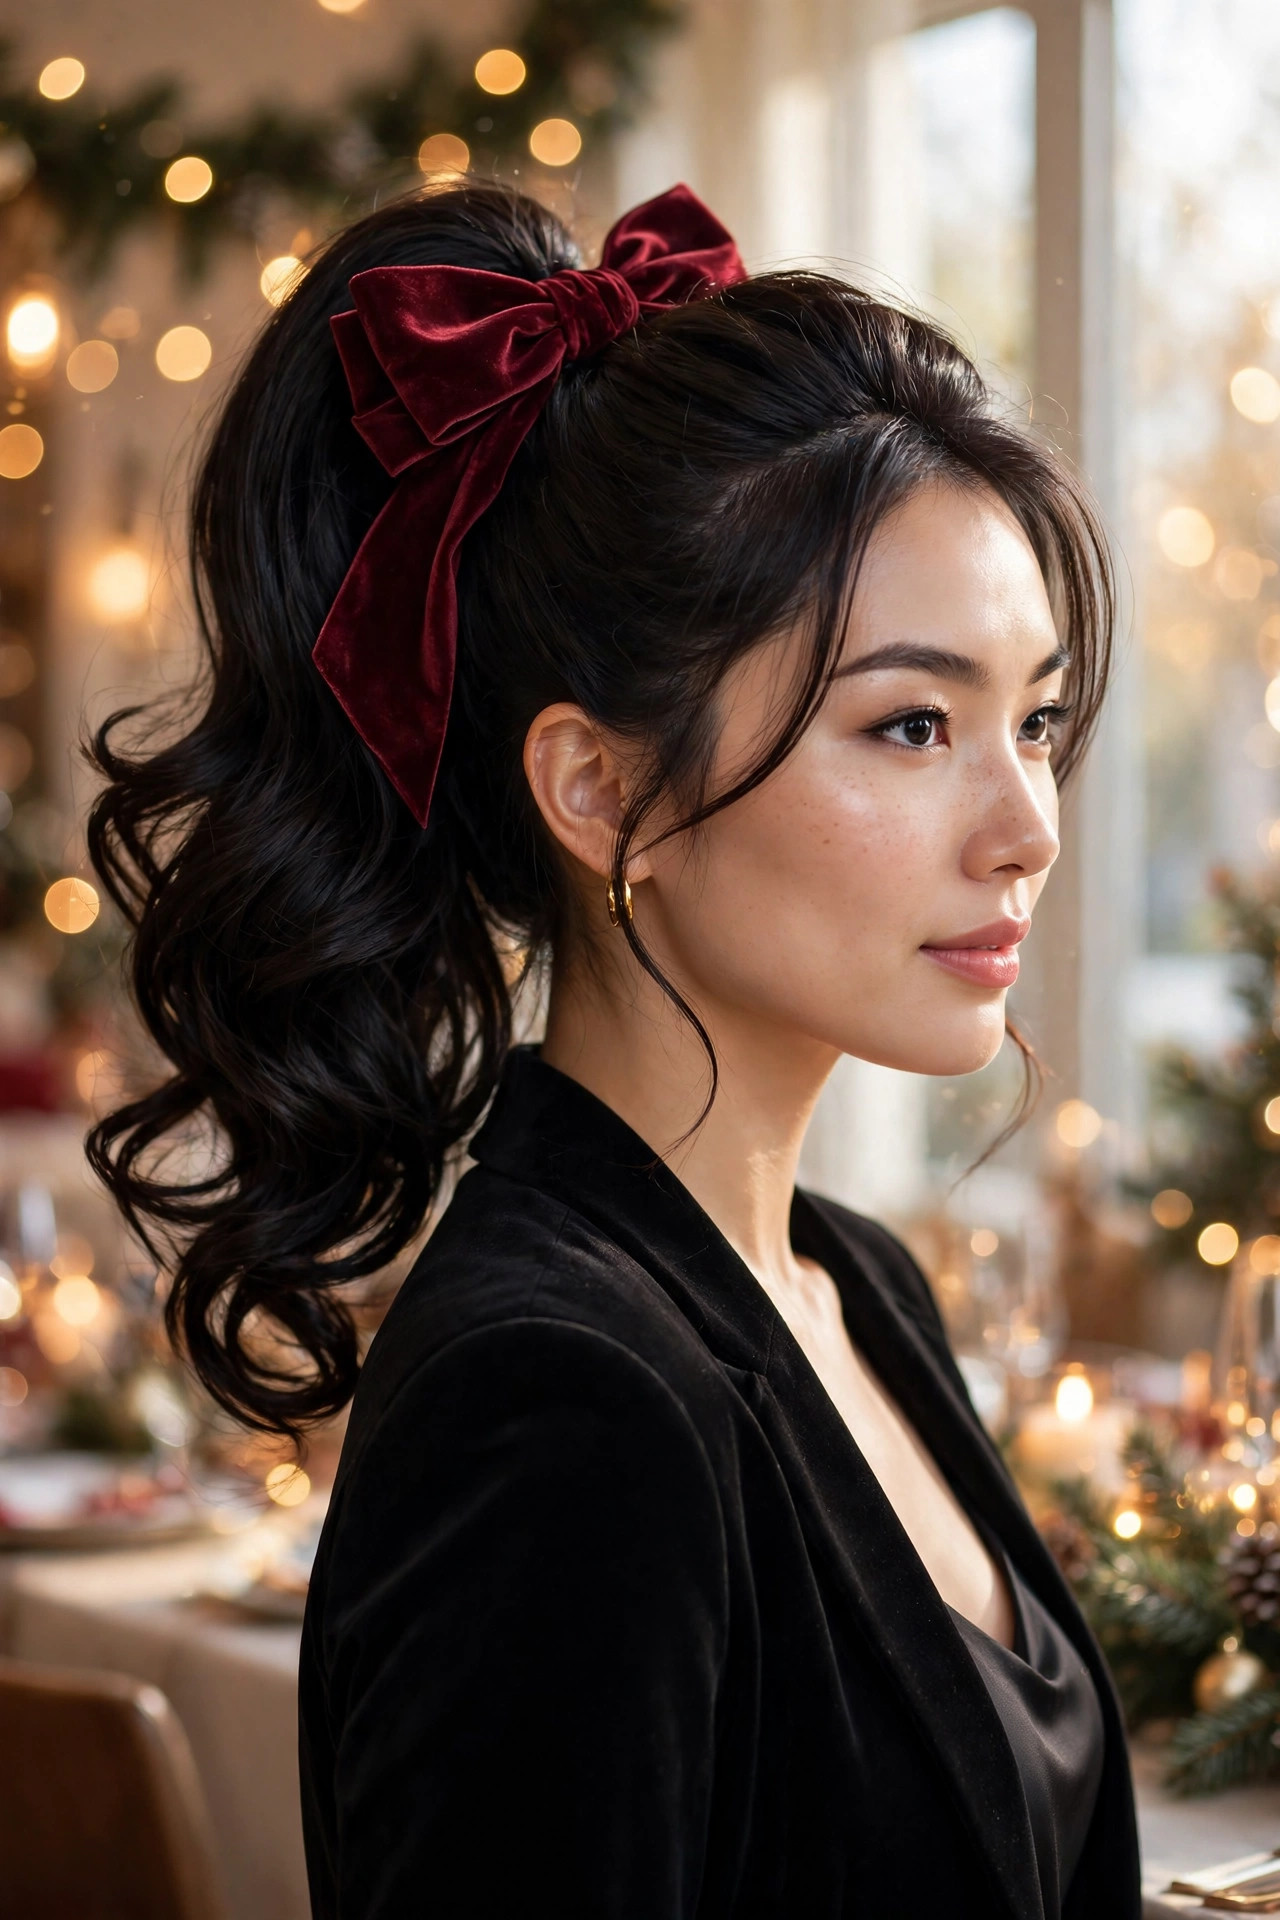
- Brush hair upward and secure it high
- Backcomb the ponytail base for lift
- Curl the ends in bouncy sections
- Fasten the velvet bow at the base
A high ponytail with a deep burgundy velvet bow is pure holiday glamour, lifting the whole face and showing off earrings, necklines, and a bold lip. Brush the hair upward firmly, securing it at the crown where it gives the most lift, and backcomb just inside the base so the ponytail stands proud rather than flopping. Curl the ends in bouncy, outward sections for movement, then anchor the bow at the front of the base so it frames the style from the front and the side alike. Keep the finish soft rather than stiff or overworked.
To keep this style comfortable all evening, distribute the weight by using two elastics crossed over each other instead of one tight band pulling at your hairline. A soft-hold spray on the lengths adds shine without crunch, and a few face-framing strands left loose will soften the look for rounder faces. This is a wonderful choice for dancing, because everything stays off your neck while the bow keeps the look festive, polished, and unmistakably party-ready from the first toast to the last song. This small effort makes a big difference all evening.
Emerald Satin Side Braid
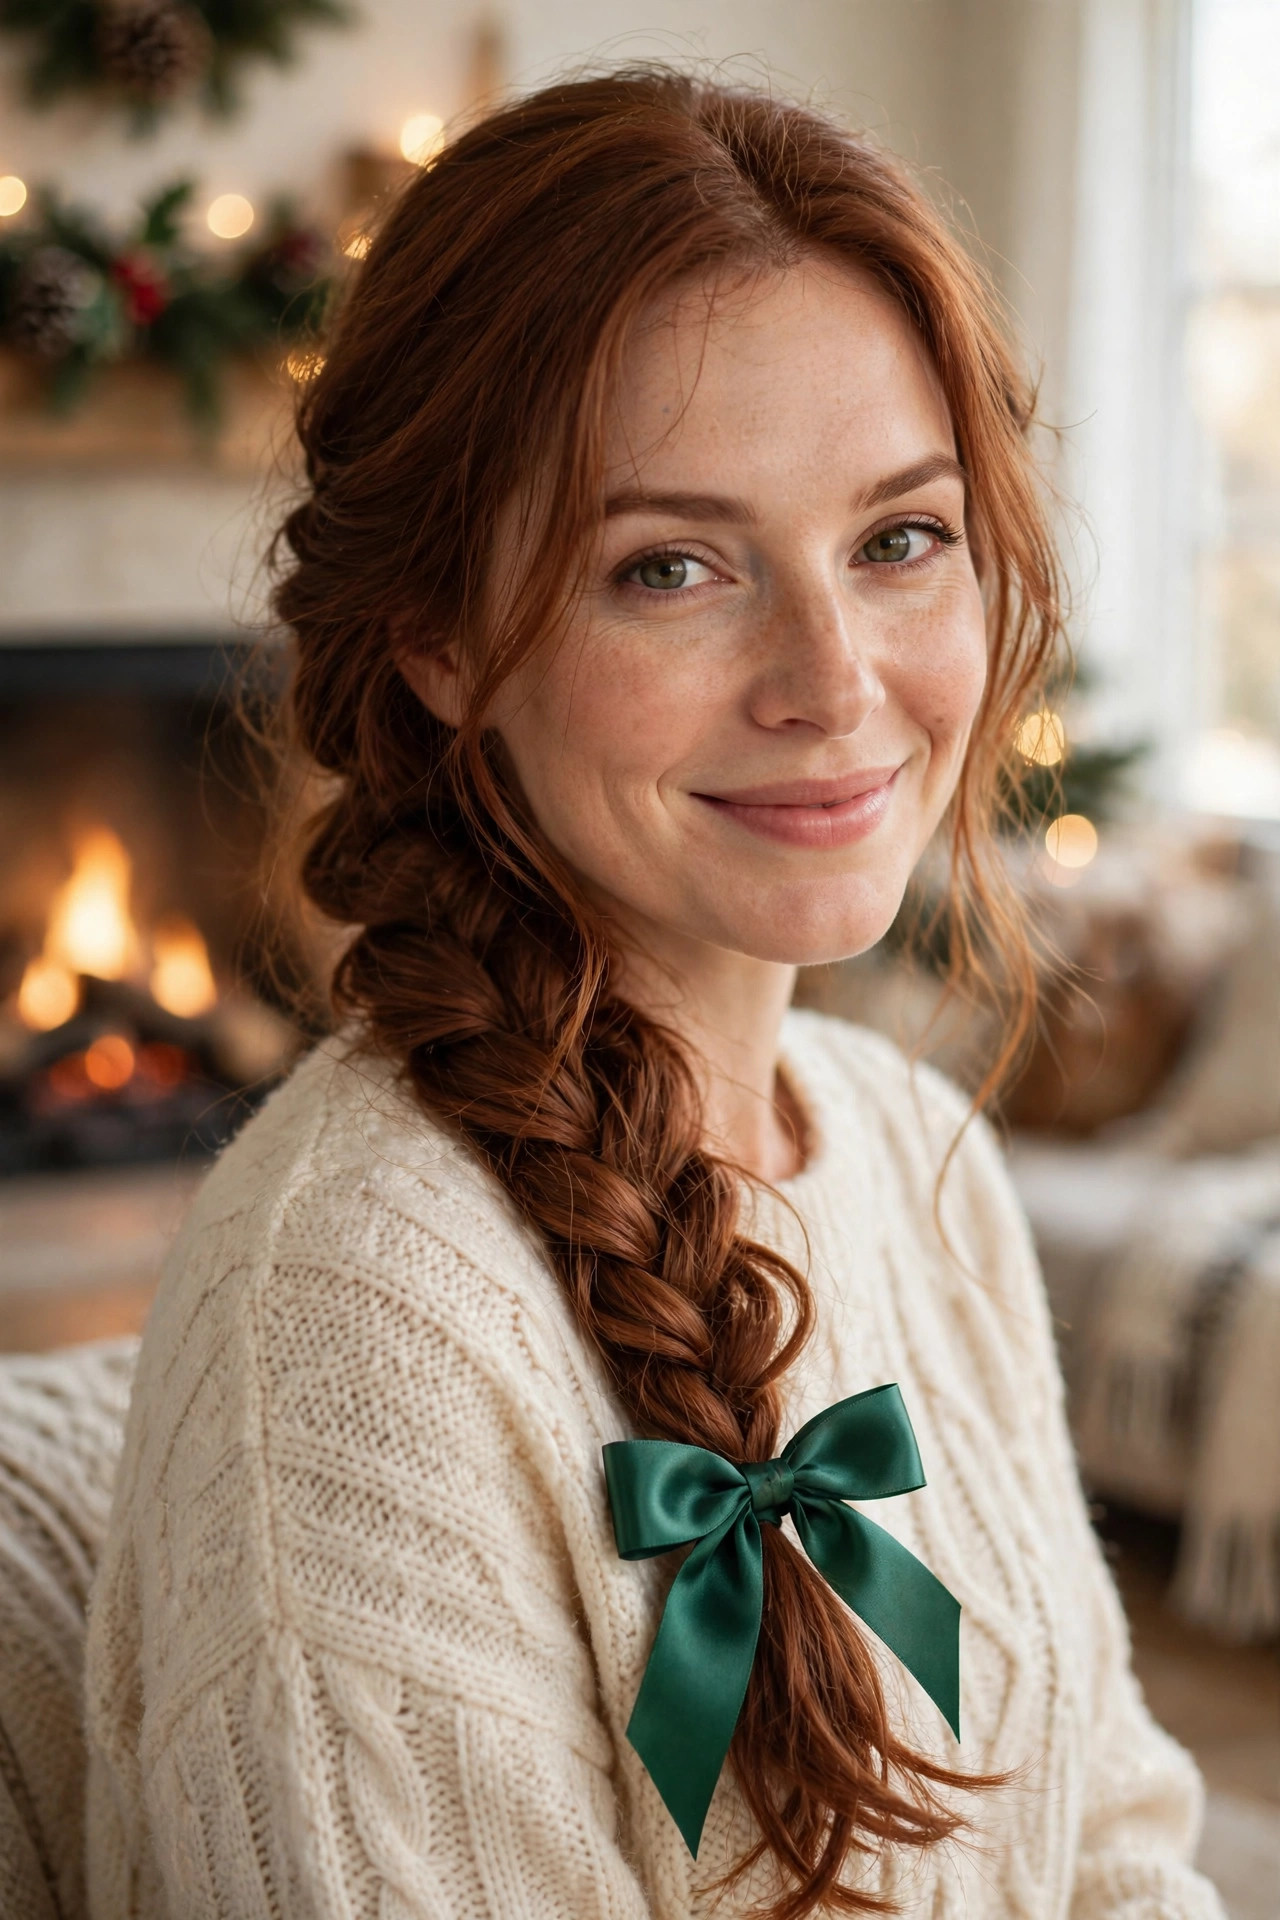
- Sweep all hair over one shoulder
- Braid loosely and keep it soft
- Pull the braid edges gently outward
- Tie the satin bow at the end
A loose side braid finished with an emerald satin bow feels romantic, relaxed, and just a little bit storybook, which makes it perfect for long dinners and quiet evenings by the fire. Sweep all of your hair over one shoulder and braid it loosely, keeping the tension soft so the braid looks full rather than tight and severe. Gently pull the outer edges of each braid section outward to create that effortless, pancaked fullness, then secure the end and tie the bow where the braid finishes for a pretty, intentional ending.
This style flatters oval, heart, and square face shapes alike, because the diagonal line of the braid draws the eye gracefully across the face. If your hair is layered, a few shorter pieces escaping near the face only add to the romance, so do not fight them; simply curl them lightly and let them frame your cheeks. It also pairs beautifully with off-shoulder necklines and high collars, and the deep emerald shade looks striking against both jewel tones and classic black holiday outfits. Finish with a light mist of flexible-hold spray.
Gold Bow Holiday Updo
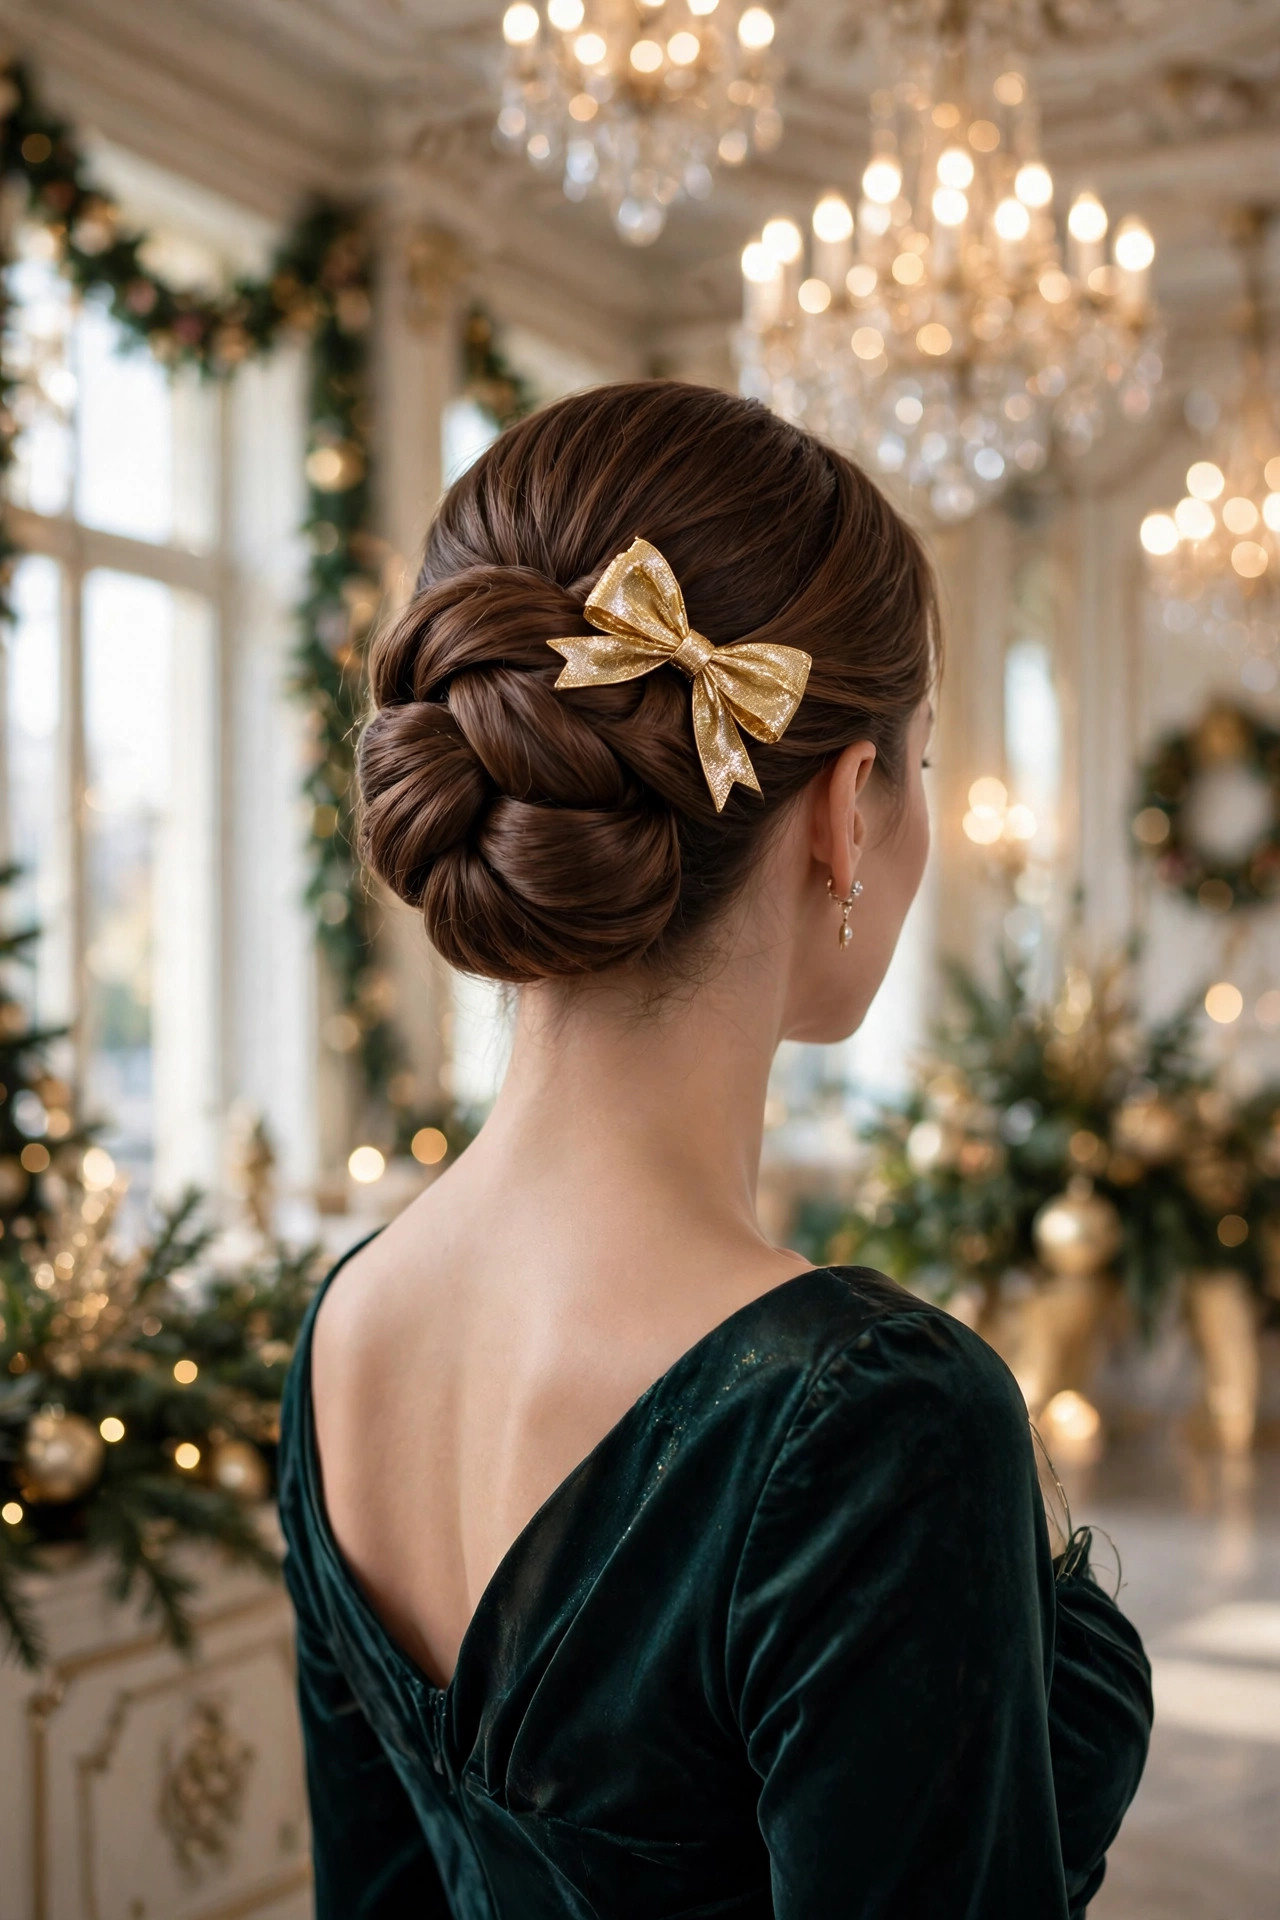
- Twist sections upward and pin securely
- Smooth the surface with light pomade
- Leave two soft tendrils loose
- Place the gold bow at the side
For the fanciest night on your calendar, a twisted updo with a gold bow delivers old-Hollywood polish without requiring a salon appointment. Twist small sections upward, pinning as you go so the shape builds gradually and stays secure, then smooth the surface with a touch of pomade for a refined, light-catching finish. Two soft tendrils left loose around the face keep the updo from looking too severe, while the gold bow placed just off-centre becomes the sparkling focal point that ties the outfit together. For more festive party inspiration, browse these party-ready looks before you choose your final accessories.
The secret to an updo that survives a long evening is building it on hair with a little grip, so style on second-day hair or add dry texture spray first. Pin in a crisscross pattern rather than all in one direction, and finish with a flexible-hold spray that allows movement without collapse. This look suits medium and long hair best, though shorter hair can be faked with a padded bun form. Pair it with a satin dress and delicate jewellery, and you will look effortlessly elegant in every photograph. Smooth any stray hairs gently with your fingertips.
Red Velvet Classic Bun
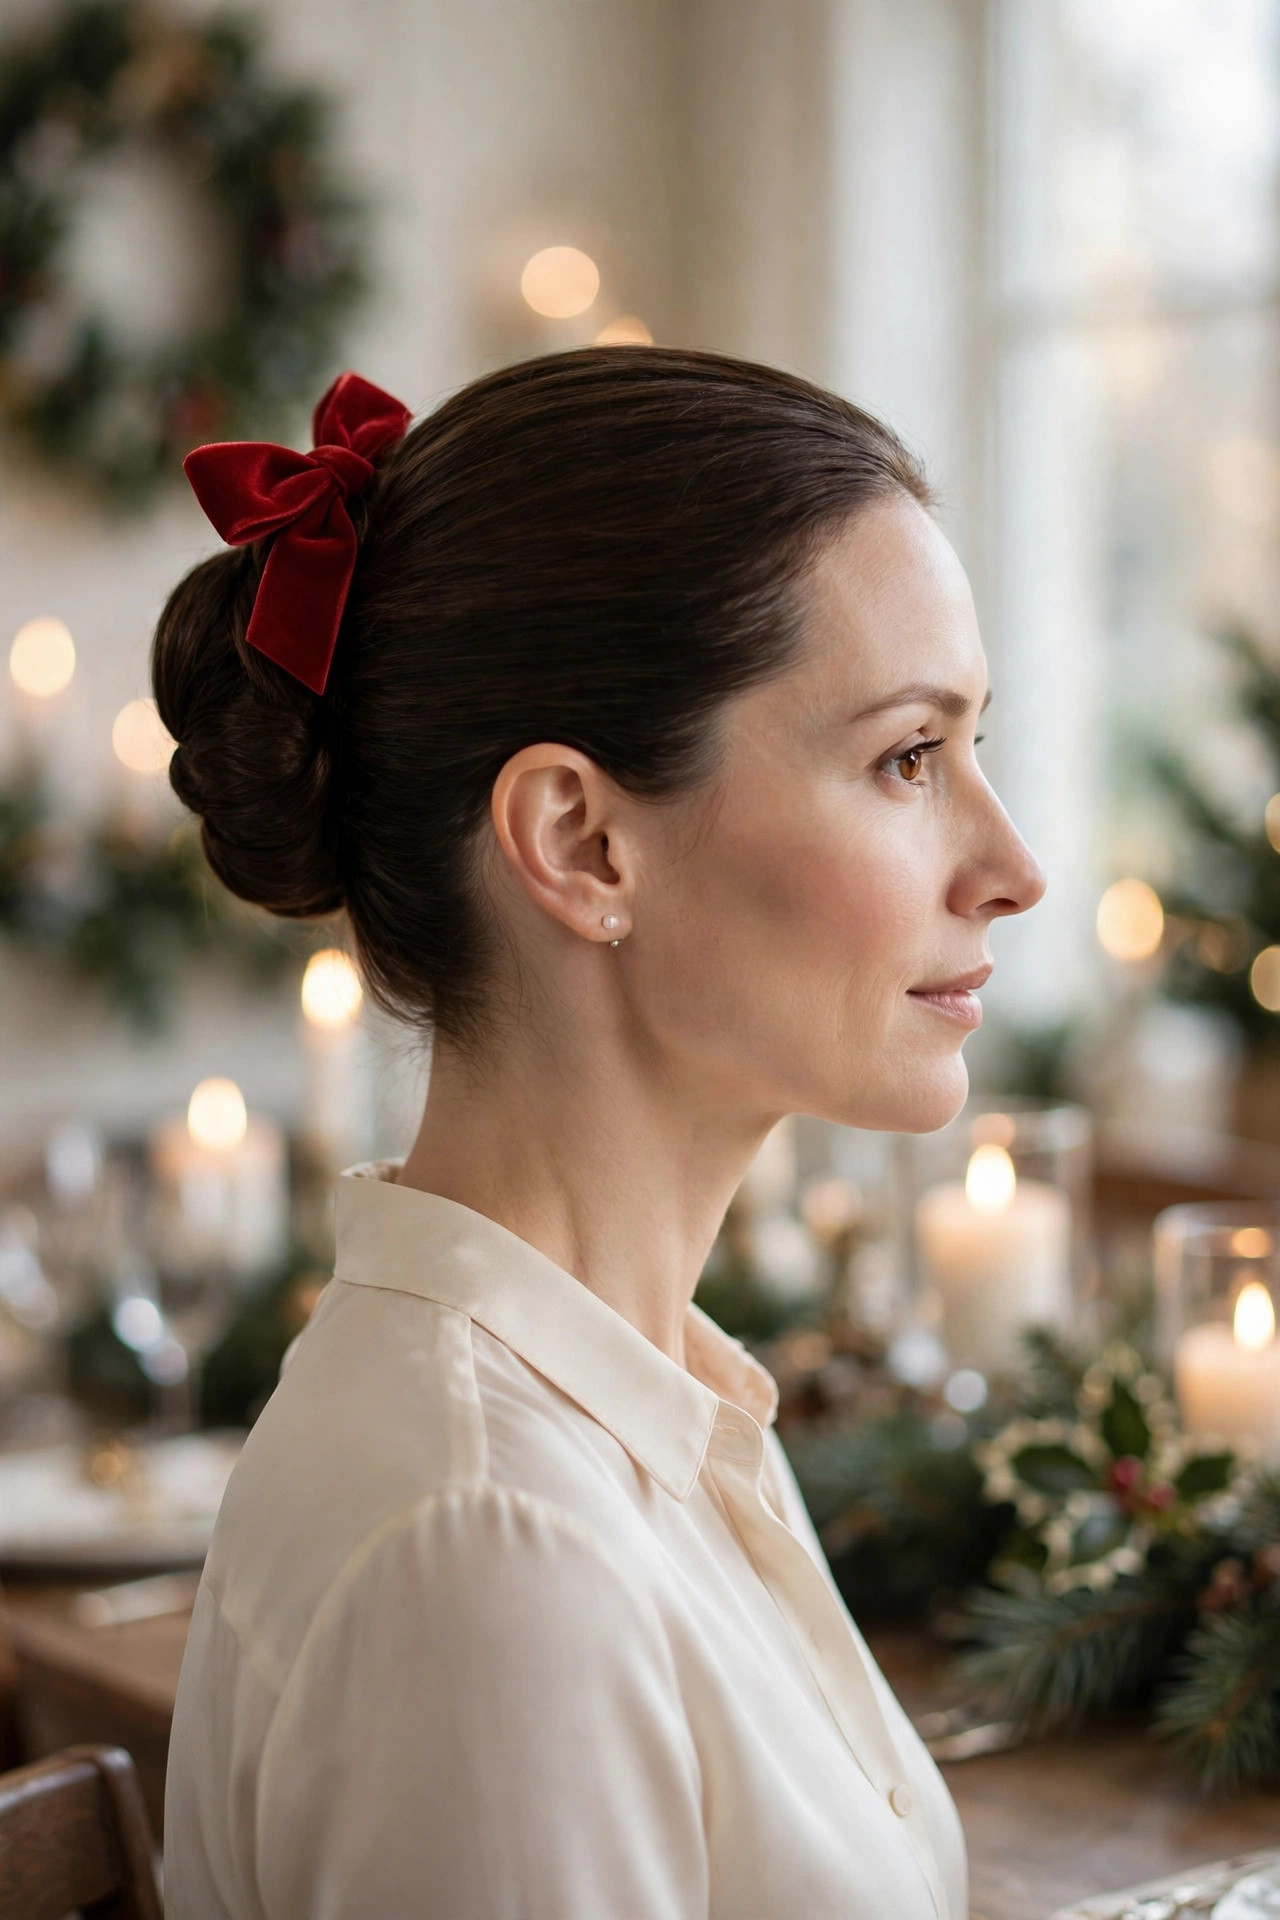
- Gather hair low and twist tightly
- Coil it into a neat round bun
- Pin all the way around securely
- Clip the red bow above it
Nothing beats a classic bun when you want a timeless look, and a red velvet bow gives this old favourite a joyful holiday twist. Gather the hair low at the nape, twist it firmly, and coil it into a neat, round shape, pinning all the way around so no loops escape. Smoothing the surface with a bristle brush keeps the finish sleek, while the bow placed just above the bun draws the eye upward and adds a pop of festive colour against dark or light hair alike. Step back and check the balance from behind.
This is the style to choose when your outfit is already doing a lot of talking, because the bun keeps everything neat and lets the bow be the single festive accent. It works for straight, wavy, and curly textures, though curly hair may need a little smoothing cream on the surface for a polished result. For all-day comfort, pin the bun close to the head without pulling the front too tight, and carry two spare pins in your bag for quick fixes between courses and conversations. Let the style settle for a few minutes first.
Black Satin Sleek Ponytail
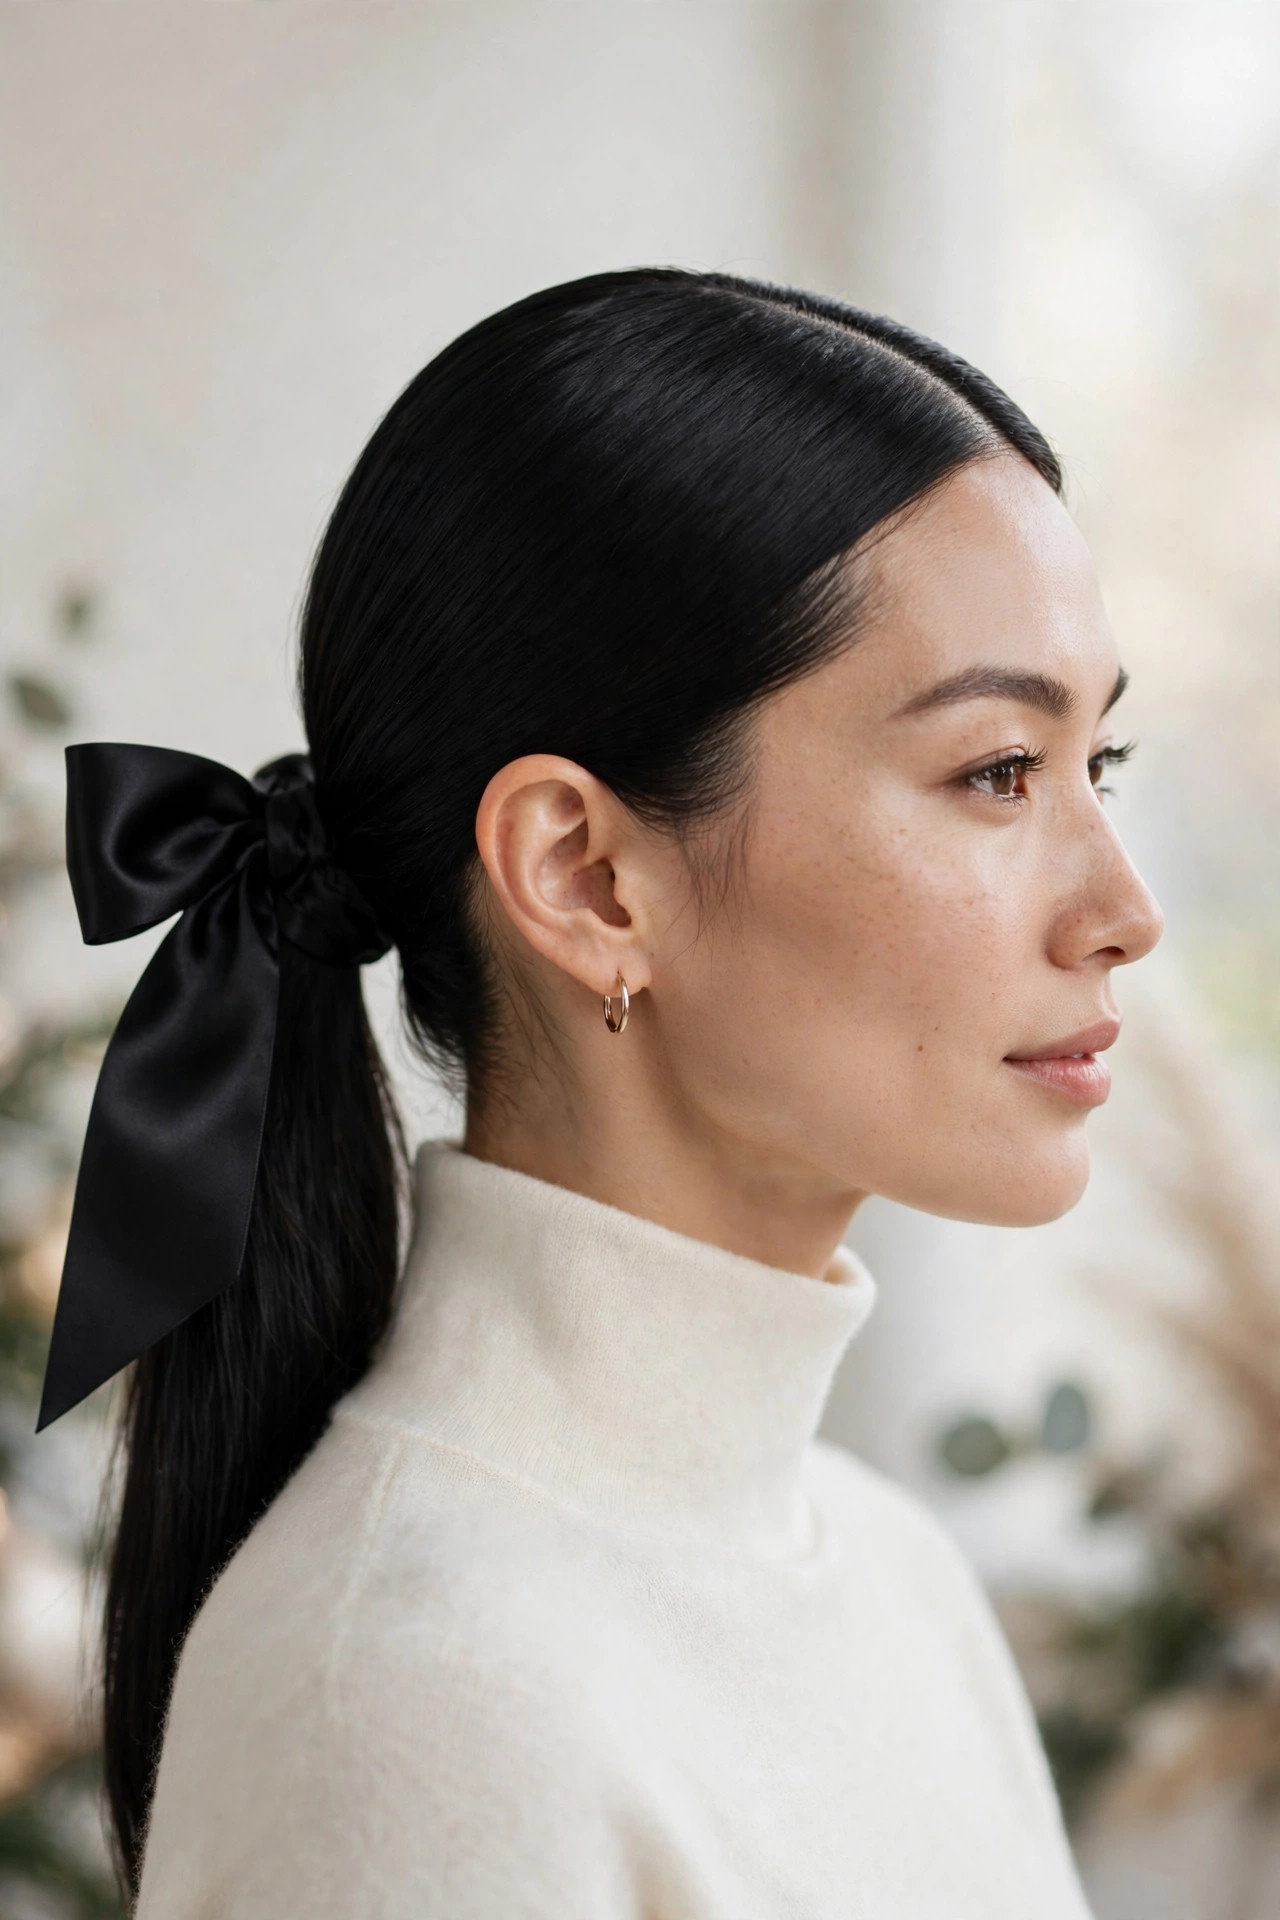
- Part hair sharply down the centre
- Smooth with gel and a brush
- Secure the ponytail at mid-height
- Tie the black satin bow neatly
A sleek ponytail with a black satin bow is the minimalist answer to holiday dressing, proving that one perfect accessory can carry an entire look. Part the hair sharply down the centre, smooth it with a little gel and a fine brush, and secure the ponytail at mid-height so it falls in a clean, glossy line. The satin bow adds softness to the sharp lines, and because the colour matches the hair, the texture contrast rather than the colour does the talking in this quietly luxurious style. Small adjustments now prevent frustration later on.
This look is especially flattering for straight and fine hair, since the smooth finish shows off shine and healthy ends beautifully. If flyaways are your enemy in winter static, a toothbrush sprayed with hairspray will tame the hairline without disturbing the sleek surface. Keep the ponytail length swinging free rather than curled, choose a bow large enough to read from behind, and let simple earrings and a red lip complete a modern, confident holiday outfit. The result should feel comfortable, never tight. Add shine spray sparingly for a healthy glow.
Champagne Bow Soft Curls
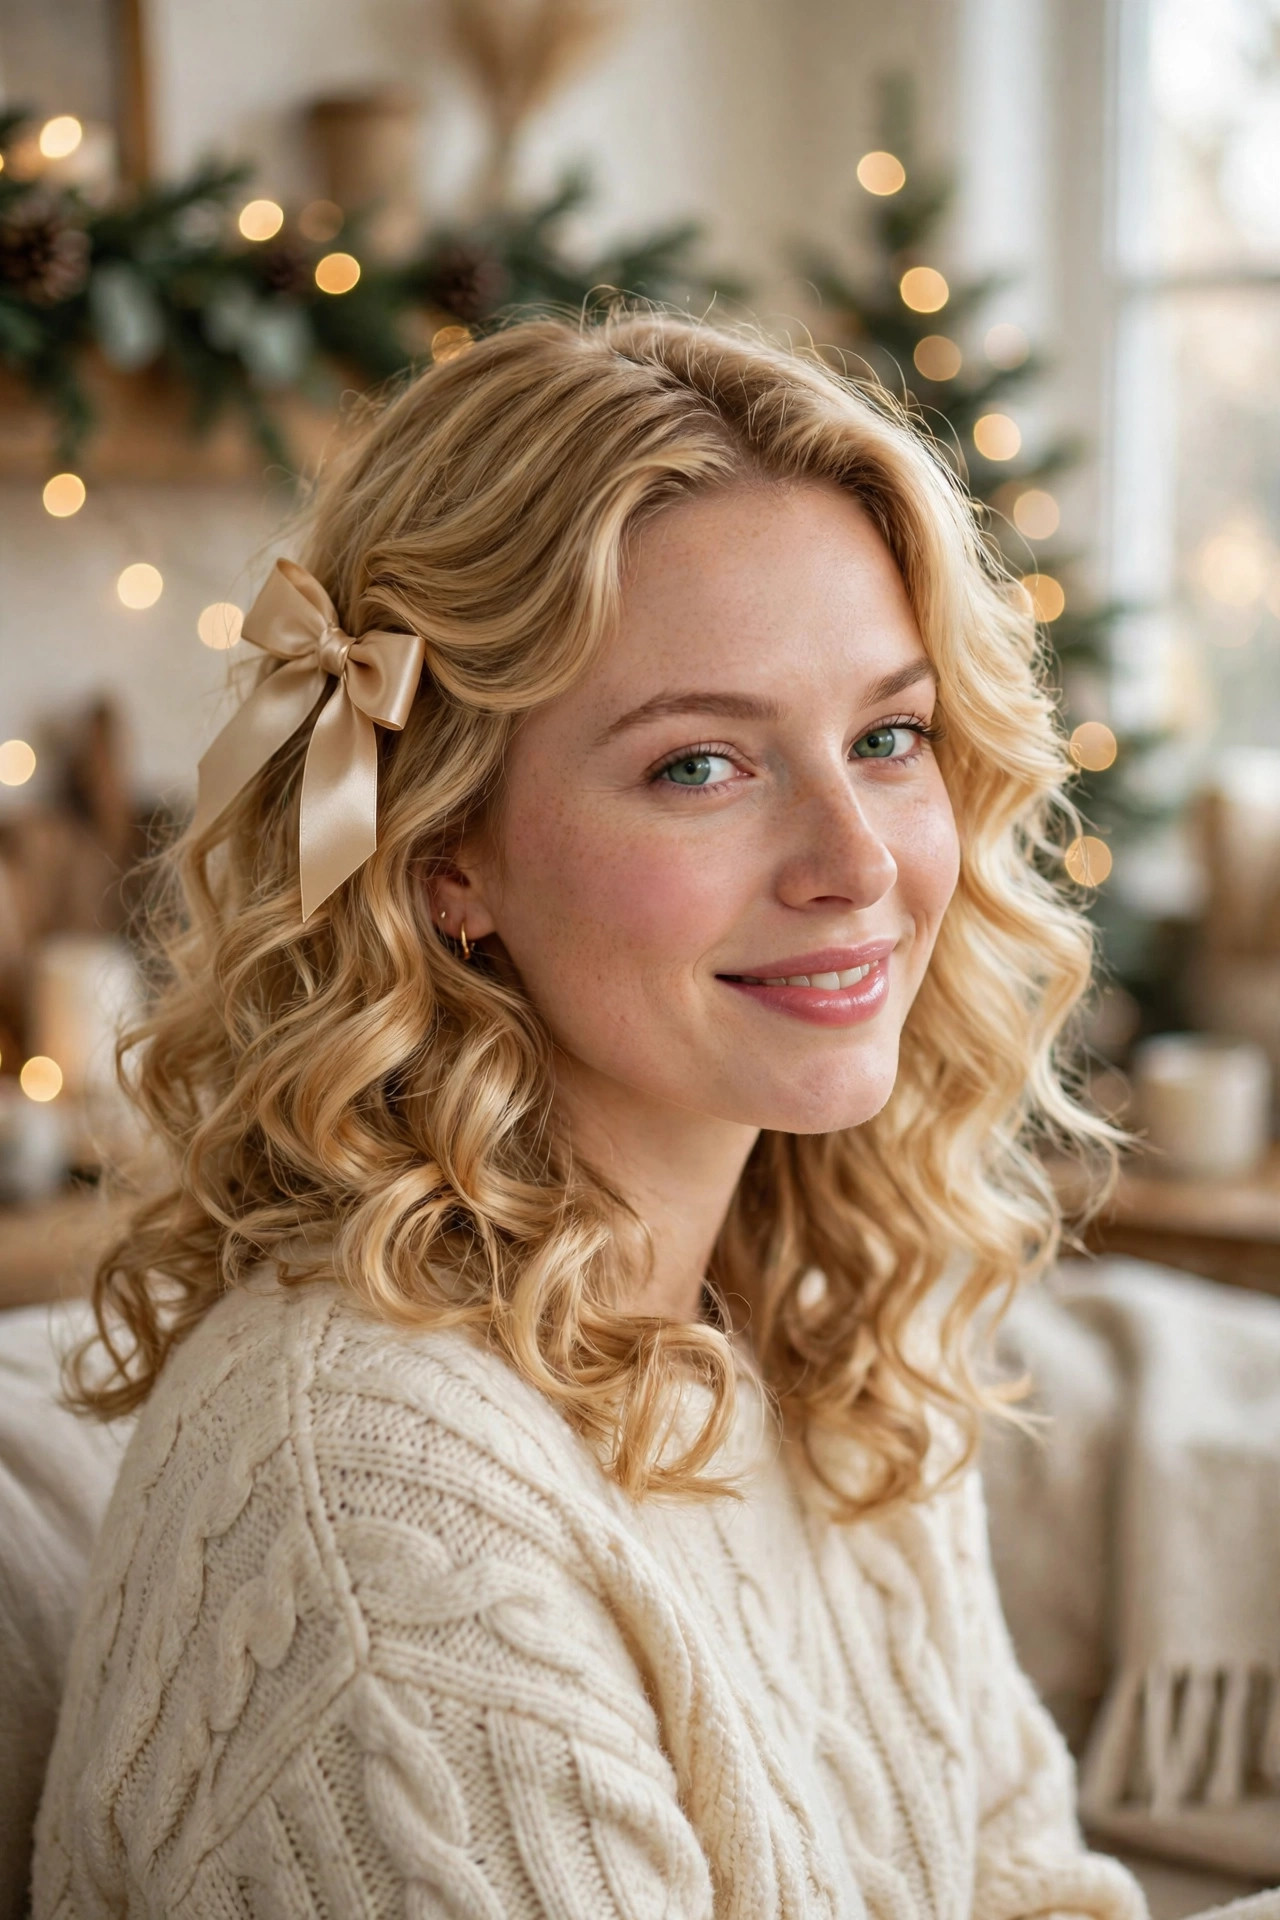
- Curl hair away from the face
- Let curls cool before brushing out
- Brush gently for soft bounce
- Clip the bow to one side
Soft curls with a champagne bow are endlessly sweet, giving shoulder-length and medium hair a romantic, touchable finish that suits almost any celebration. Curl sections away from the face with a medium barrel iron, let every curl cool completely before touching it, and then brush through gently so the curls relax into soft, bouncy waves rather than tight ringlets. Clipping the bow to one side creates a pretty asymmetry that frames the face and keeps the style feeling light, fresh, and youthful. Carry two spare pins for quick touch-ups. Practice once before the big day arrives.
The key to curls that last through a party is preparation, because cool, set curls hold far longer than curls brushed out while still warm. A light mousse before styling and flexible spray afterwards will give hold without stiffness, and second-day hair often curls even better than freshly washed hair. If your hair is naturally curly, simply define your curls with cream and add the bow; the result is just as lovely and takes only minutes to finish. A relaxed hand keeps the look modern. Work in good light for the best result.
Tartan Bow Double Braids
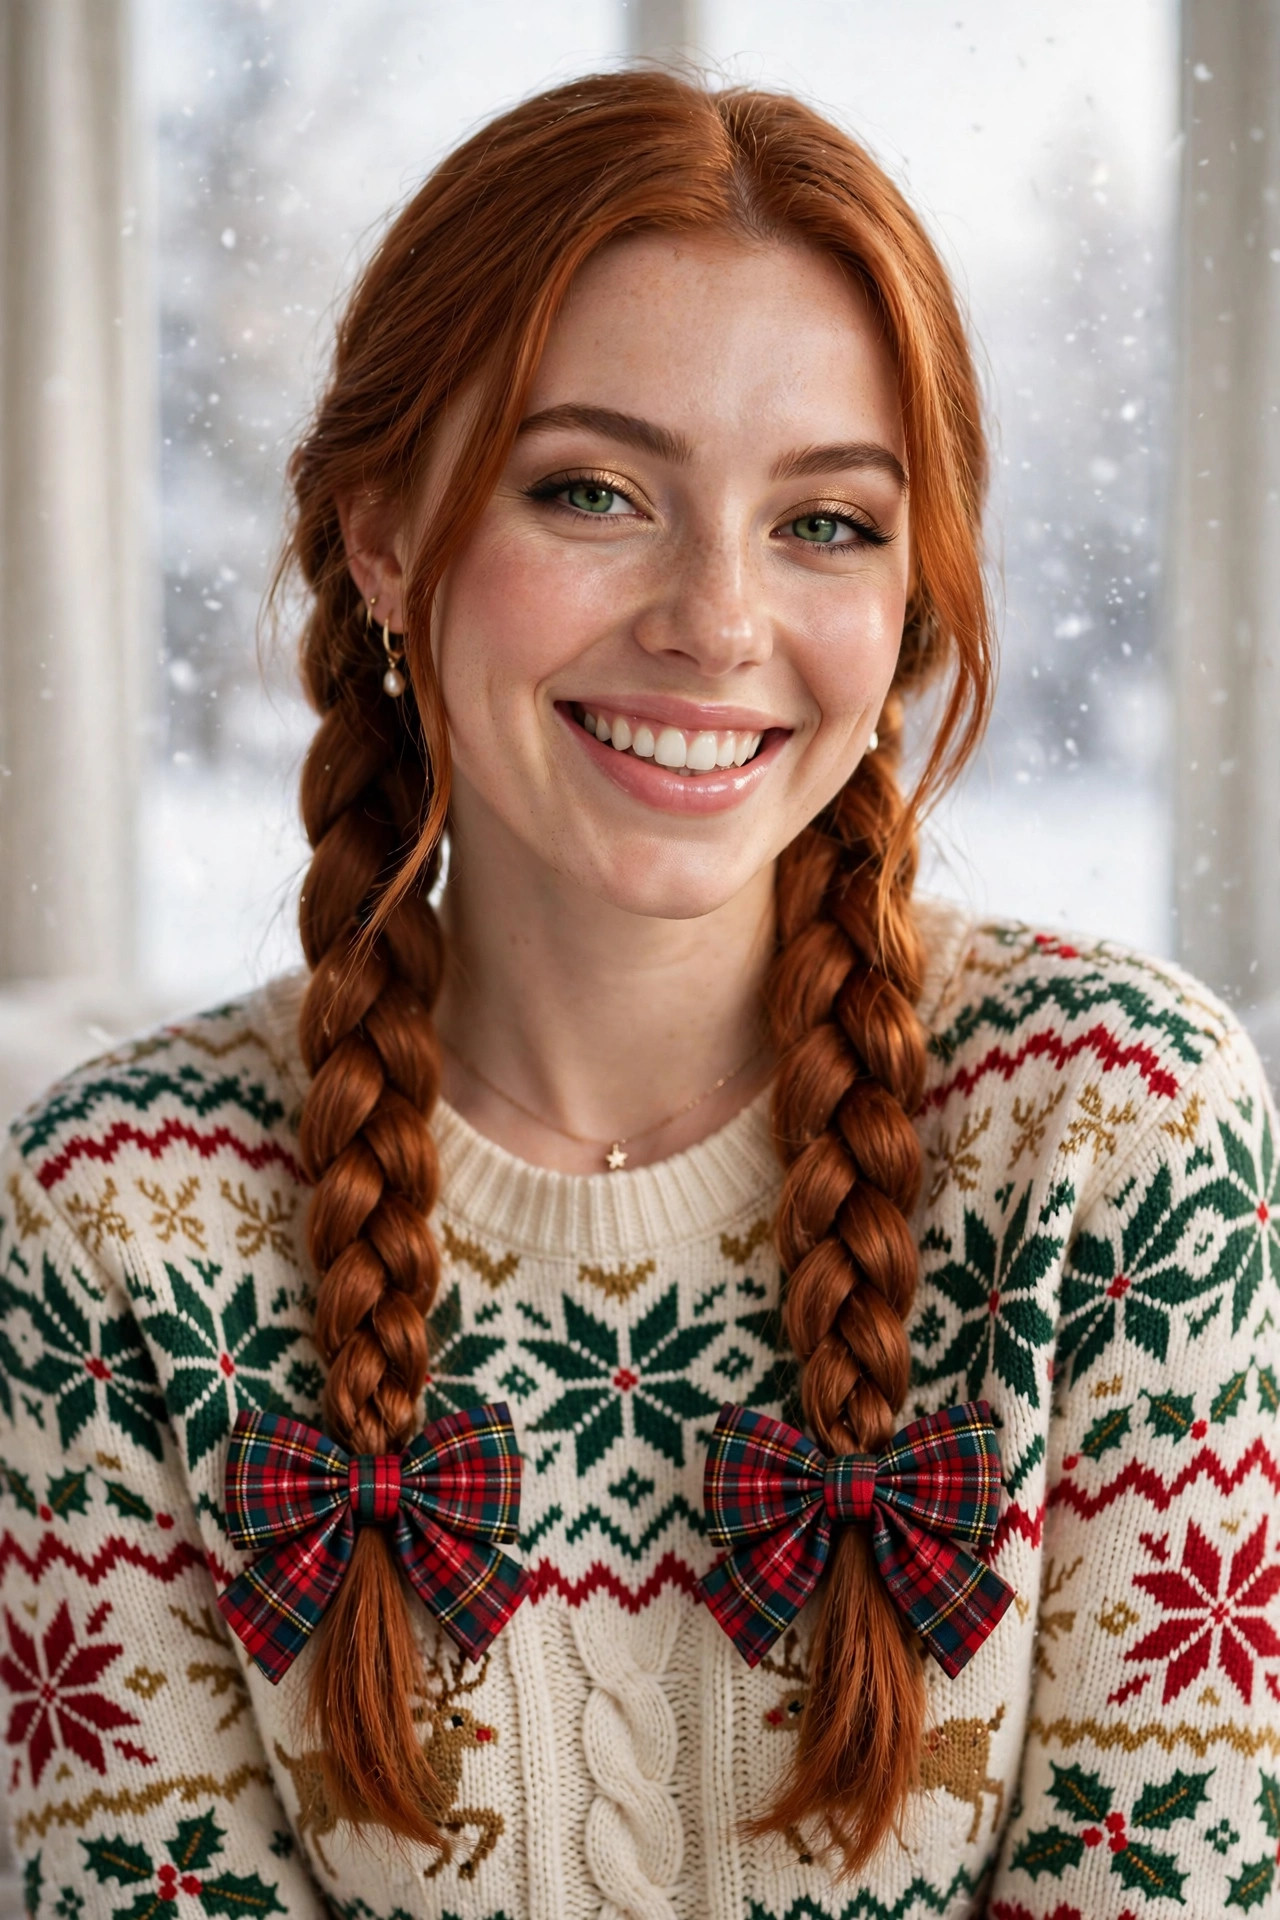
- Part hair straight down the middle
- Braid each side neatly and evenly
- Secure ends with small elastics
- Tie a tartan bow on each braid
Double braids with tartan bows are cheerful, youthful, and wonderfully practical, keeping hair tidy through market trips, ice skating, and long family afternoons. Part the hair straight down the middle and braid each side neatly, keeping the tension even so both braids match in size and fullness. Securing the ends with small clear elastics and tying a tartan bow over each one turns a school-day classic into a festive style that feels both nostalgic and fresh, especially paired with a cosy knit. Patience here pays off beautifully in the final photographs.
This style works on straight, wavy, and lightly curly hair, and it is one of the best choices for active days because braids distribute weight evenly and rarely come undone. For extra fullness, pancake the braids gently after braiding, and for a softer finish, pull a few wispy pieces free around the face. It also photographs beautifully from the front, making it a lovely choice for Christmas cards, matching family outfits, and any day when you want to look put-together with very little effort. A quick mirror check before leaving saves later fixes.
Rosy Velvet Twisted Crown
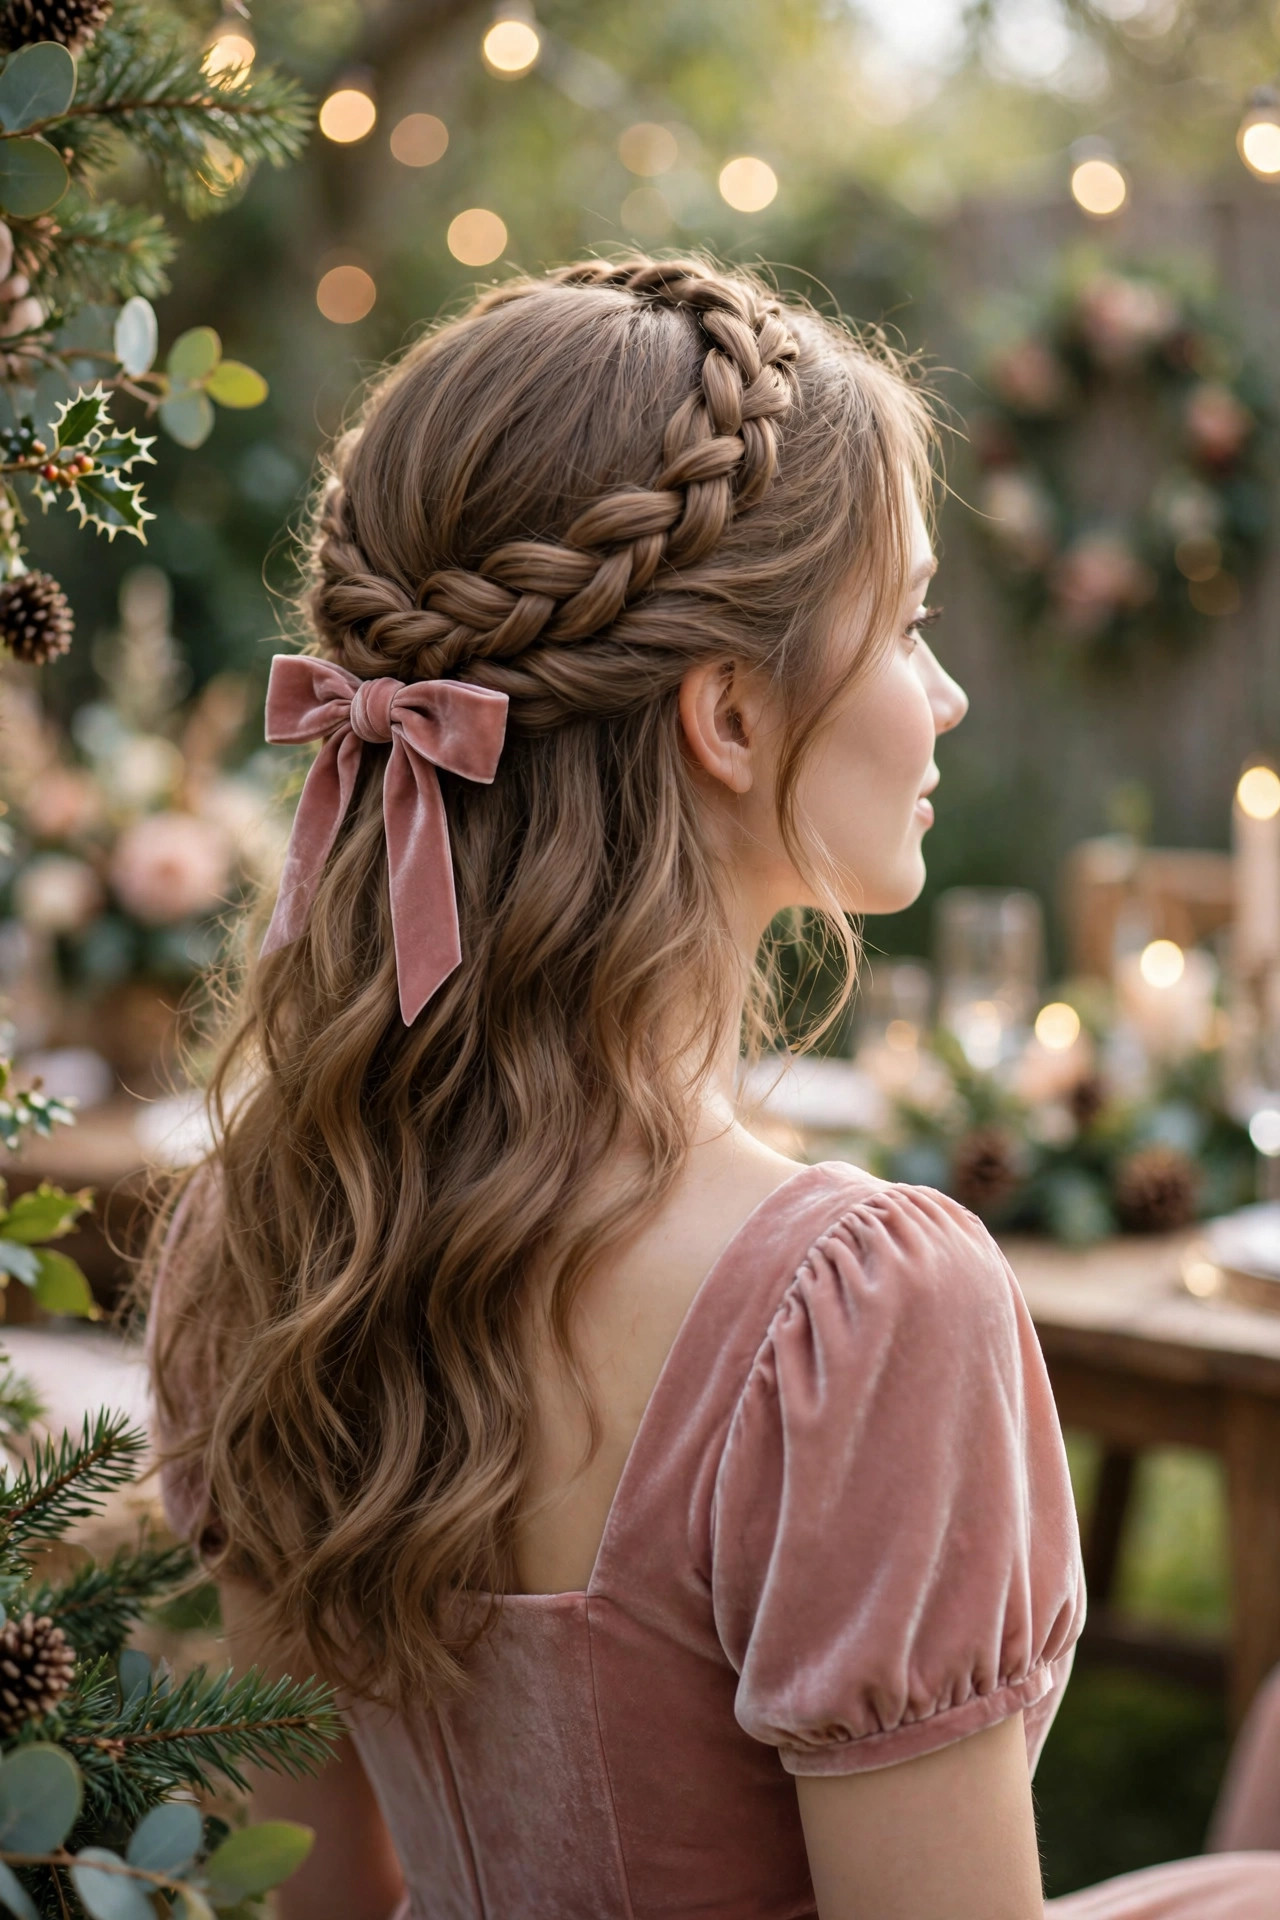
- Twist front sections back gradually
- Pin twists along the crown line
- Let the lengths fall in waves
- Place the rose bow centrally
A twisted crown with a dusty rose velvet bow feels like something from a winter fairytale, romantic and soft without being fussy. Twist the front sections back gradually, pinning along the crown line as you go, and let the remaining lengths fall in loose waves beneath the twists. The rose bow placed at the back becomes a surprise detail, visible as you turn and in photographs taken from behind, which makes this style especially lovely for dinners where guests see you from all sides. Keep the finish soft rather than stiff or overworked.
This look suits long and medium hair best, and it is forgiving for beginners because twists hide uneven sections far better than braids do. If your hair is slippery, a little texture spray before twisting will give the pins something to grip, and crossed pins will hold the crown through hours of wear. Pair it with a soft, flowing dress and minimal jewellery, and the whole effect is gentle, feminine, and quietly festive rather than loud or costume-like. This small effort makes a big difference all evening. Finish with a light mist of flexible-hold spray.
Midnight Bow French Twist
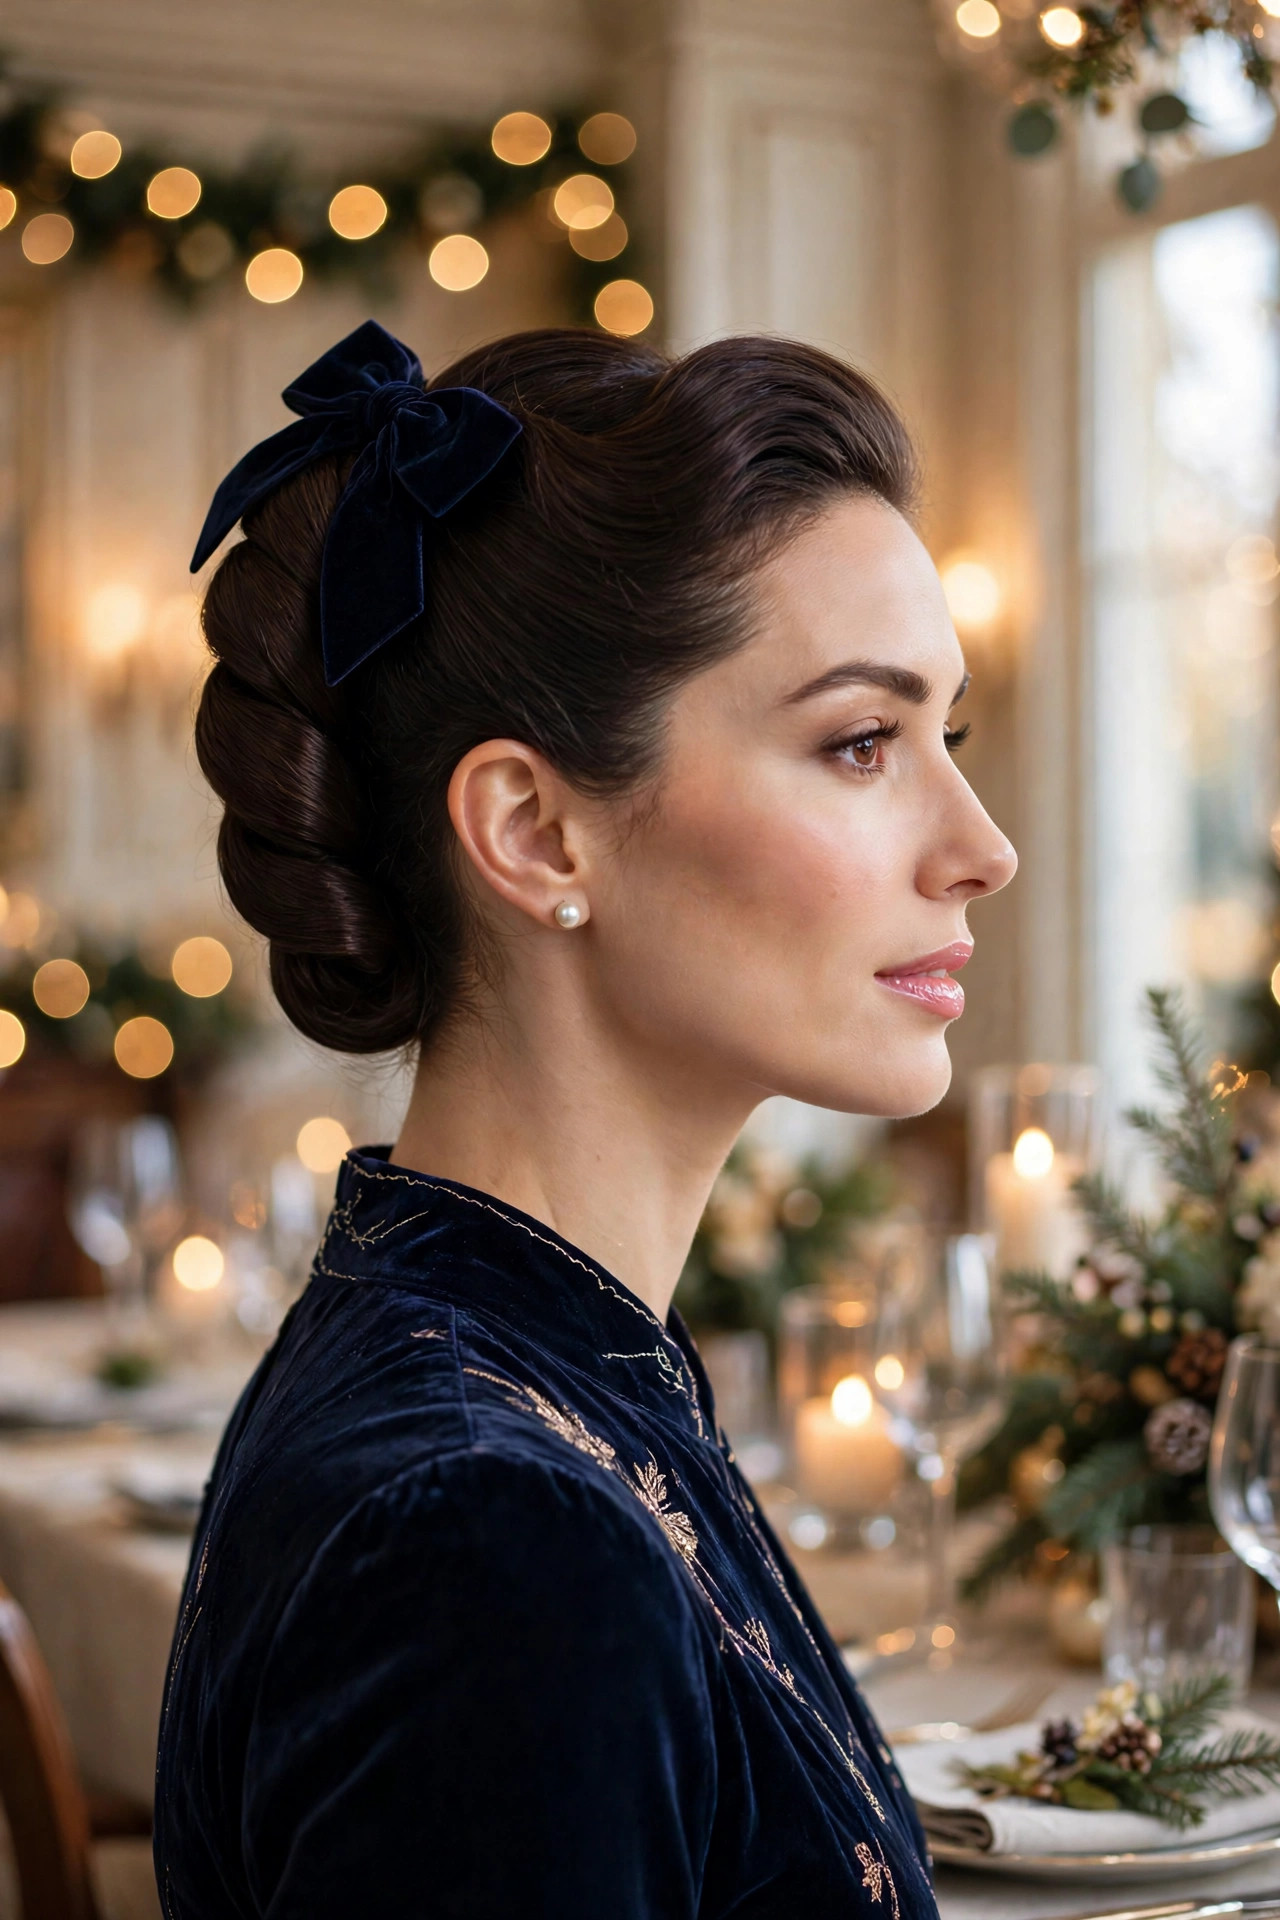
- Brush hair to one side smoothly
- Roll it upward into a twist
- Pin along the seam firmly
- Add the navy bow on top
The French twist is the ultimate grown-up holiday style, and a deep navy bow gives it a modern, midnight-party edge. Brush all the hair smoothly to one side, roll it upward into a neat twist, and pin firmly along the seam so the roll holds its tall, elegant shape. The navy bow placed near the top softens the formality just enough, adding colour and personality without undermining the sophistication that makes this style so beloved for weddings, galas, and formal Christmas dinners. For more ideas for longer lengths, see these long-hair festive styles that pair beautifully with classic updos.
A French twist looks hardest but becomes easy with practice, especially if you build it on hair that already has some texture from the day before. Use strong pins placed vertically along the seam, and finish with a firm spray that still allows a little movement. It flatters long necks and oval faces particularly well, and it keeps hair completely off the shoulders, which is ideal for high necklines, statement earrings, and coats that would otherwise crush a looser style. Step back and check the balance from behind. Let the style settle for a few minutes first.
Cream Satin Messy Bun
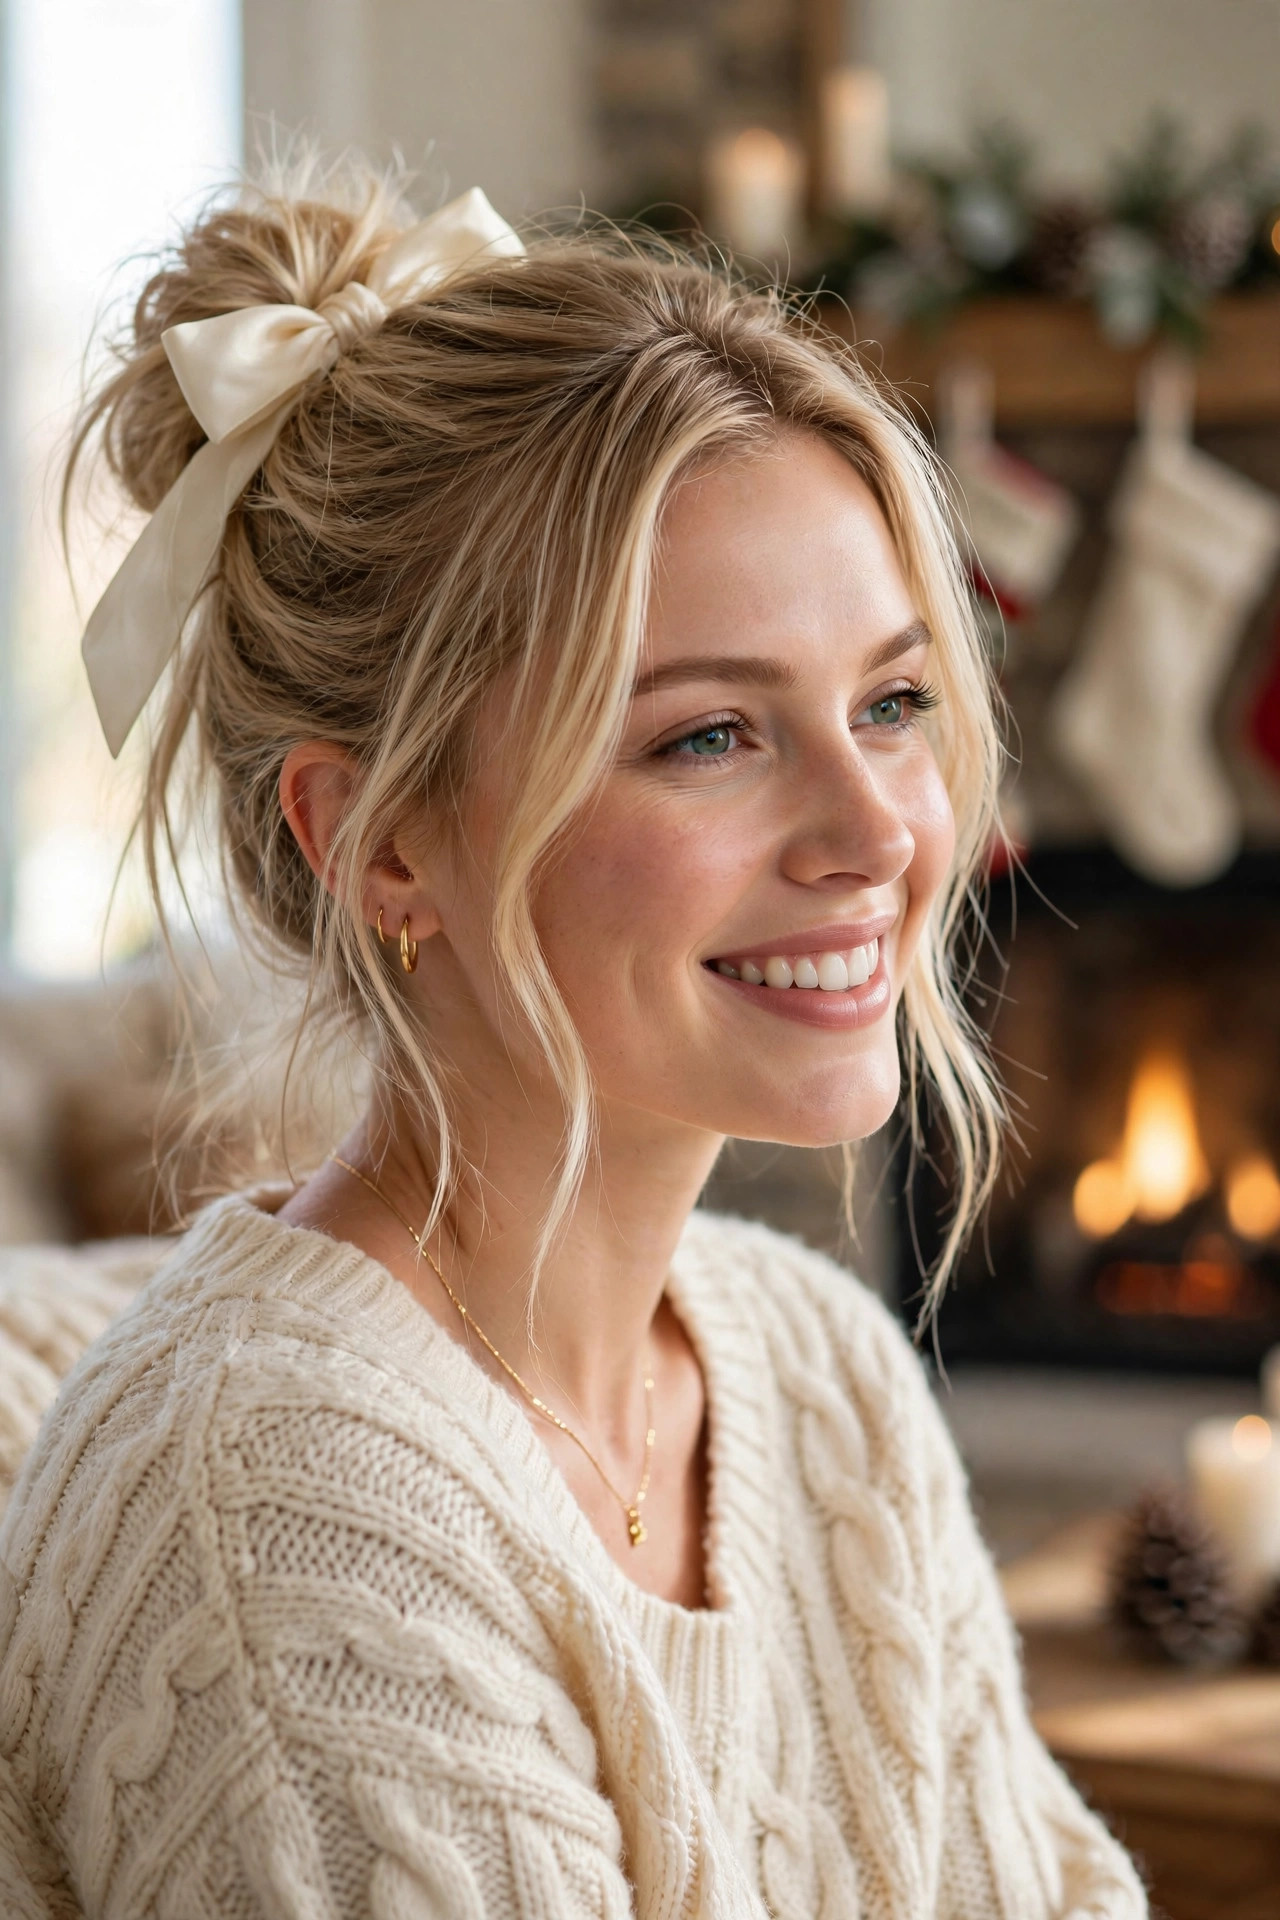
- Gather hair loosely at the crown
- Twist it into a soft bun
- Pull pieces loose for texture
- Tie the cream bow around it
A messy bun with a cream satin bow is the cosy answer to Christmas morning, wrapping presents, and relaxed gatherings where comfort matters as much as style. Gather the hair loosely, twist it into a soft bun without worrying about perfection, and pull a few pieces loose around the face for that lived-in texture. The cream bow elevates the whole look instantly, turning an everyday bun into something deliberately festive, soft, and photogenic without any extra effort or heat styling at all. The result should feel comfortable, never tight. Add shine spray sparingly for a healthy glow.
This style is kind to all hair types, because messiness is the point and there is no wrong way to arrange the bun. Fine hair benefits from a little dry shampoo and backcombing for fullness, while thick hair can simply be looped and pinned. It also works beautifully as a second-day style, holds well under a hat or hood on the way to a gathering, and can be refreshed in seconds by retying the bow and smoothing the front with your fingers. Carry two spare pins for quick touch-ups. Practice once before the big day arrives.
Holly Bow Fishtail Braid
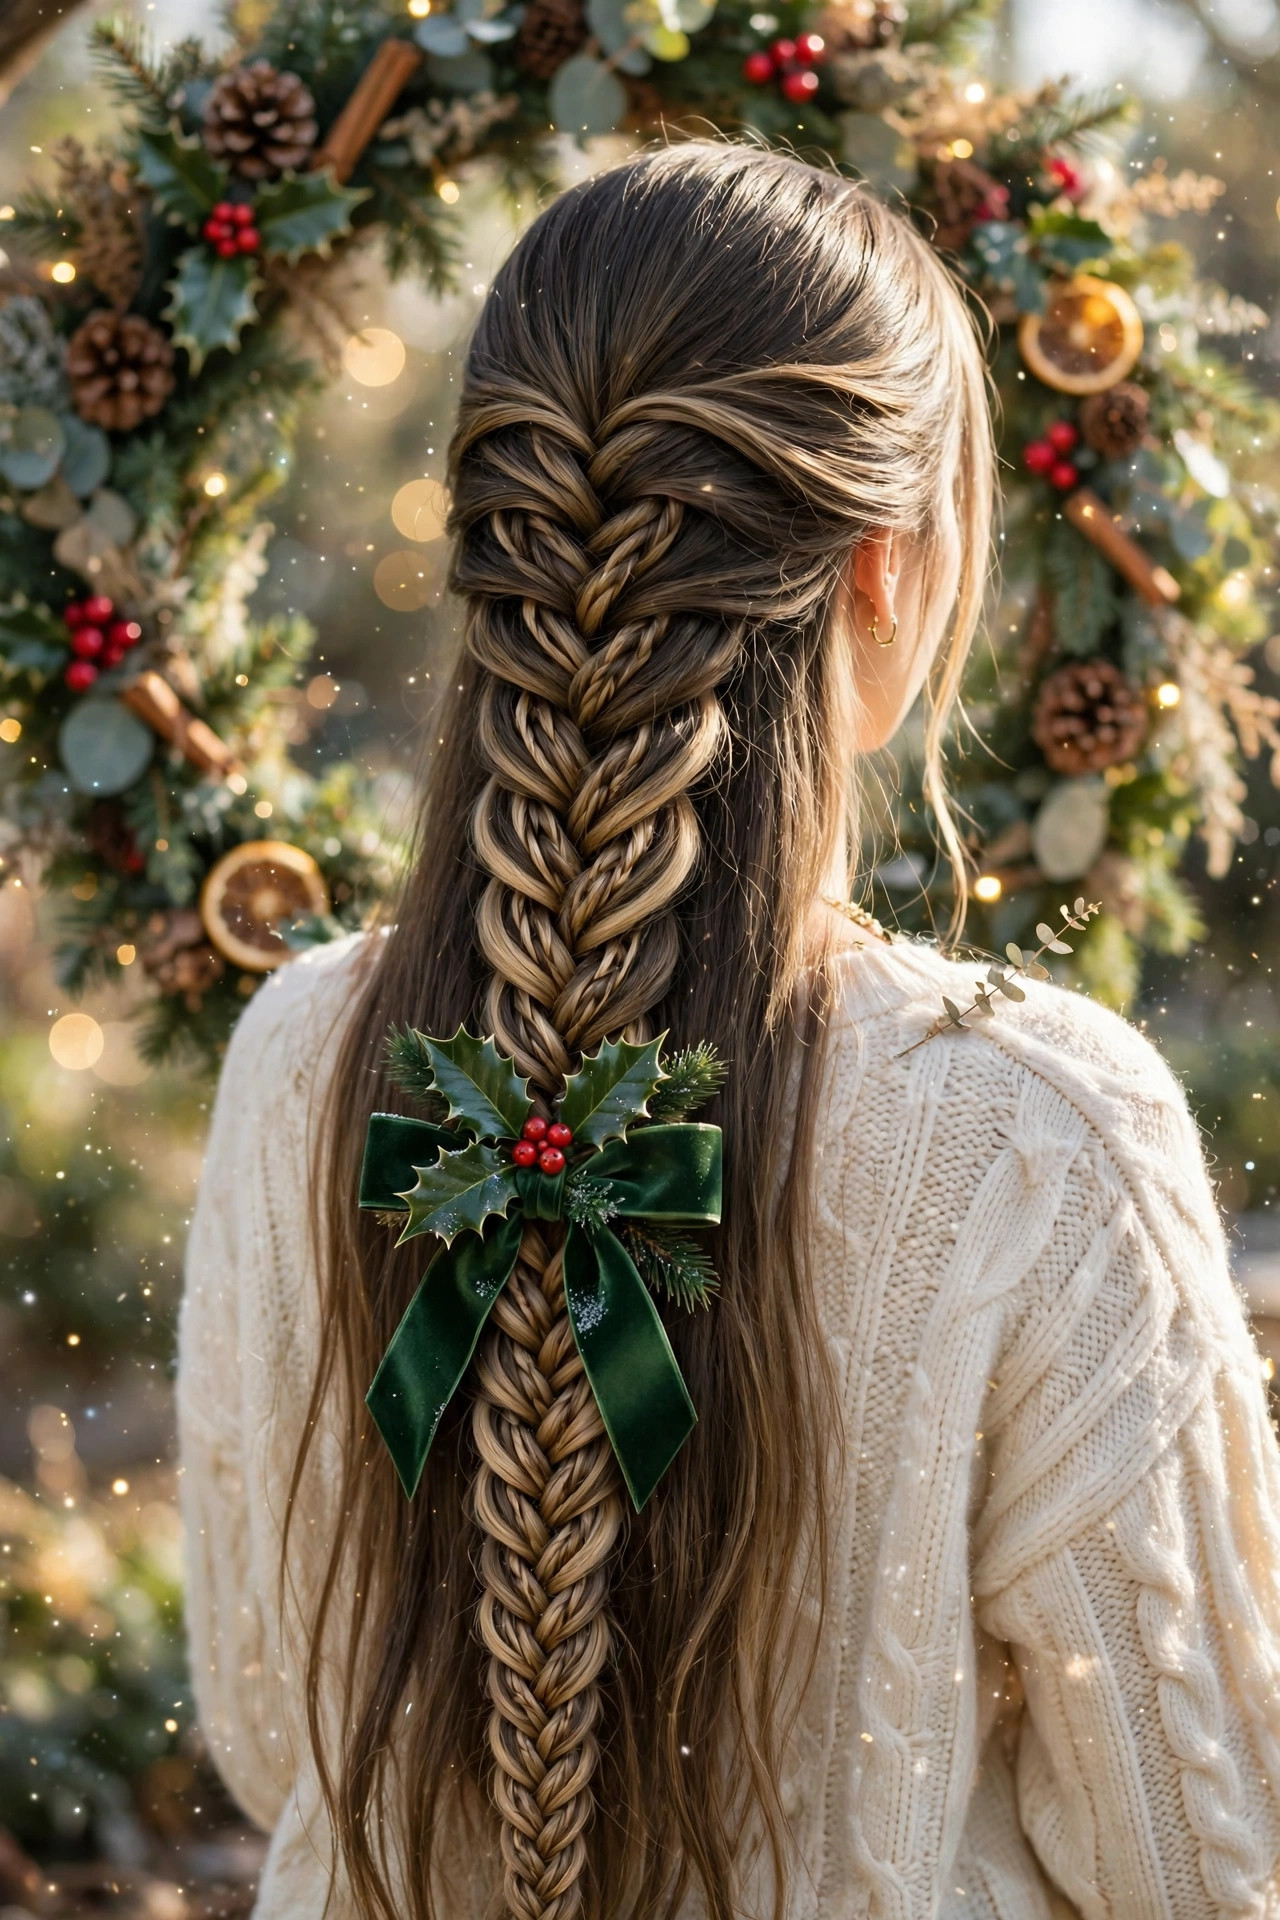
- Divide the ponytail into two sections
- Cross small pieces alternately across
- Keep the braid even and neat
- Tie the holly bow at the end
A fishtail braid with a deep green holly bow is intricate, enchanting, and surprisingly simple once you learn the rhythm of crossing small pieces alternately. Divide the hair into two sections and pass tiny strands from each outer edge across to the opposite side, repeating evenly until you reach the ends. The resulting woven texture looks far more complex than it is, and the holly-green bow at the finish gives it a woodland, wreath-like charm that feels perfectly at home in December. Work in good light for the best result.
Patience is the only real requirement here, because smaller sections create a finer, more detailed fishtail, while larger sections give a chunkier, more casual braid. Either way, the style holds beautifully for hours and suits very long hair best, though medium hair can achieve a shorter version with a little pancaking for fullness. Finish with a light spray, keep the front soft with a couple of loose strands, and enjoy a braid that earns compliments all evening long. Take a photo to check the back view. Patience here pays off beautifully in the final photographs.
Silver Bow Glam Waves
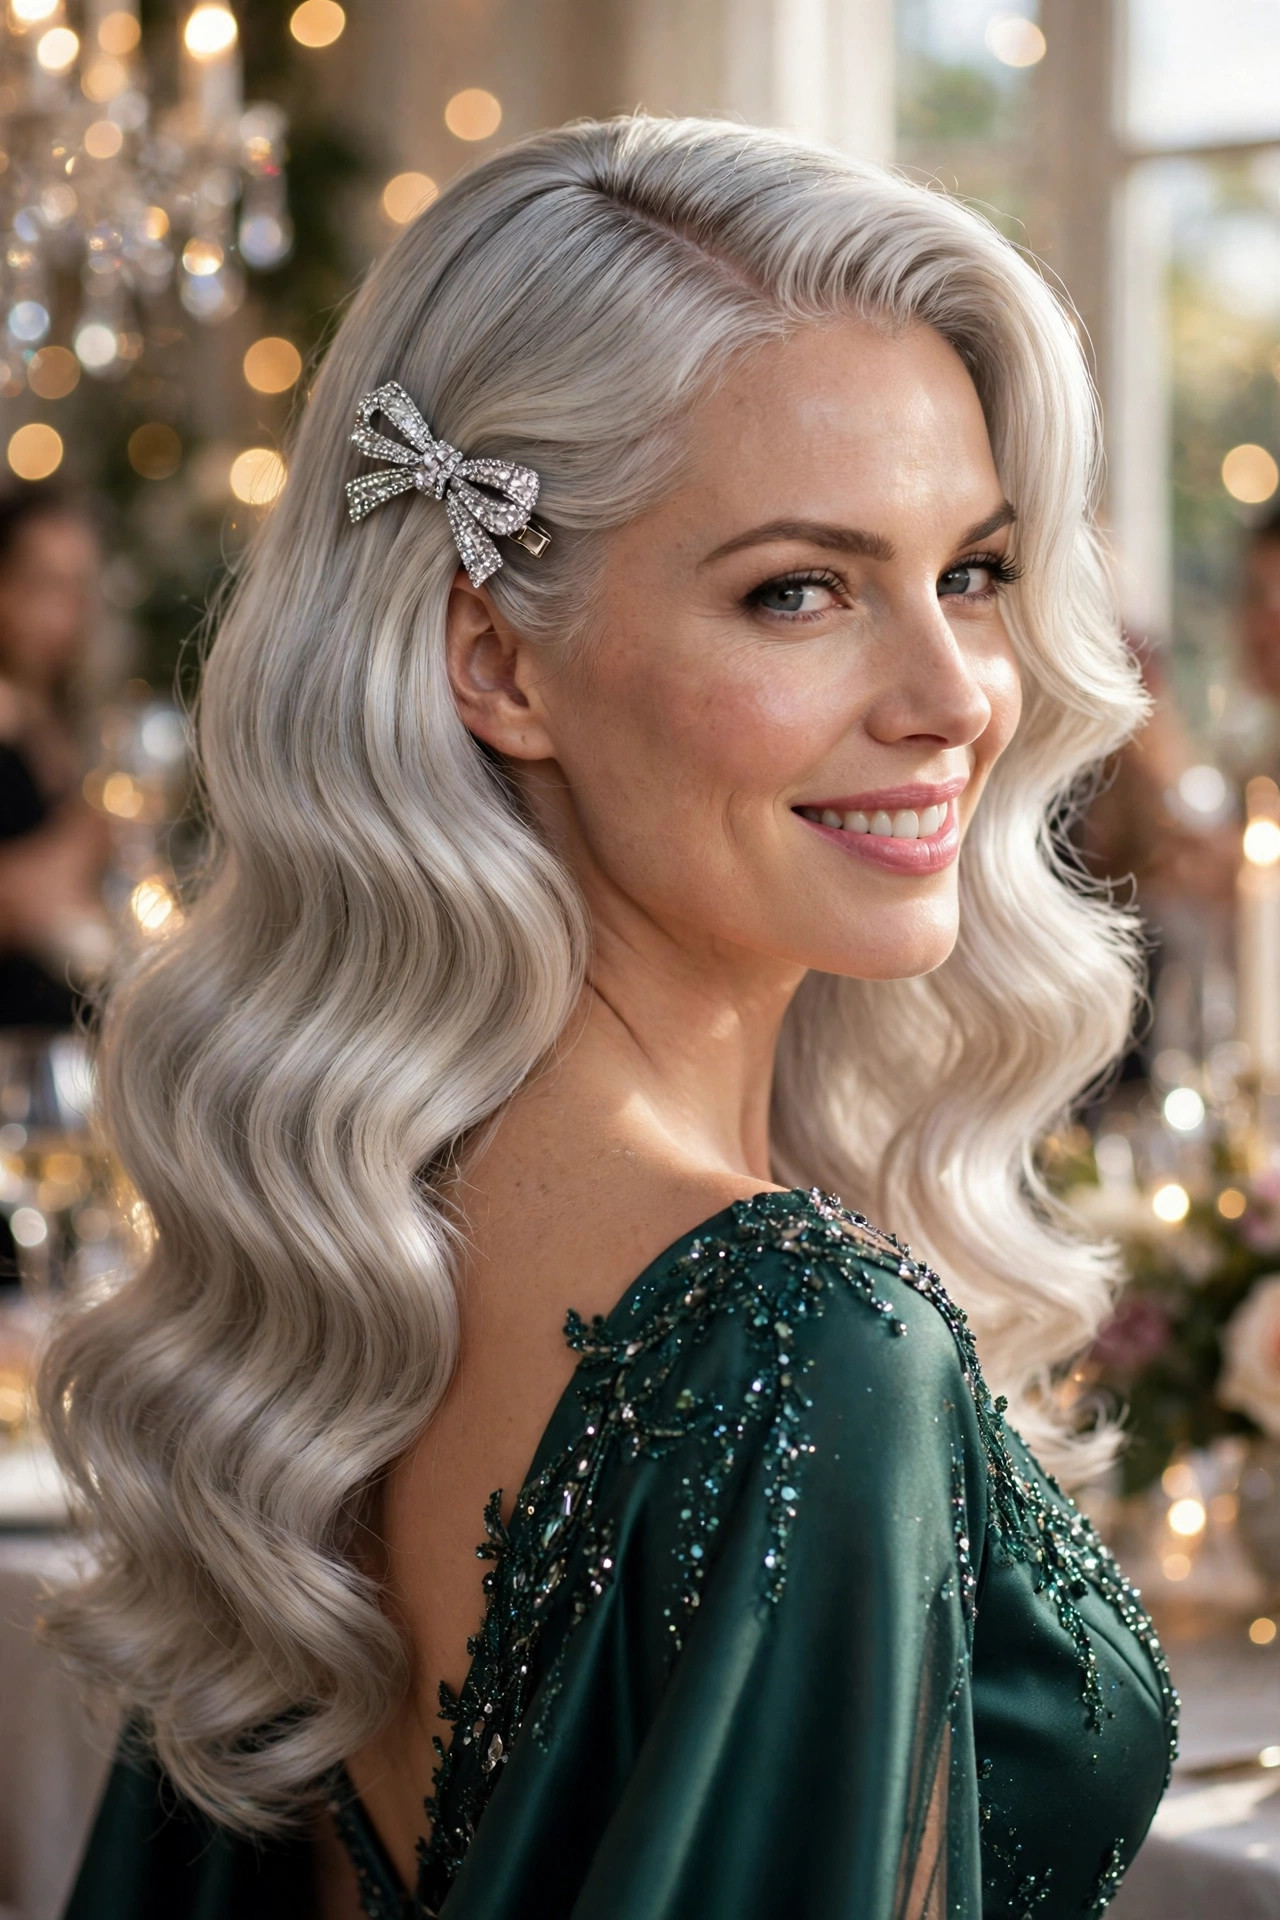
- Create a deep side part first
- Curl all sections in one direction
- Brush waves into smooth S-shapes
- Clip the silver bow neatly
Hollywood waves with a sparkling silver bow are pure red-carpet glamour, made for the most sparkling night of your holiday season. Create a deep side part, curl every section in the same direction, and then brush the curls out carefully until they fall into smooth, continuous S-shaped waves. The silver bow clipped above one ear catches the light with every turn of the head, and the deep part gives the waves a dramatic sweep that flatters the cheekbones beautifully. A quick mirror check before leaving saves later fixes. Keep the finish soft rather than stiff or overworked.
This style rewards patience, because letting the curls cool and set before brushing is what creates that smooth, liquid wave rather than frizz. A shine serum through the lengths and a strong but flexible spray will keep the waves intact through dancing and photographs. It suits medium and long hair, works on blonde, brunette, and silver hair alike, and pairs perfectly with a gown, statement earrings, and a confident smile for a truly unforgettable entrance. This small effort makes a big difference all evening. Finish with a light mist of flexible-hold spray.
Cranberry Velvet Top Knot
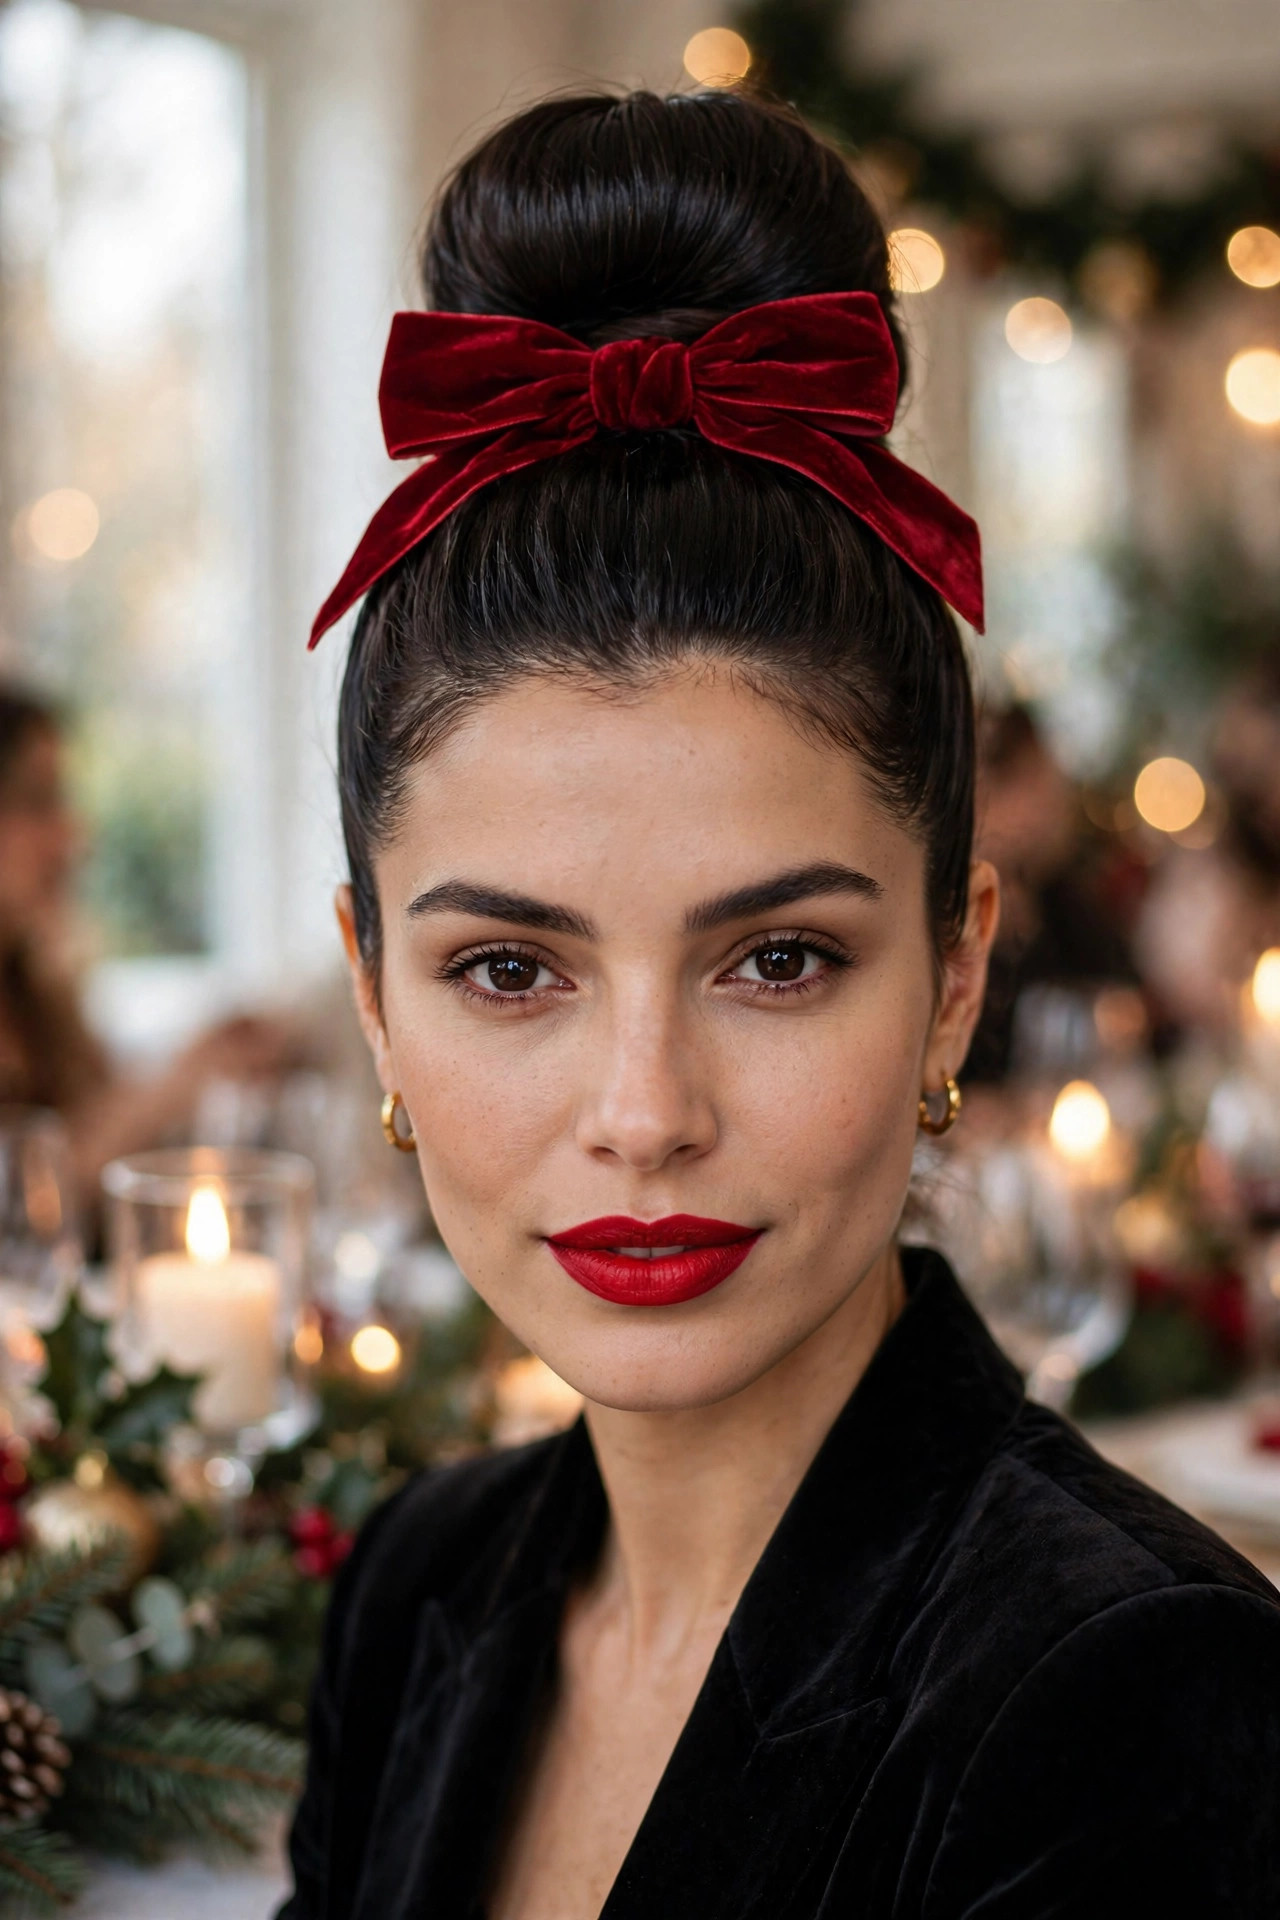
- Brush hair up to the crown
- Twist into a tight high knot
- Smooth flyaways with pomade
- Wrap the velvet bow around it
A high top knot with a cranberry velvet bow is bold, modern, and wonderfully practical, keeping hair completely out of the way while still looking deliberately festive. Brush the hair up to the crown, twist it into a tight, polished knot, and smooth any flyaways with a little pomade for a clean finish. The cranberry bow wrapped at the base adds a rich pop of colour that pairs beautifully with a bold lip, making this a favourite for parties where you plan to dance, mingle, and stay comfortable. Step back and check the balance from behind.
This look is especially good for thick hair, which gives the knot natural fullness, though fine hair can be boosted with a small bun form hidden inside. To avoid a headache, secure the knot with pins rather than one very tight elastic, and keep the front smooth but not pulled painfully tight. It also survives hats, scarves, and coats gracefully, so it is an excellent choice for outdoor markets followed by indoor celebrations. Let the style settle for a few minutes first. Small adjustments now prevent frustration later on. The result should feel comfortable, never tight.
Forest Satin Rope Twist
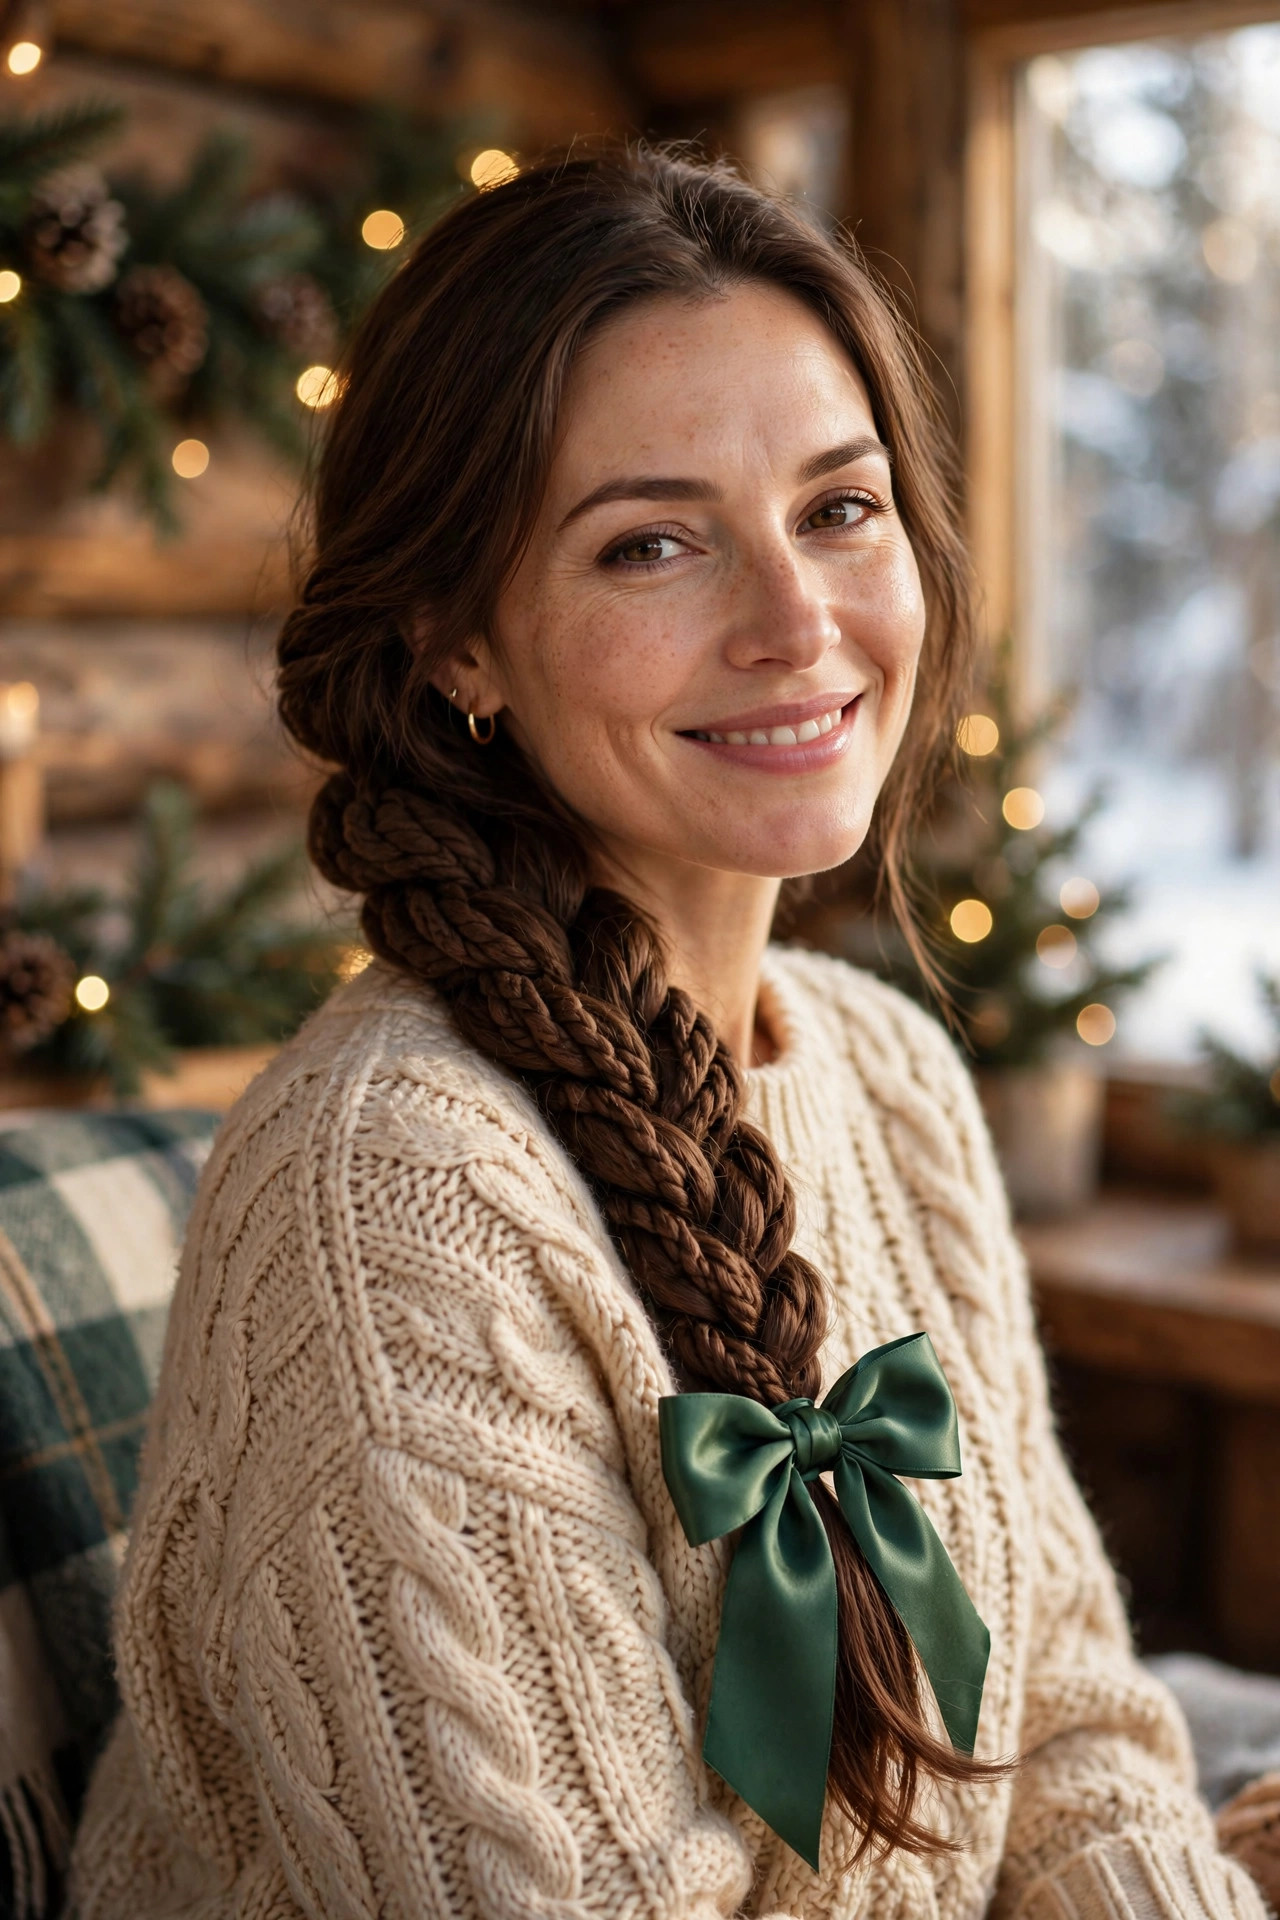
- Split hair into two sections
- Twist each section one way
- Wrap them together oppositely
- Tie the forest bow at the end
A rope twist with a forest green satin bow is a wonderfully simple style that looks far more polished than the few minutes it takes to create. Split the hair into two sections, twist each one in the same direction, then wrap them around each other in the opposite direction so the twist locks itself together. The chunky, twisted texture catches the light beautifully, and the deep forest bow at the end gives it a woodland elegance that suits cosy knits, wool coats, and relaxed winter gatherings perfectly. Add shine spray sparingly for a healthy glow.
Rope twists are ideal for beginners, because the technique is forgiving and the twist naturally tightens as you work down the length. They also hold well on wavy and curly textures, and on straight hair a little texture spray beforehand will stop the twist from unravelling. For a softer finish, pancake the twist gently after securing it, and let a few face-framing pieces fall free for romance. It is a lovely everyday festive style you will reach for again and again. Carry two spare pins for quick touch-ups. Practice once before the big day arrives.
Pearl Bow Elegant Chignon
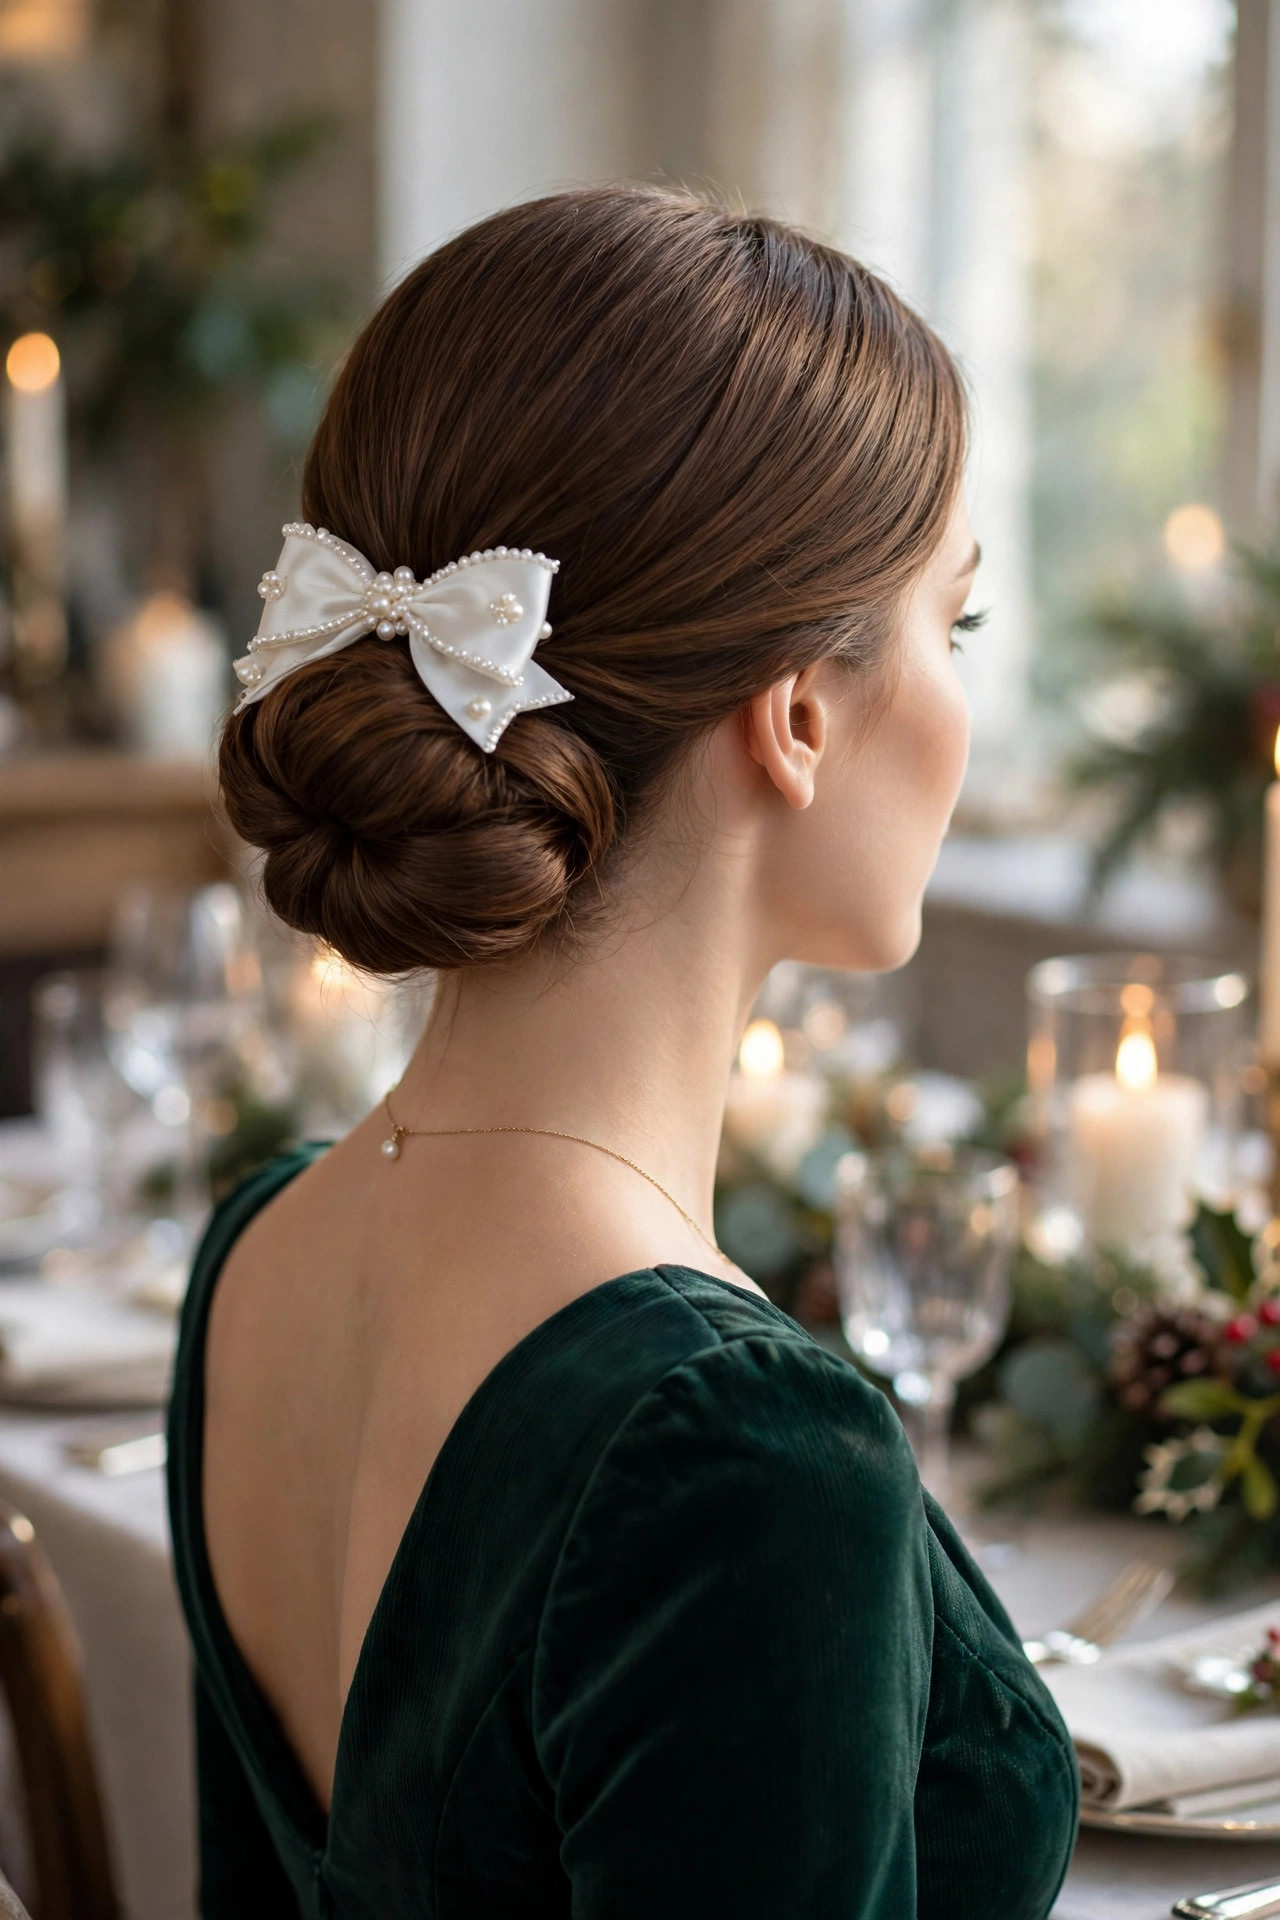
- Gather hair low at the nape
- Fold it into a soft chignon
- Pin the shape all around
- Place the pearl bow above
A low chignon with a pearl-accented bow is timeless elegance, the kind of style that never dates and suits every formal occasion on the calendar. Gather the hair low at the nape, fold it gently into a soft, rounded chignon, and pin the shape all around so it sits neatly against the head. The pearl bow placed just above adds a luminous, bridal-like detail that catches candlelight beautifully, making this a perfect choice for formal dinners, weddings, and New Year celebrations alike. For shorter lengths that still want this polish, try these short-hair festive ideas alongside your chignon plans.
This style works best on medium and long hair, though shorter hair can be gathered into a smaller chignon with the help of pins and a little padding. Keep the front smooth and the part neat for formality, or soften it with a centre part and two loose tendrils for a more romantic feel. A flexible spray will hold the shape without stiffness, and because the hair sits low, it pairs beautifully with high necklines, statement necklaces, and coats worn over evening dresses. Work in good light for the best result.
Candy Bow Curly Ponytail
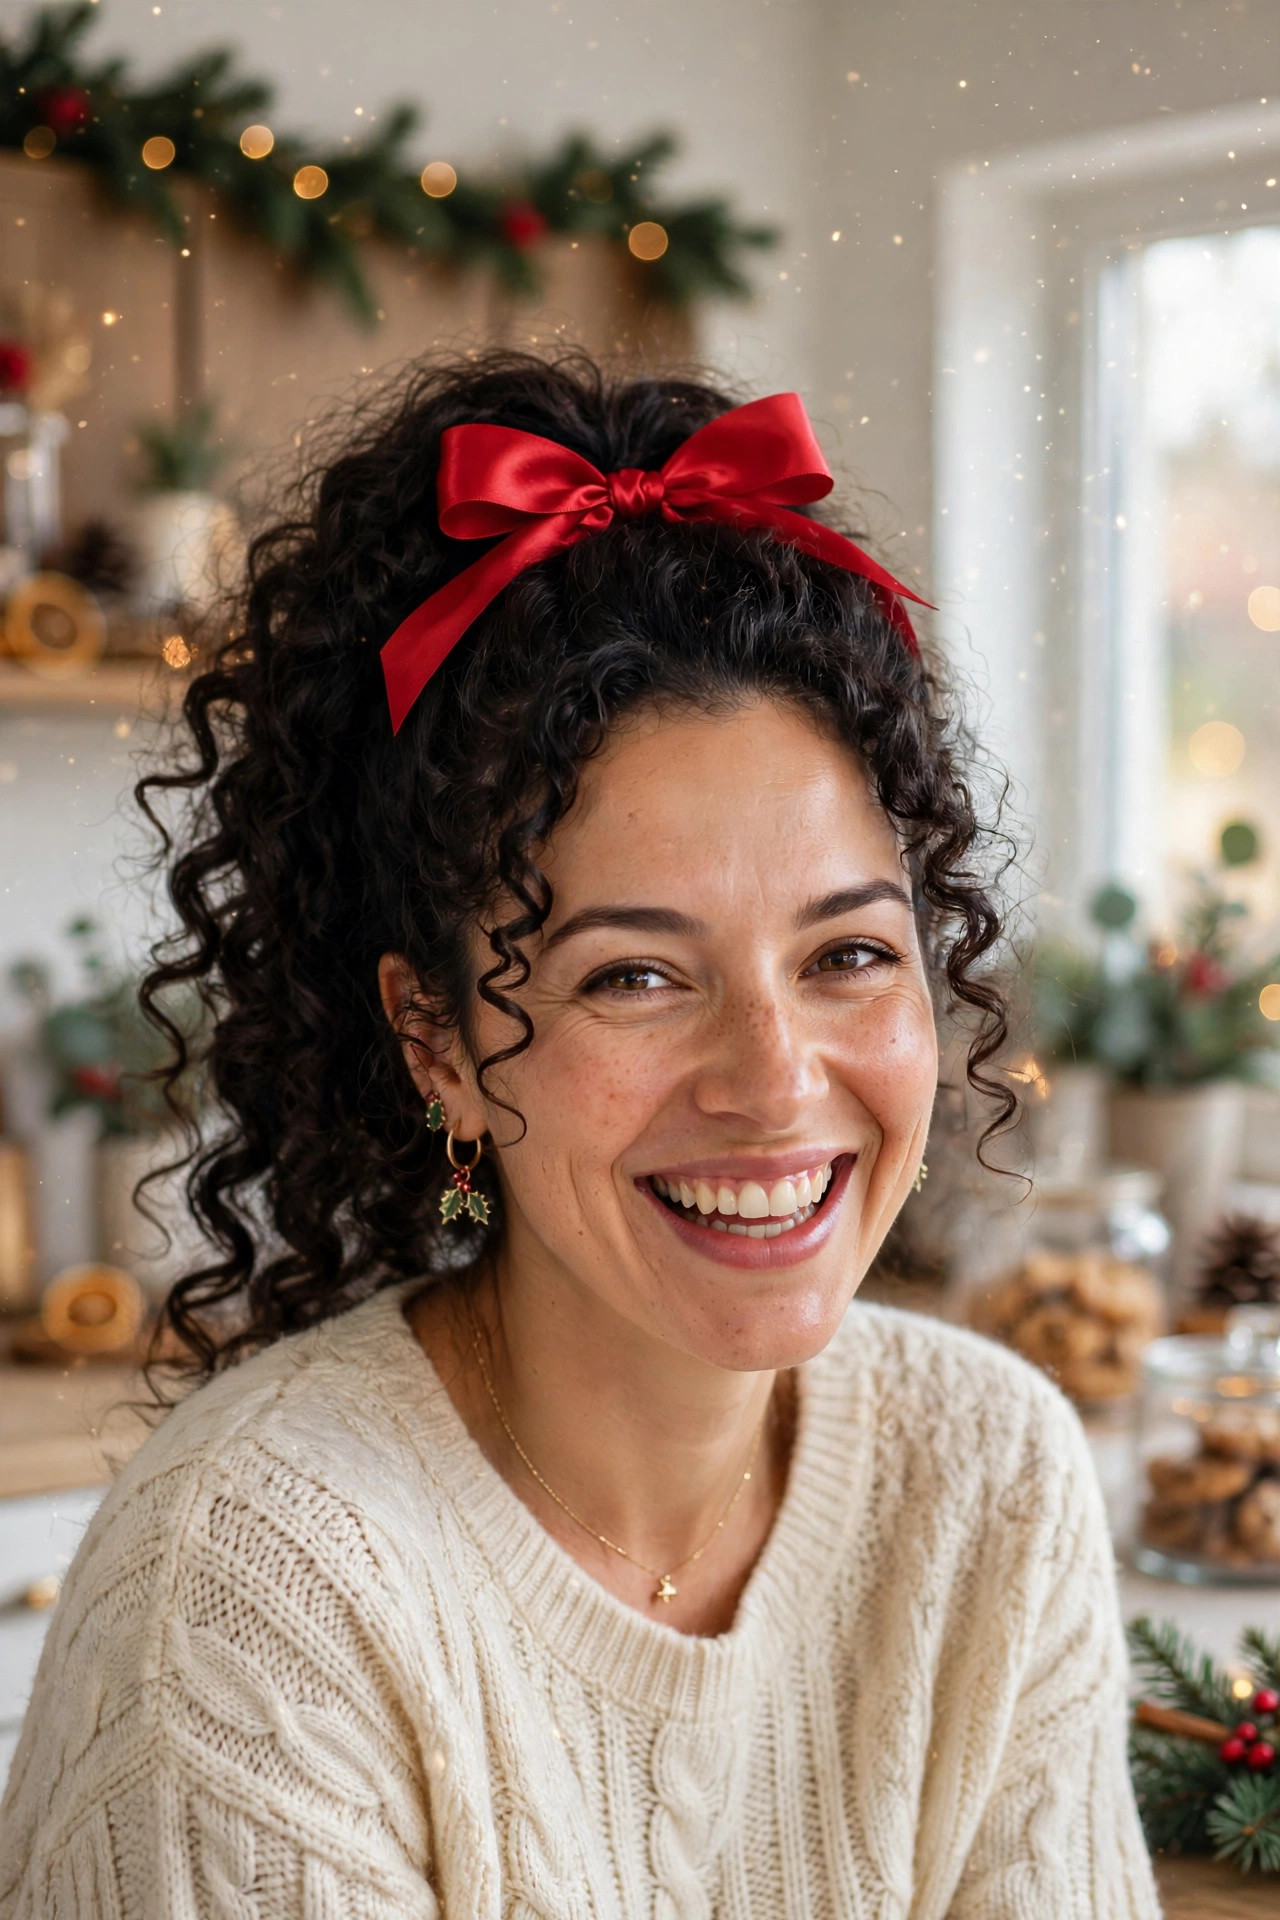
- Define curls with cream first
- Gather curls high loosely
- Secure without flattening volume
- Tie the candy bow on top
A high curly ponytail with a candy red satin bow celebrates natural texture, letting bouncy, defined curls take centre stage while the bow adds a joyful pop. Define the curls with cream first, gather them high loosely, and secure the ponytail without flattening the volume that makes this style so lively. The bow sits on top like the cherry on a celebration, framing the curls and drawing the eye upward, which is wonderfully flattering and full of personality. Patience here pays off beautifully in the final photographs. A quick mirror check before leaving saves later fixes.
The key to this style is working with your curl pattern rather than against it, so avoid brushing the curls out and instead scrunch them gently into shape. A diffuser will add volume at the roots, while a light oil on the ends keeps the curls shiny and frizz-free through a long day. This look suits coily, curly, and wavy hair alike, holds up well for active celebrations, and looks fantastic in photographs because the curls create natural movement and dimension. Keep the finish soft rather than stiff or overworked.
Ivory Velvet Romantic Updo
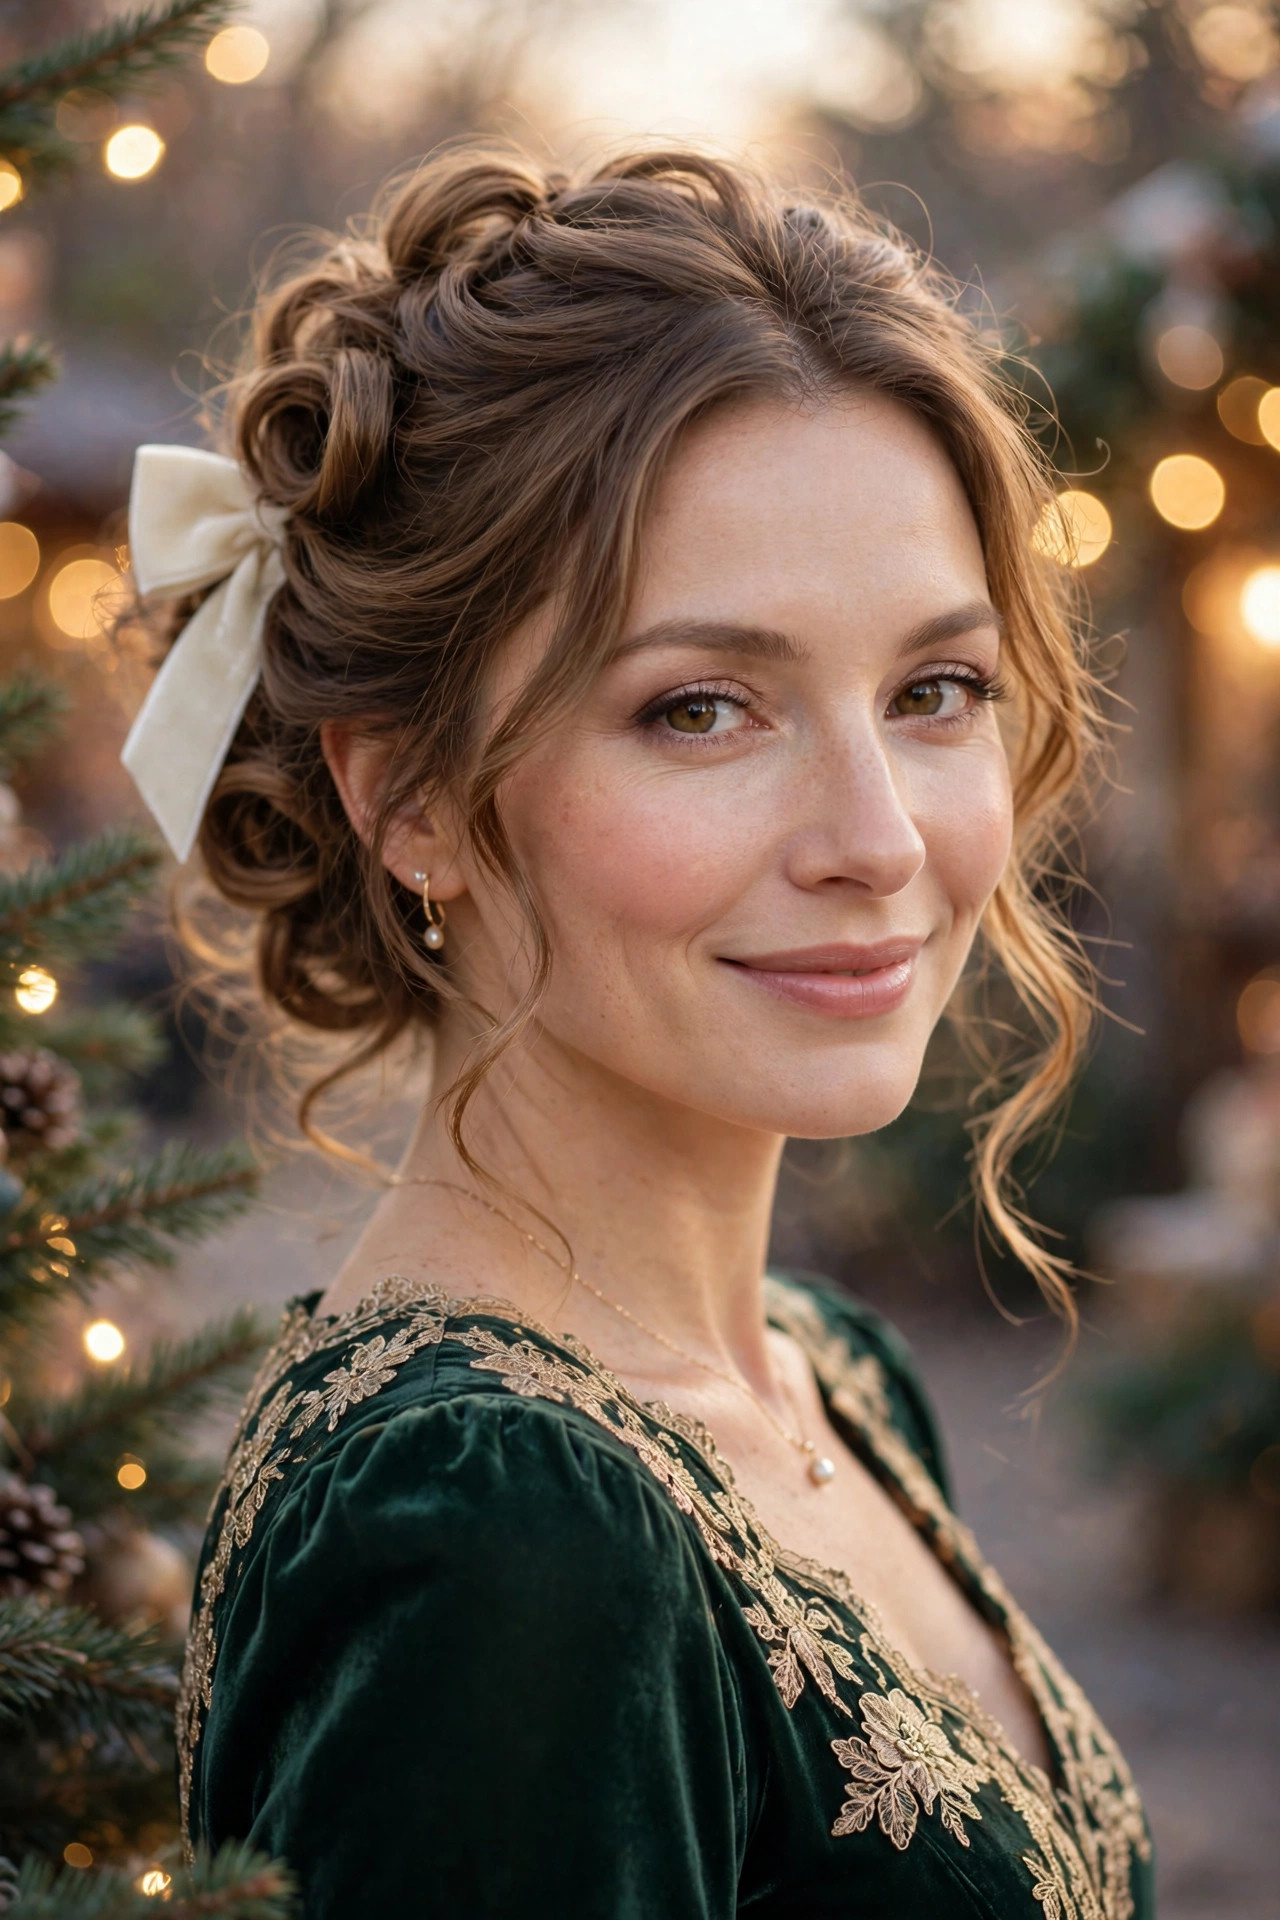
- Curl hair loosely all over
- Pin curls up softly one by one
- Leave the nape soft and loose
- Place the ivory bow centrally
A loose romantic updo with an ivory velvet bow is soft, dreamy, and perfect for evenings when you want to look beautiful without looking overdone. Curl the hair loosely all over, then pin the curls up one by one, building a soft, cloud-like shape rather than a tight, structured bun. Leaving the nape soft and a few curls loose around the face keeps the updo romantic, while the ivory bow placed centrally becomes a gentle focal point that complements pale dresses and candlelit rooms beautifully. Finish with a light mist of flexible-hold spray.
This style is forgiving for all skill levels, because the loose, pinned-curl technique hides uneven sections and lets you adjust the shape as you go. It works on medium and long hair, and on fine hair a little backcombing at the crown will give the updo the fullness it needs. Finish with a soft spray that allows movement, and you will have a style that looks effortless, photographs softly, and feels comfortable from the first course through the final dance. Smooth any stray hairs gently with your fingertips. Step back and check the balance from behind.
Festive Bow Bubble Ponytail
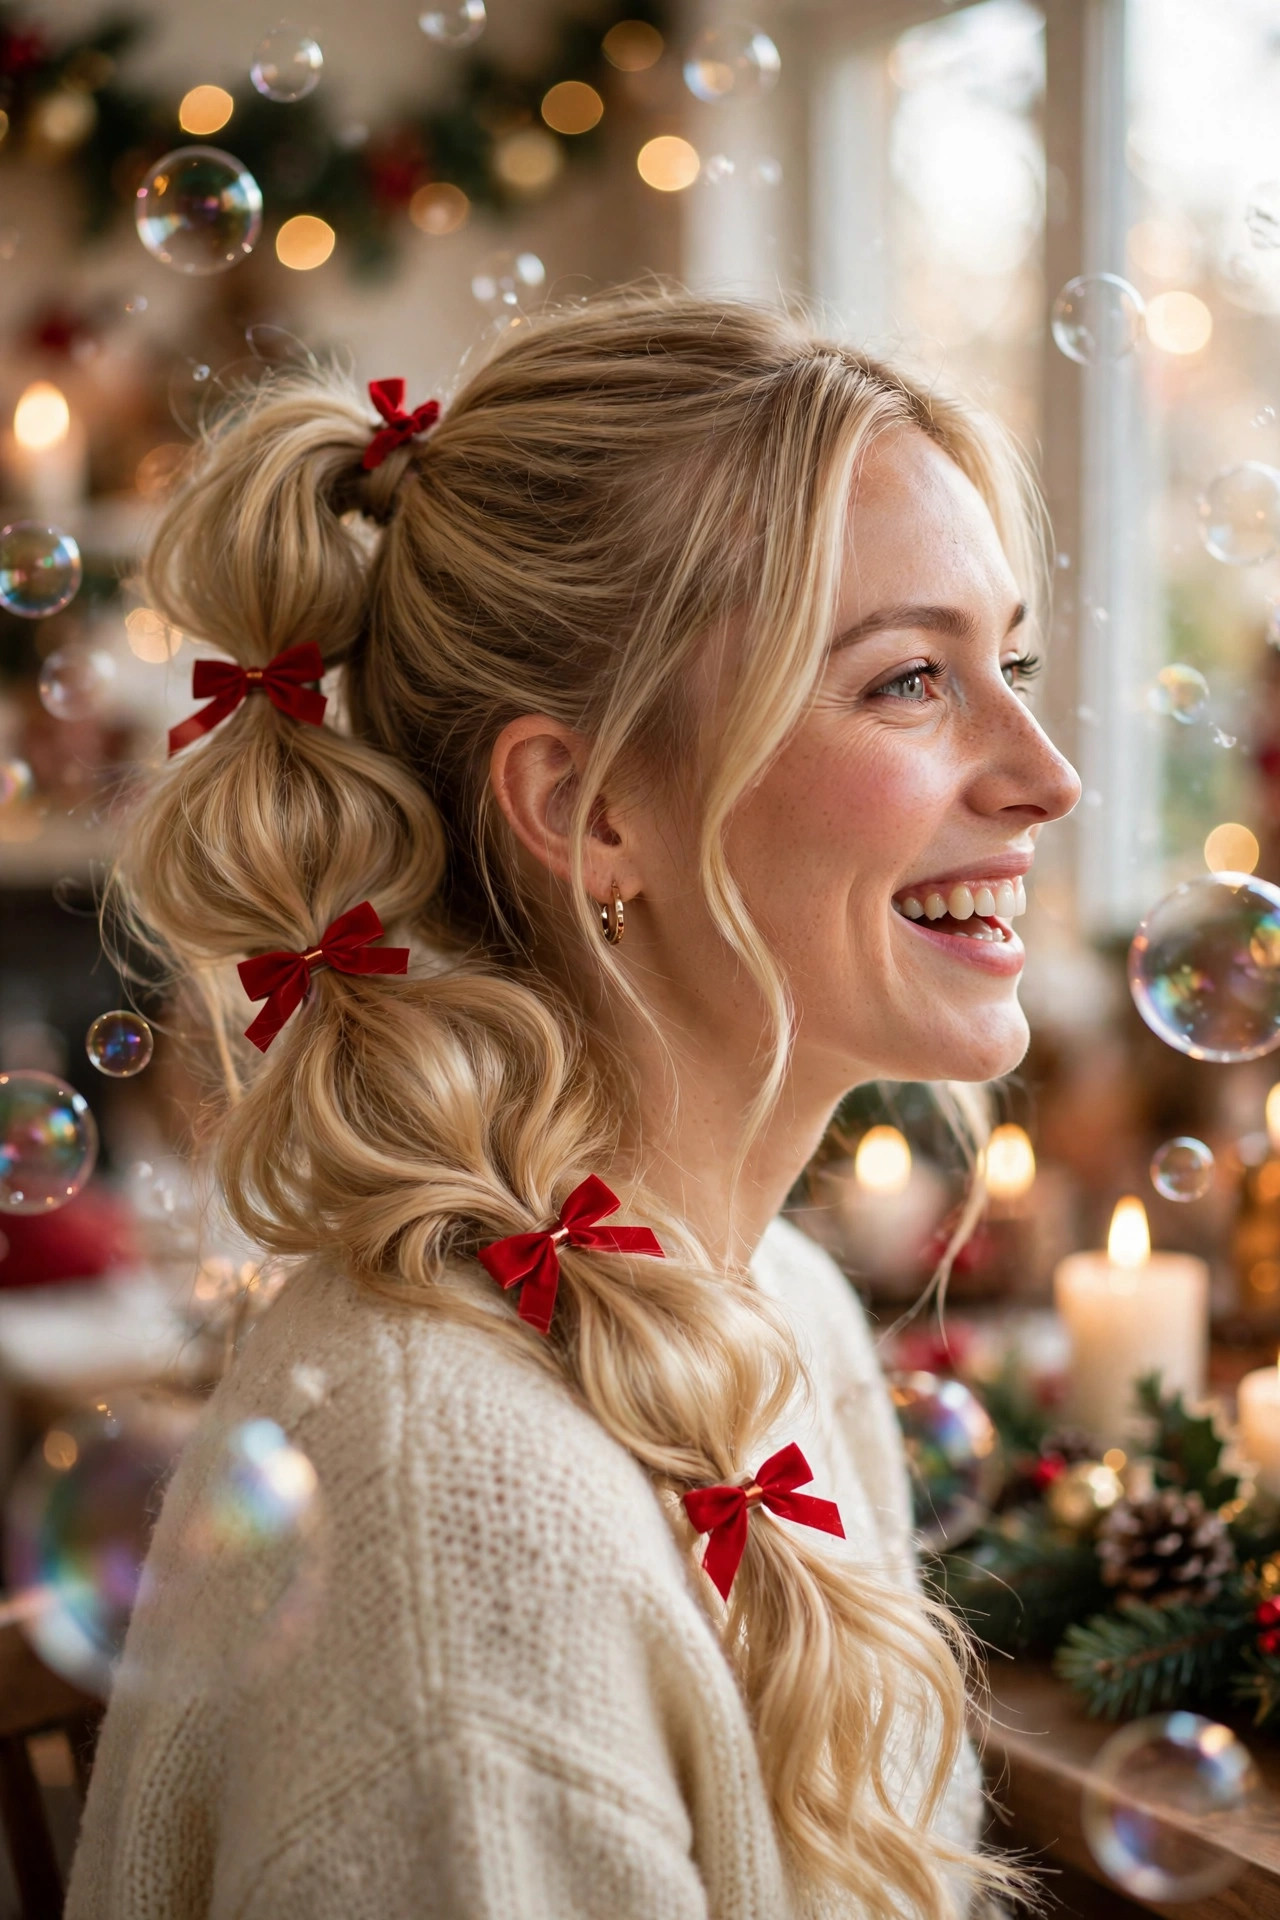
- Make a high ponytail securely
- Add elastics down the length
- Pull sections out into bubbles
- Tie small red bows between
A bubble ponytail dotted with small festive bows is the most joyful way to end this collection, playful and bright without ever feeling childish. Make a high ponytail securely, add elastics at even intervals down the length, and pull each section outward into a soft, rounded bubble. Tying a small red bow at each elastic turns the ponytail into a string of little gifts, a style that moves beautifully when you dance and looks delightful in every holiday photograph you take. Small adjustments now prevent frustration later on. The result should feel comfortable, never tight.
This look is a wonderful choice for long hair and for anyone who wants a style that lasts from morning until midnight with minimal touch-ups. A little texture spray before you start will help the bubbles hold, and pancaking each bubble evenly keeps the ponytail looking full rather than lopsided. Pair it with a party dress or a cosy sweater, add a touch of sparkle at the ears, and finish your festive season with a style that is as fun as the celebrations themselves. Add shine spray sparingly for a healthy glow.
As you plan your holiday looks, remember that christmas hairstyles with bows work best when the bow feels intentional rather than added as an afterthought. Choose one bow per style, match its size to your hair length and your outfit, and let the texture, colour, and placement do the talking. Whether you loved the sleek ponytails, the romantic braids, or the playful bubble styles in this collection, you now have twenty-one sweet options to try through December and beyond. Save your favourites, practise the one that caught your eye first, and enjoy stepping into every celebration feeling festive, confident, and beautifully finished.
FAQ
How do I keep a velvet bow from slipping all evening?
Start with hair that has grip, since washed, silky hair lets clips slide. Anchor the bow over an elastic or a crossed pair of bobby pins, and add a mist of texture spray underneath. For fine or straight hair, backcomb just the section beneath the bow. Check the placement after an hour, then relax and enjoy your evening.
Which bow size suits fine or thin hair best?
Smaller and medium bows flatter fine or thin hair, because an oversized bow can overwhelm the style and pull the hair flat. Choose satin or velvet, place the bow near the crown or nape for balance, and add volume at the roots. For round faces, a slightly higher placement lengthens the look, while side placement softens square jawlines beautifully.
Can I wear a bow hairstyle to a formal office party?
Absolutely, provided the bow and base style stay polished. A sleek low bun, a French twist, or a smooth chignon paired with a velvet or satin bow in black, navy, or burgundy reads elegant rather than playful. Keep jewellery minimal, match the bow to your outfit, and avoid glitter overload so the look feels refined, professional, and celebration-ready.
How do I match my bow to my outfit without looking overdone?
Treat the bow as your single festive accent and keep everything else calm. If your dress is patterned or sequinned, choose a solid bow in a complementary tone. For plain outfits, a plaid or jewel-toned bow adds interest. Consider your skin tone and hair colour too, since deep burgundy and emerald suit most complexions and occasions.