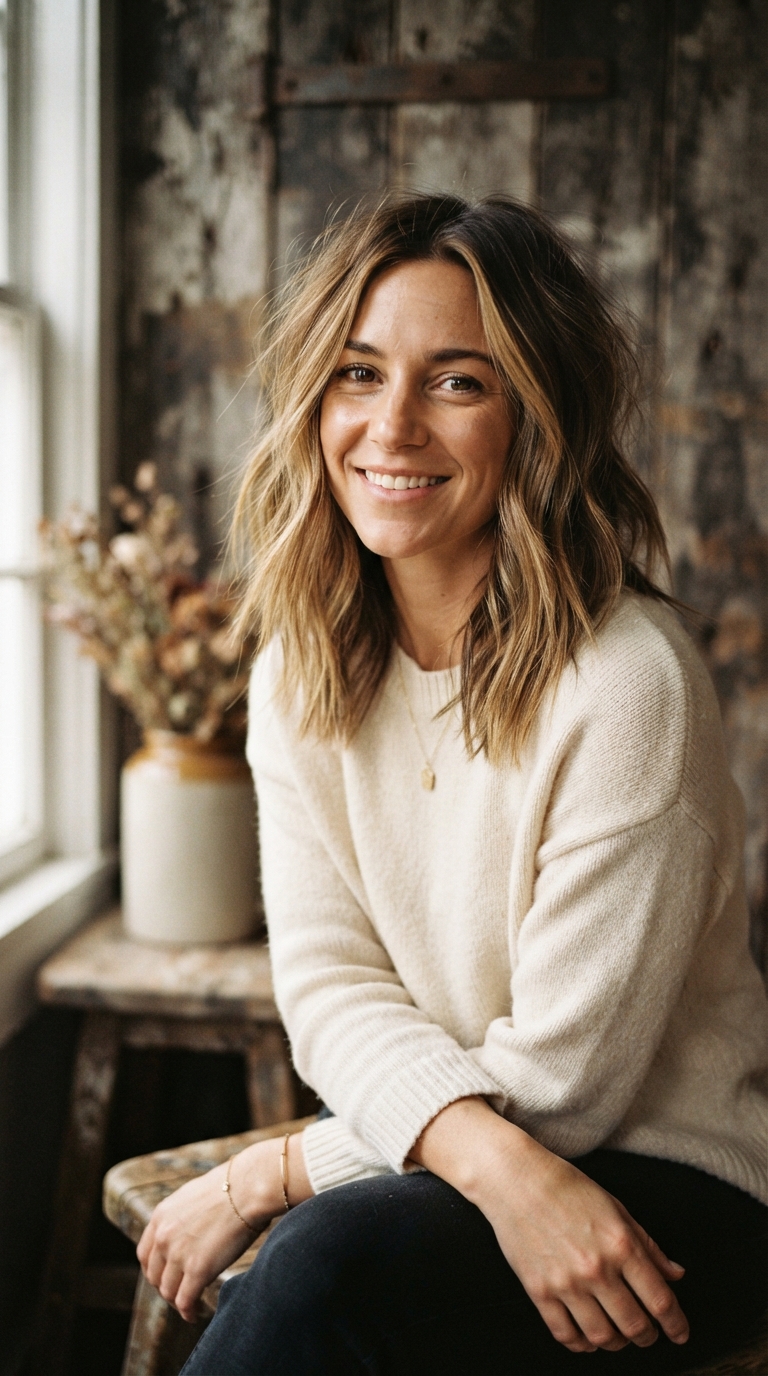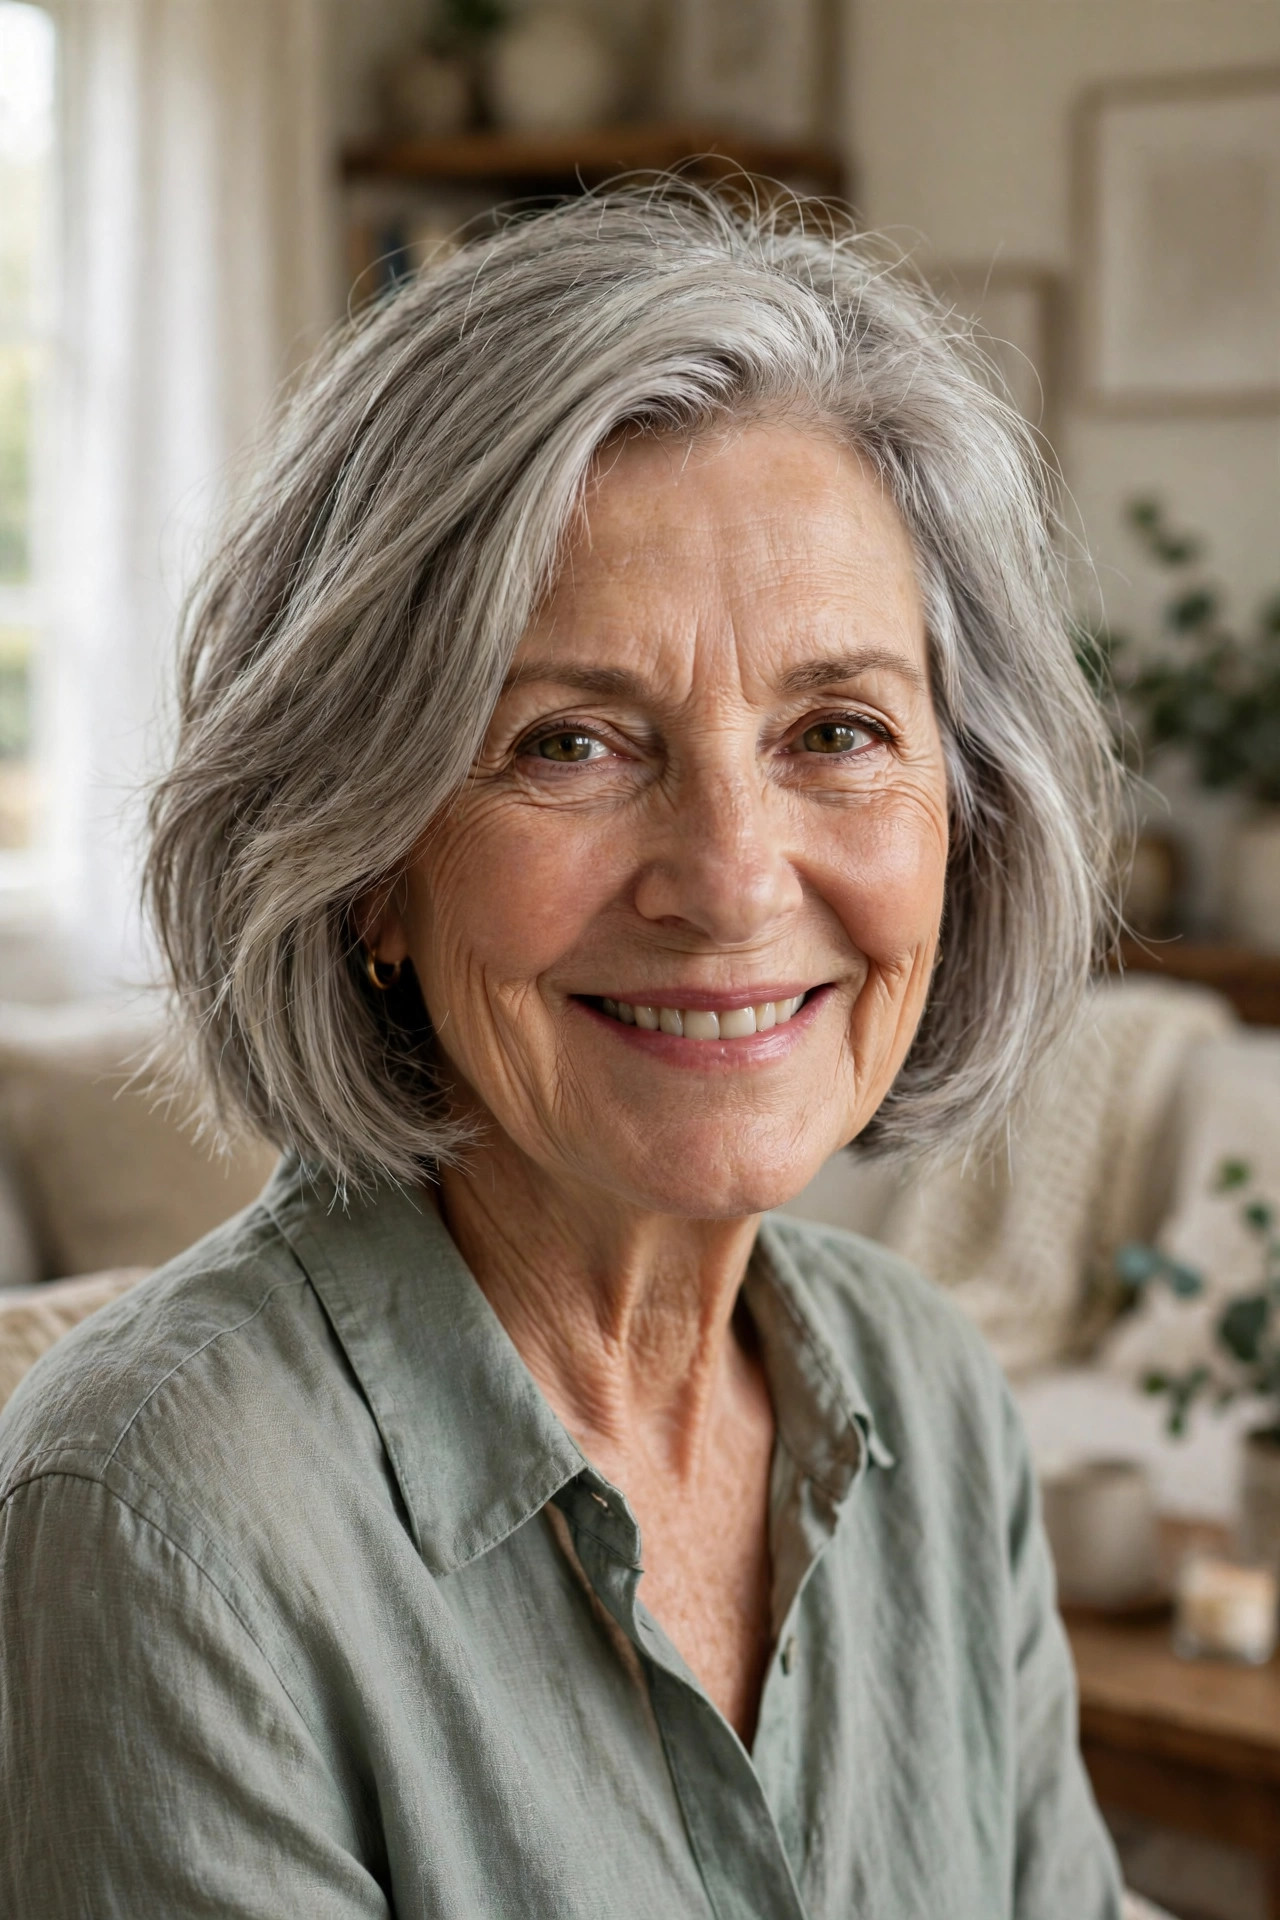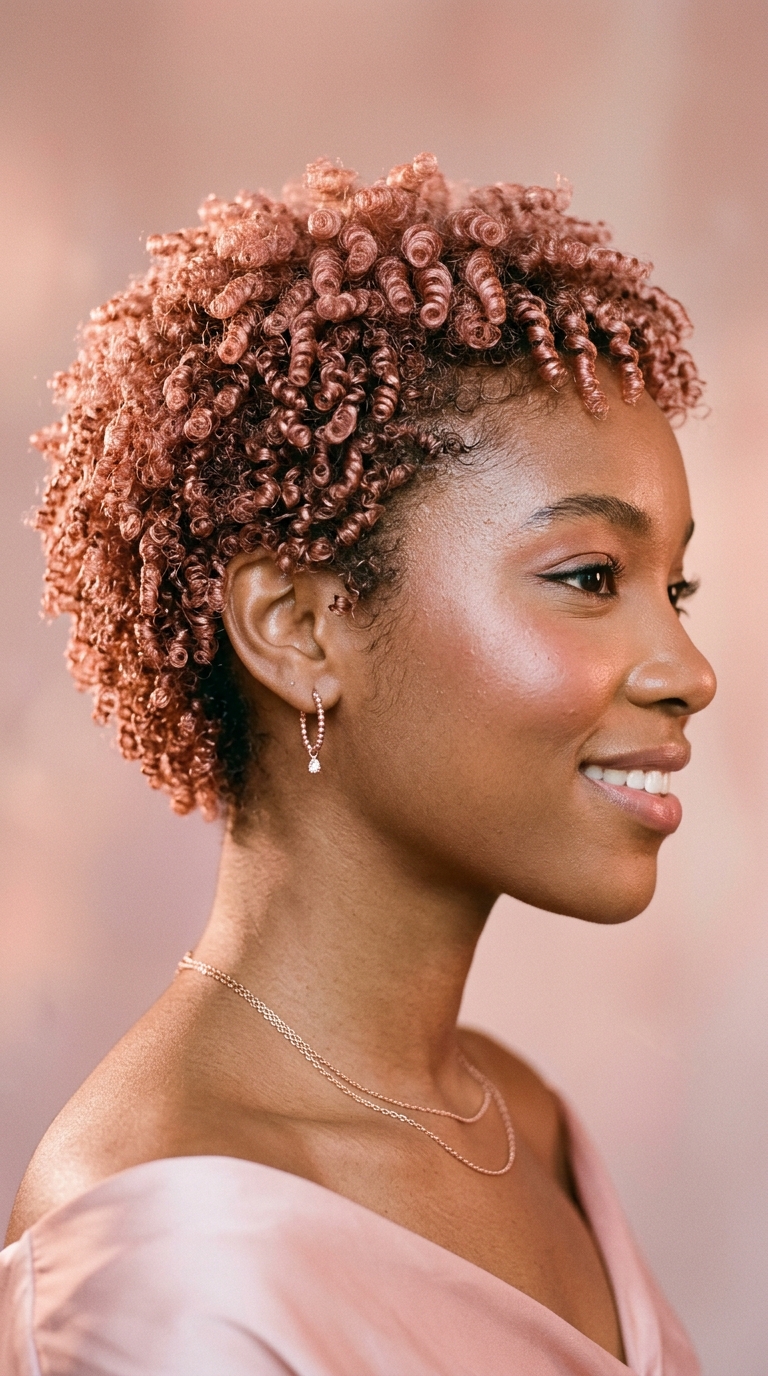
There is something effortlessly dreamy about curly half up half down hairstyles, which balance face-framing lift with soft, tumbling length in a single look. They keep curls out of your eyes while letting your natural texture take centre stage, which makes them perfect for weddings, date nights, busy workdays, and lazy weekends alike. Whether your curls are loose waves, springy ringlets, or tight coils, this collection offers a fresh twist on the classic silhouette, with braids, twists, clips, and buns that flatter every face shape and hair length. Each idea below also includes simple styling tips, so you can recreate your favourite look at home without salon help.
Classic Crown Twist
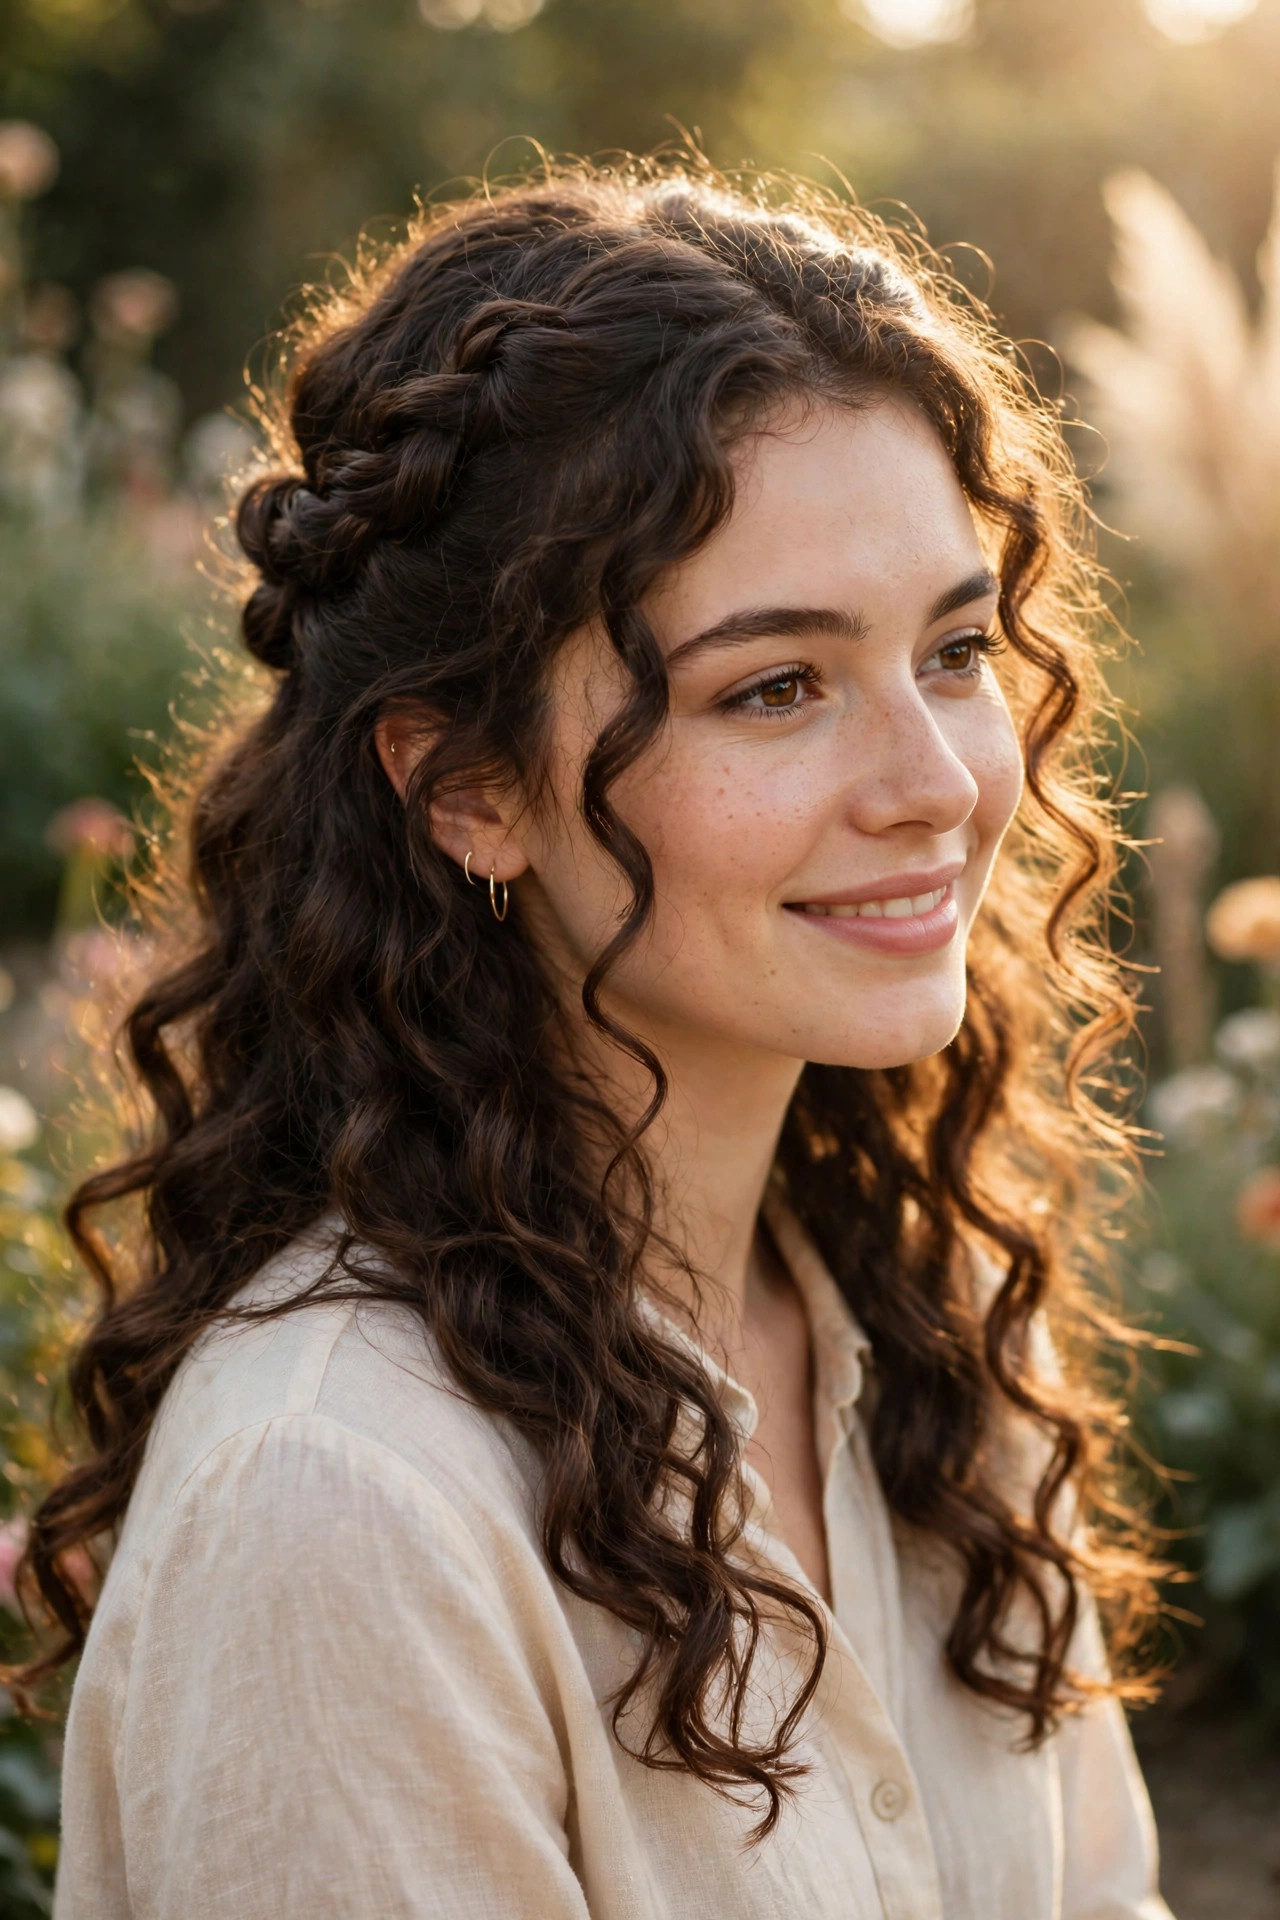
- Start with freshly washed, conditioned curls for the best definition
- Apply a curl cream to damp hair, then diffuse until fully dry
- Twist two front sections back and pin them at the crown
- Leave soft, face-framing tendrils loose around the cheeks
The classic crown twist is the easiest place to begin because it works on almost every curl pattern and takes less than ten minutes. Simply gather the hair above your ears, twist each side gently toward the back, and secure the twists where they meet with pins that match your hair colour. The result looks polished without feeling stiff, and the loose length underneath keeps the whole style soft and romantic. It is ideal for second-day curls that need a quick refresh. It also photographs beautifully, making it a reliable favourite for everyday snapshots and special occasions alike.
To keep this look lasting all day, mist the finished twists with a light-hold spray and avoid touching the curls once they are set. If your hair tends to fall flat at the roots, tease the crown section lightly before twisting, or clip the roots upward while diffusing for extra lift. This simple trick gives fine curls believable volume without heavy backcombing. Pair it with statement earrings and minimal makeup for an effortlessly put-together finish. For a softer finish, loosen the twists slightly after pinning, and let a few short curls escape near the temples.
Romantic Braided Halo
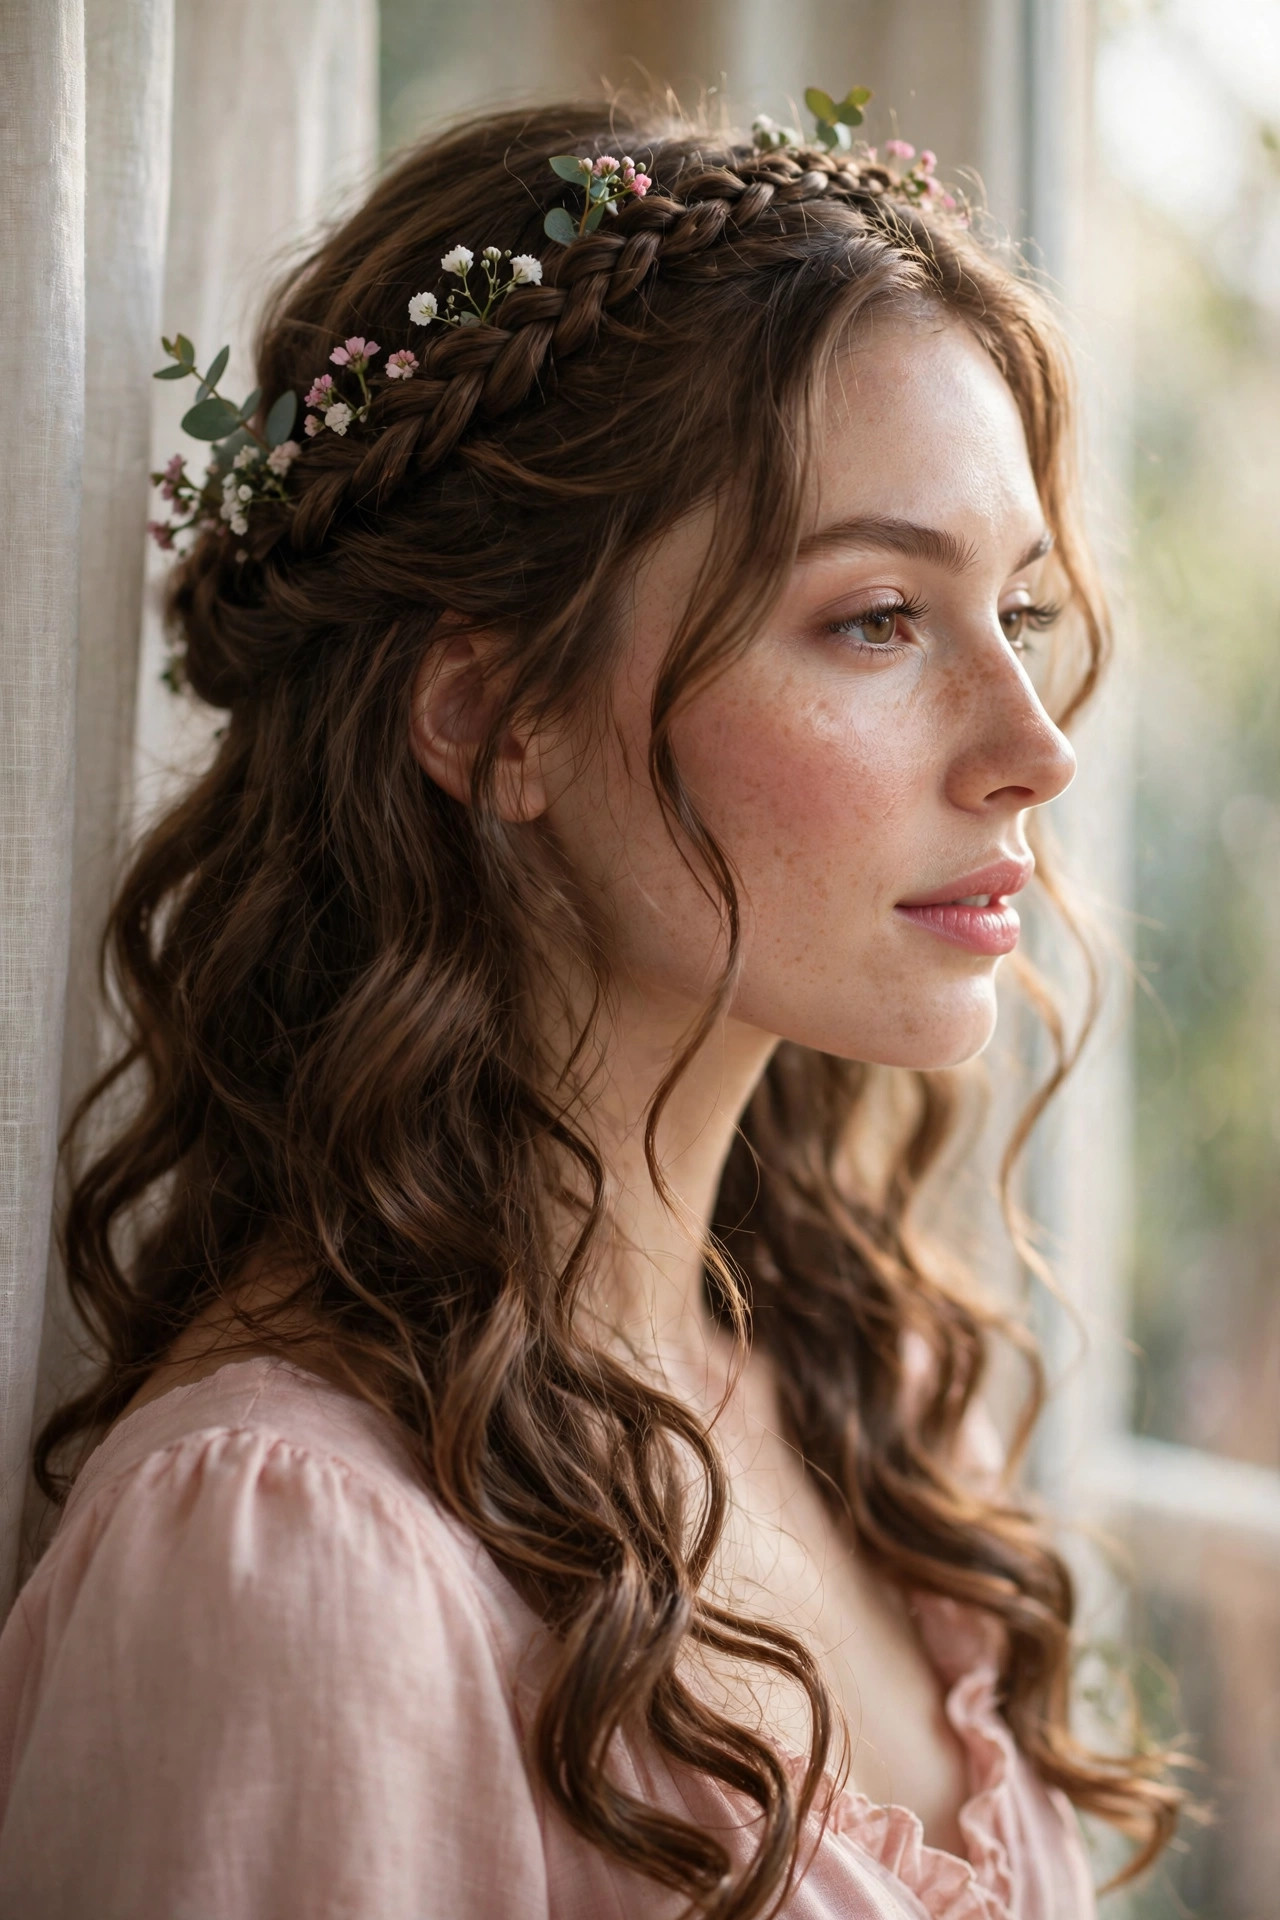
- Braid two small sections from each temple toward the back
- Cross the braids over the crown and pin them securely
- Gently pull the braid loops apart for a fuller, softer effect
- Add tiny fresh flowers or pearl pins for a romantic finish
A braided halo brings instant romance to any gathering, from garden weddings to anniversary dinners, because it frames the face like a delicate crown. The braids add structure to the top of the style while the curls underneath stay wild and free, creating a beautiful contrast between control and movement. This look photographs beautifully from every angle, which makes it a favourite for special occasions and celebration photos alike. Pair it with soft, glowing makeup and delicate jewellery, and the whole look feels effortlessly elegant from morning until midnight without any fuss.
The secret to a soft halo is braiding loosely and tugging each loop outward once the pins are in place. Tight braids can look severe against bouncy curls, so keep your tension relaxed and let a few wisps escape naturally. If your curls are shorter, use two smaller braids instead of one thick one for the same dreamy effect. Finish with a flexible spray so the style moves with you all evening. A flexible spray keeps everything touchable, so the braids move naturally and never feel stiff or overworked during the evening.
High Voluminous Ponytail
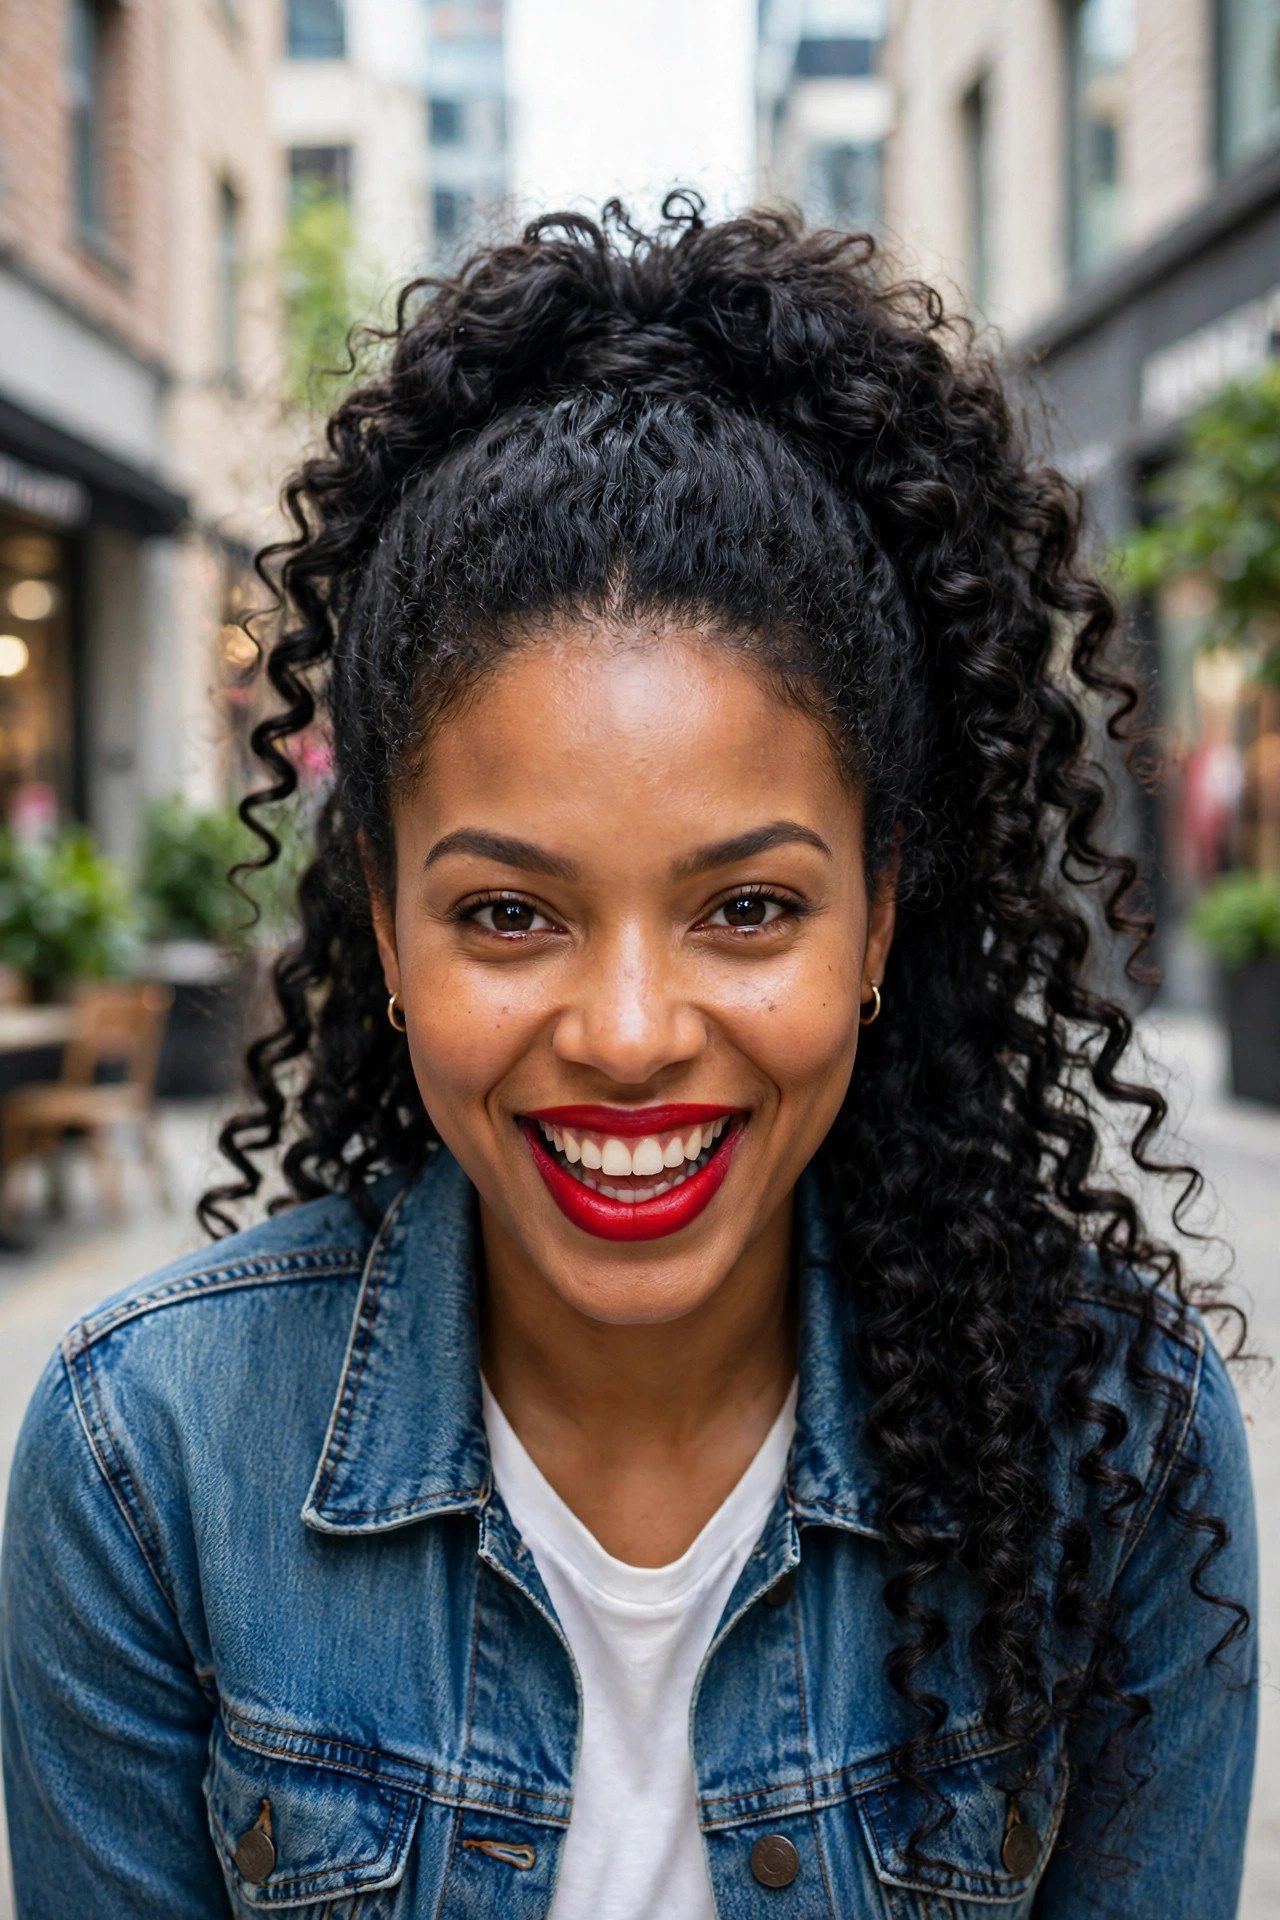
- Gather only the top half of the hair, leaving the rest loose
- Secure the ponytail high on the crown with a strong elastic
- Wrap a small strand around the elastic to hide it neatly
- Fluff the ponytail gently with your fingers for extra volume
A high voluminous ponytail gives instant drama and height, lifting the face while the lower curls flow freely down the back and shoulders. It is a brilliant choice for parties, concerts, and nights out when you want a bold silhouette without committing to a full updo. The contrast between the sleek pulled-back top and the wild, bouncy length underneath creates a look that feels both glamorous and full of personality. It also works brilliantly for dancing, since the pinned top stays secure while the loose curls bounce and move with you.
For the most flattering lift, tilt your head back slightly while gathering the top section, and place the elastic just behind the crown rather than directly on top. Fans of curly hairstyles for women often use a root-lifting spray before styling to keep the ponytail from sinking during the day. If your hair is fine, tease the ponytail base lightly and separate the curls for a fuller, more dramatic shape. Finish with a light mist of flexible spray, and separate a few curls at the ends so the ponytail looks full and lively.
Sleek Side Swept Curls
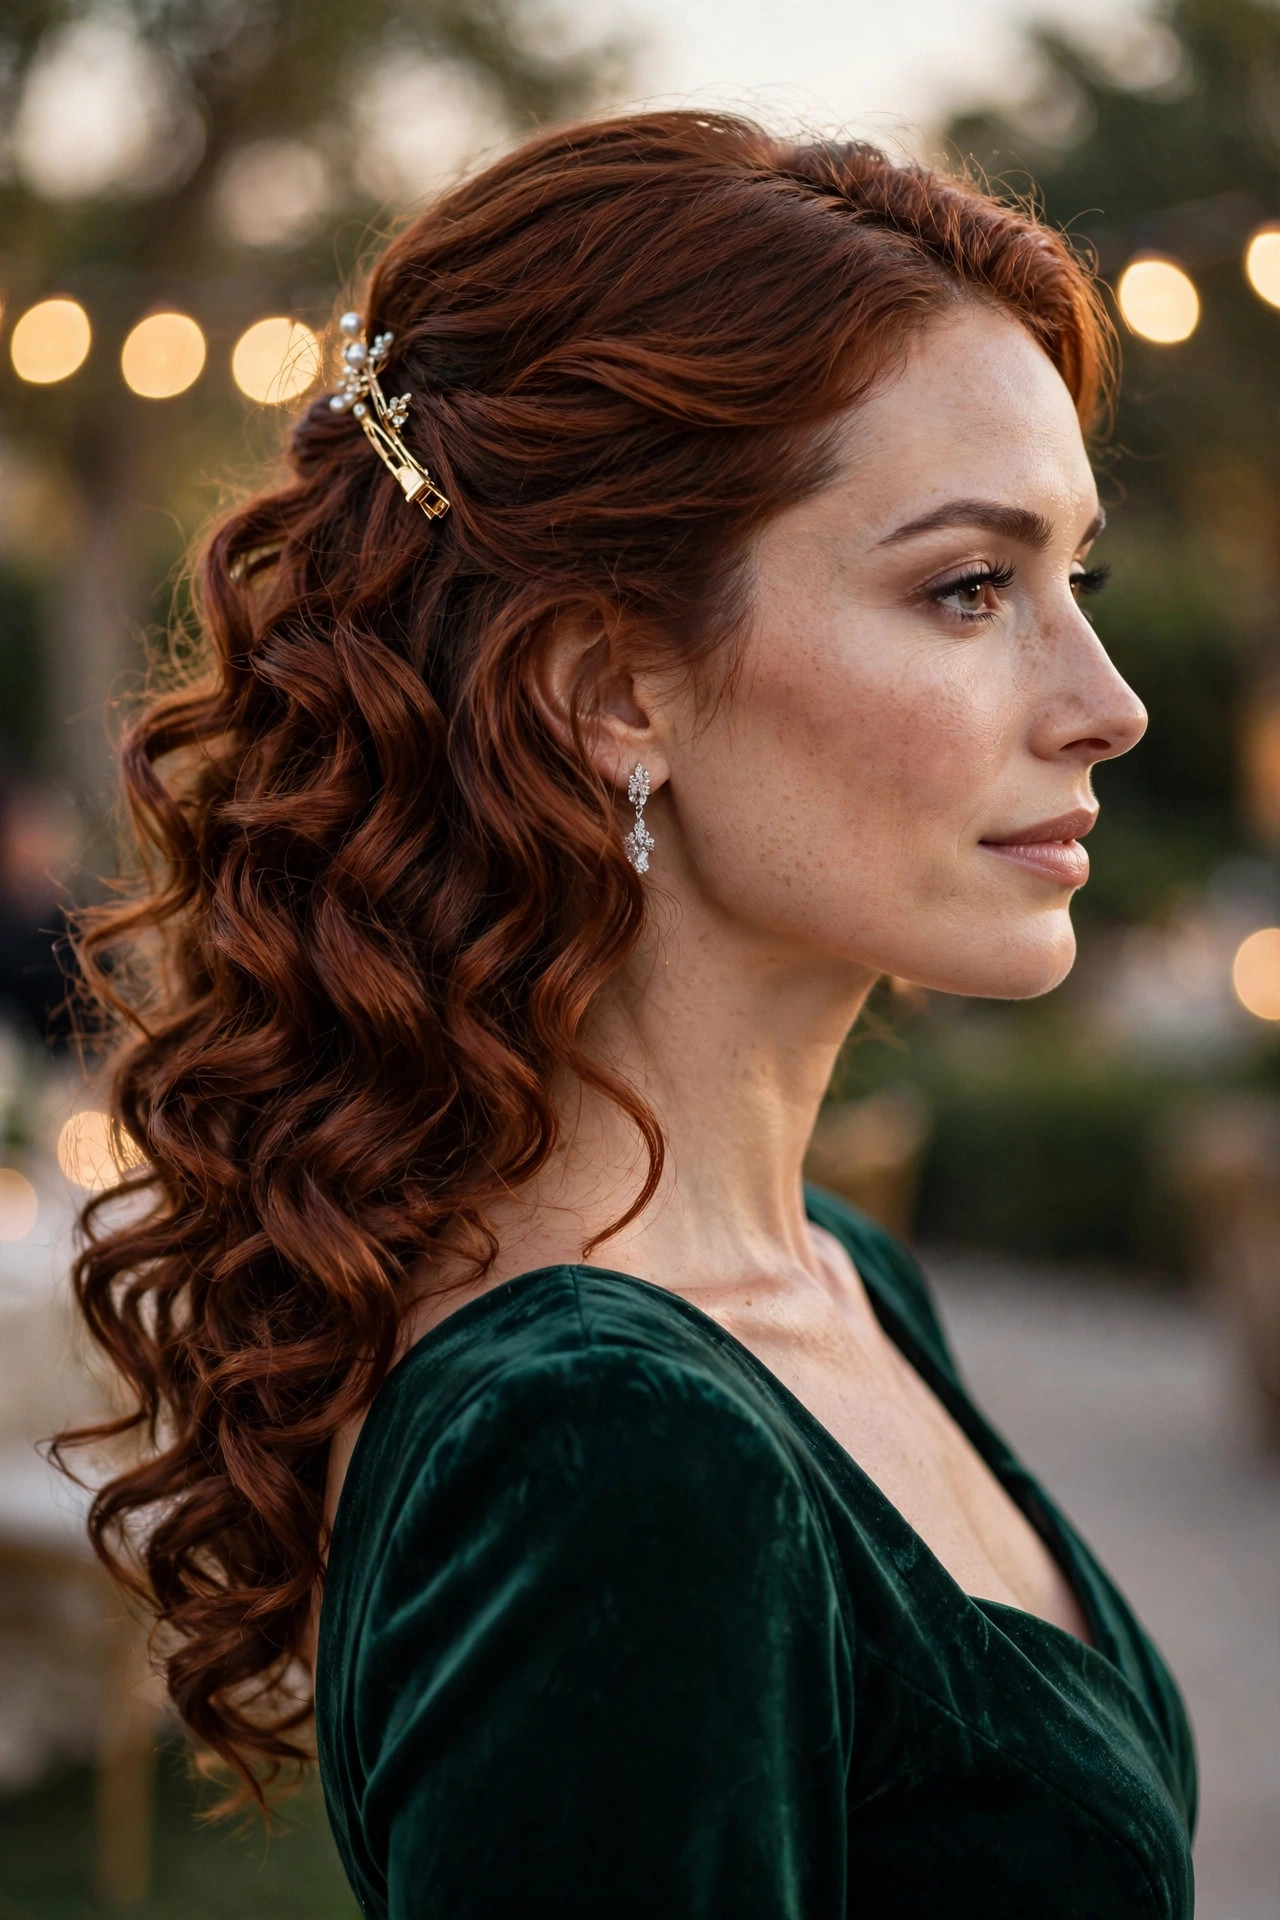
- Create a deep side part while the hair is still damp
- Smooth the smaller side back with gel and pin it flat
- Define the larger side with curl cream and gentle scrunching
- Mist with shine spray for a glossy, red-carpet finish
Sleek side swept curls are pure old-Hollywood glamour, with one smooth, pinned side balancing a waterfall of defined ringlets over the opposite shoulder. This look suits formal events beautifully because it shows off the neckline and earrings while keeping the styling surprisingly simple. The deep side part adds instant sophistication, and the contrast between sleek roots and bouncy ends makes the whole silhouette feel intentional and red-carpet ready. Add a touch of shine serum to the ends, and the ringlets will catch the light beautifully in every photograph you take.
The key to this style is controlling frizz on the pinned side without flattening the curls that fall freely. Use a strong-hold gel on the smaller section only, smoothing it with a fine-tooth comb, and leave the larger side untouched except for curl cream. A light shine spray over the finished look adds polish and helps the style survive humid evenings. This is a wonderful choice for oval and heart-shaped faces. This polished silhouette also suits cocktail parties and dinners, where a refined, grown-up finish always makes a strong impression.
Boho Bubble Braids
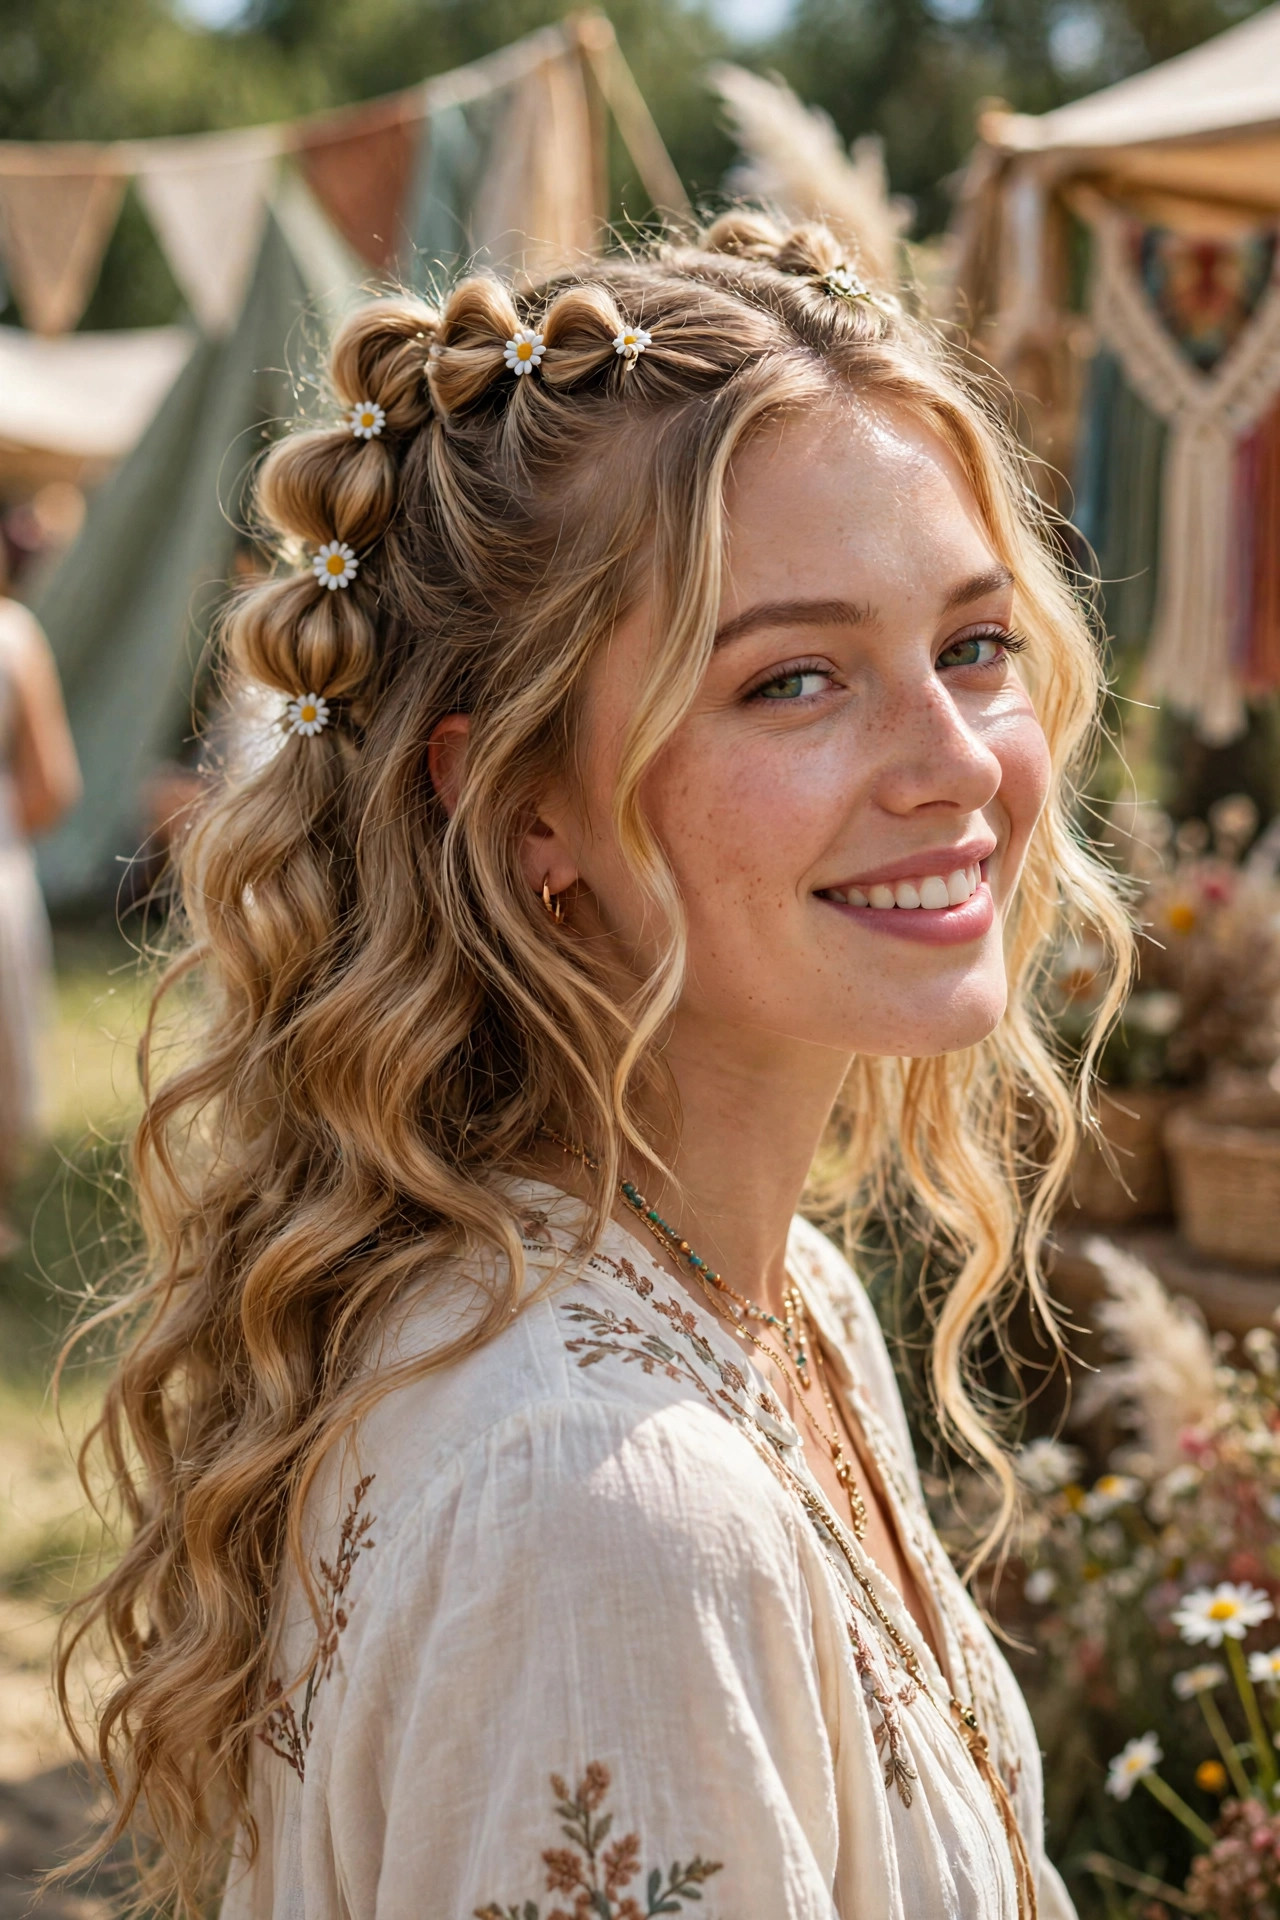
- Divide the top section into two parts and tie them loosely
- Add small elastics every few inches to form soft bubbles
- Gently pull each bubble outward to make it round and full
- Leave the lower curls loose and slightly tousled
Bubble braids bring a playful, festival-ready energy to curly hair, turning the top section into a row of soft, pillowy puffs while the rest of the curls fall freely. The style looks intricate but is genuinely easy, since it only needs small elastics and a little patience. It works beautifully on longer lengths, where the bubbles have room to form, and it keeps hair neatly away from the face during long, warm days outdoors. It is also wonderfully comfortable, since nothing pulls tightly at the hairline during long, warm days outside.
To make the bubbles look full rather than flat, pull each section outward gently after tying it, working from the bottom upward for even volume. A texturising spray on the top section gives the elastics something to grip, which stops them sliding down by afternoon. If your curls are fine, backcomb each bubble lightly before shaping it. This carefree look pairs perfectly with denim, linen, and summer dresses. For extra staying power, mist each bubble lightly before shaping it, and carry two spare elastics in your bag just in case.
Vintage Bouffant Glamour
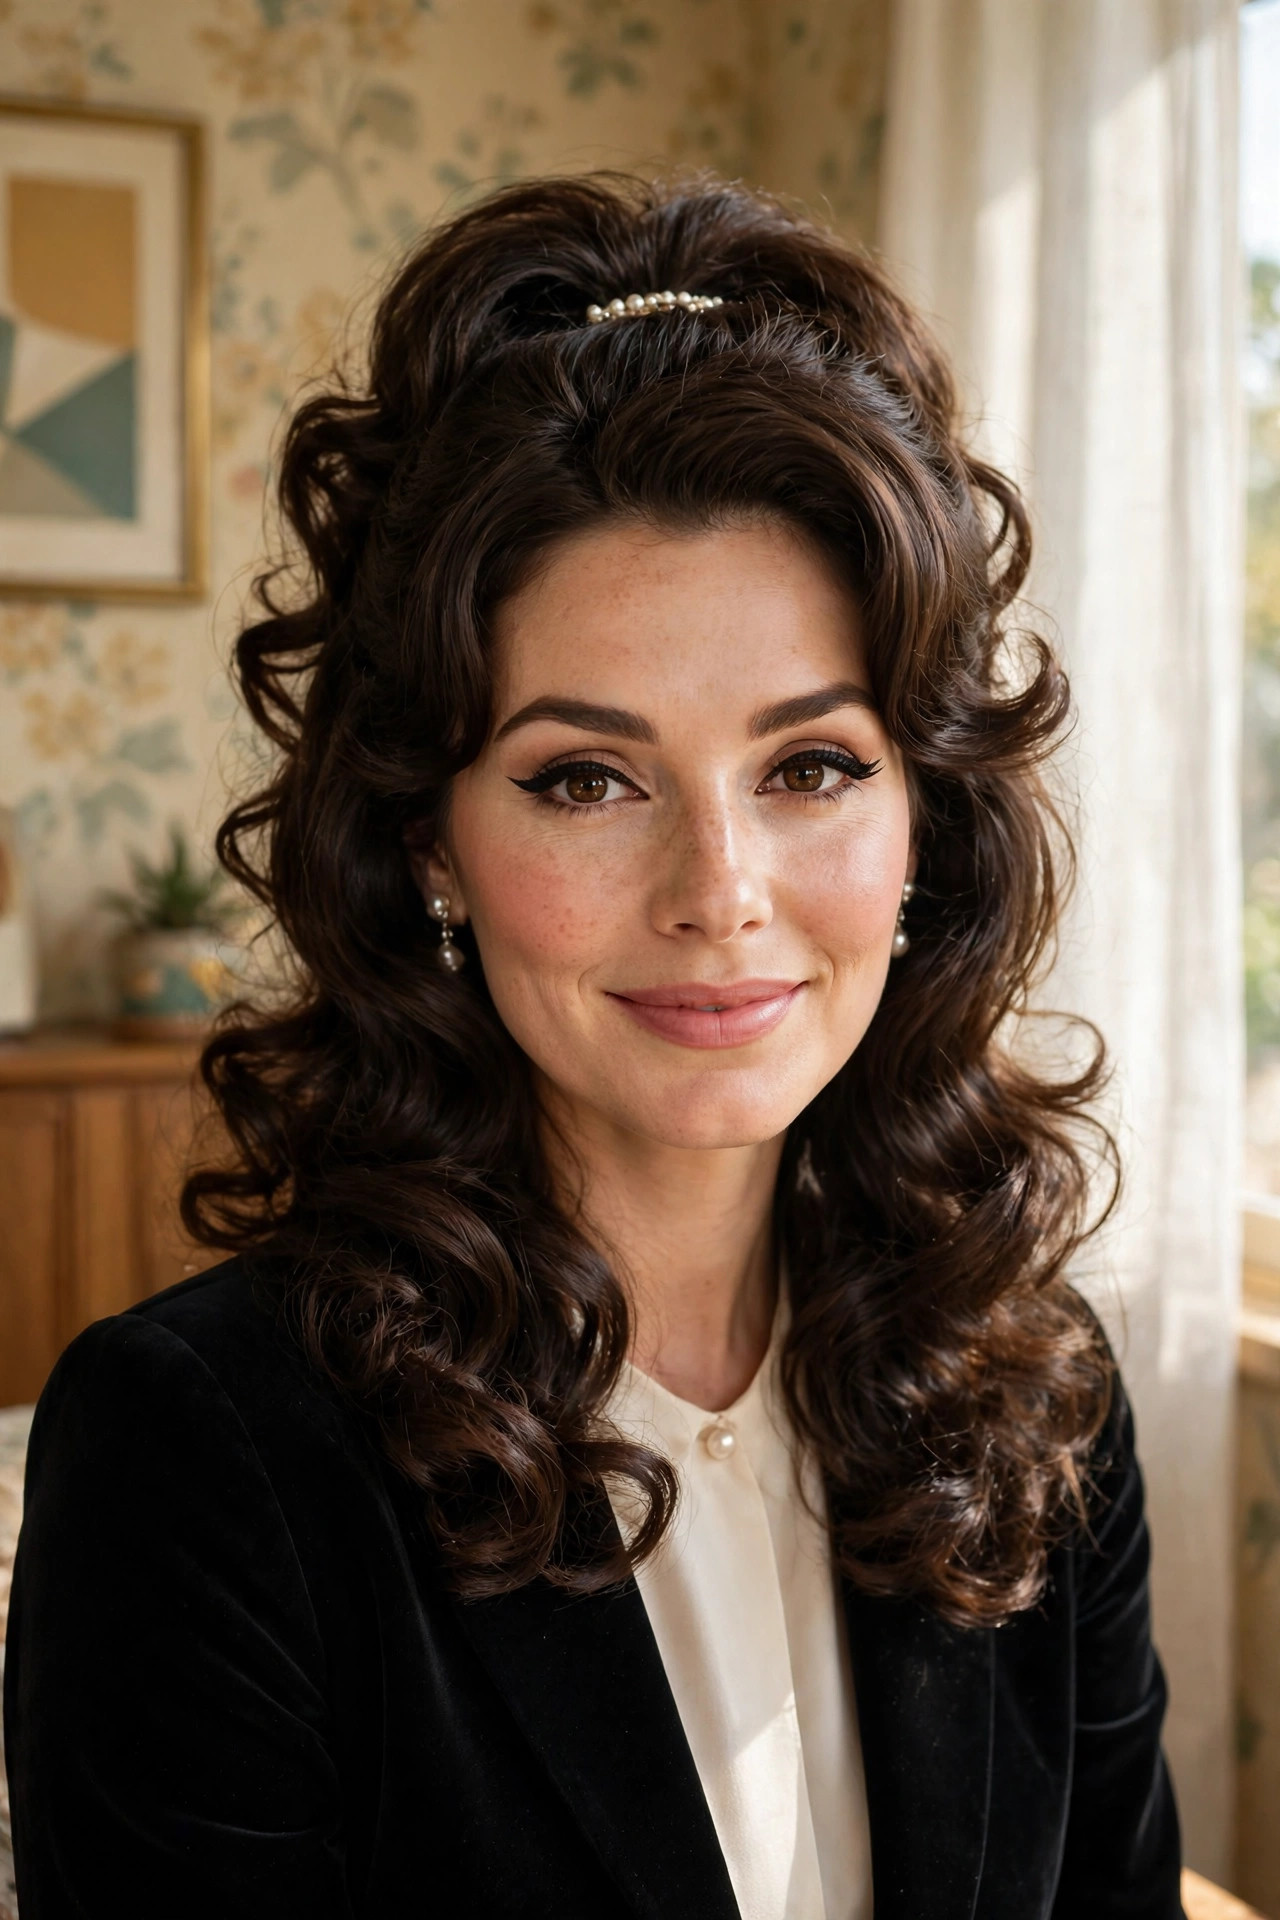
- Tease the crown section gently with a fine-tooth comb
- Smooth the top layer over the teased hair for a clean finish
- Pin the bouffant at the back, leaving curls loose below
- Set everything with a medium-hold hairspray for lasting height
Vintage bouffant glamour channels the elegance of a bygone era, with a softly teased crown giving height and drama above flowing curls. It is a stunning choice for formal dinners, galas, and retro-themed parties, where a little extra polish goes a long way. The bouffant flatters round and square faces especially well, since the height at the crown lengthens the silhouette and draws the eye upward in the most flattering way. It also pairs beautifully with vintage dresses and classic jewellery, completing a timeless look that never feels dated or costume-like.
The trick to a modern bouffant is keeping the teasing hidden beneath a smooth outer layer, so the volume looks natural rather than stiff or dated. Work in small sections, tease only the underneath layers, and smooth the surface gently with a soft brush. A light mist of flexible spray keeps the height in place without making the hair crunchy. Add pearl earrings and a classic red lip for the full vintage effect. Take care to smooth only the surface layer, leaving the teased underneath untouched so the height stays soft and natural-looking.
Pearl Claw Clip
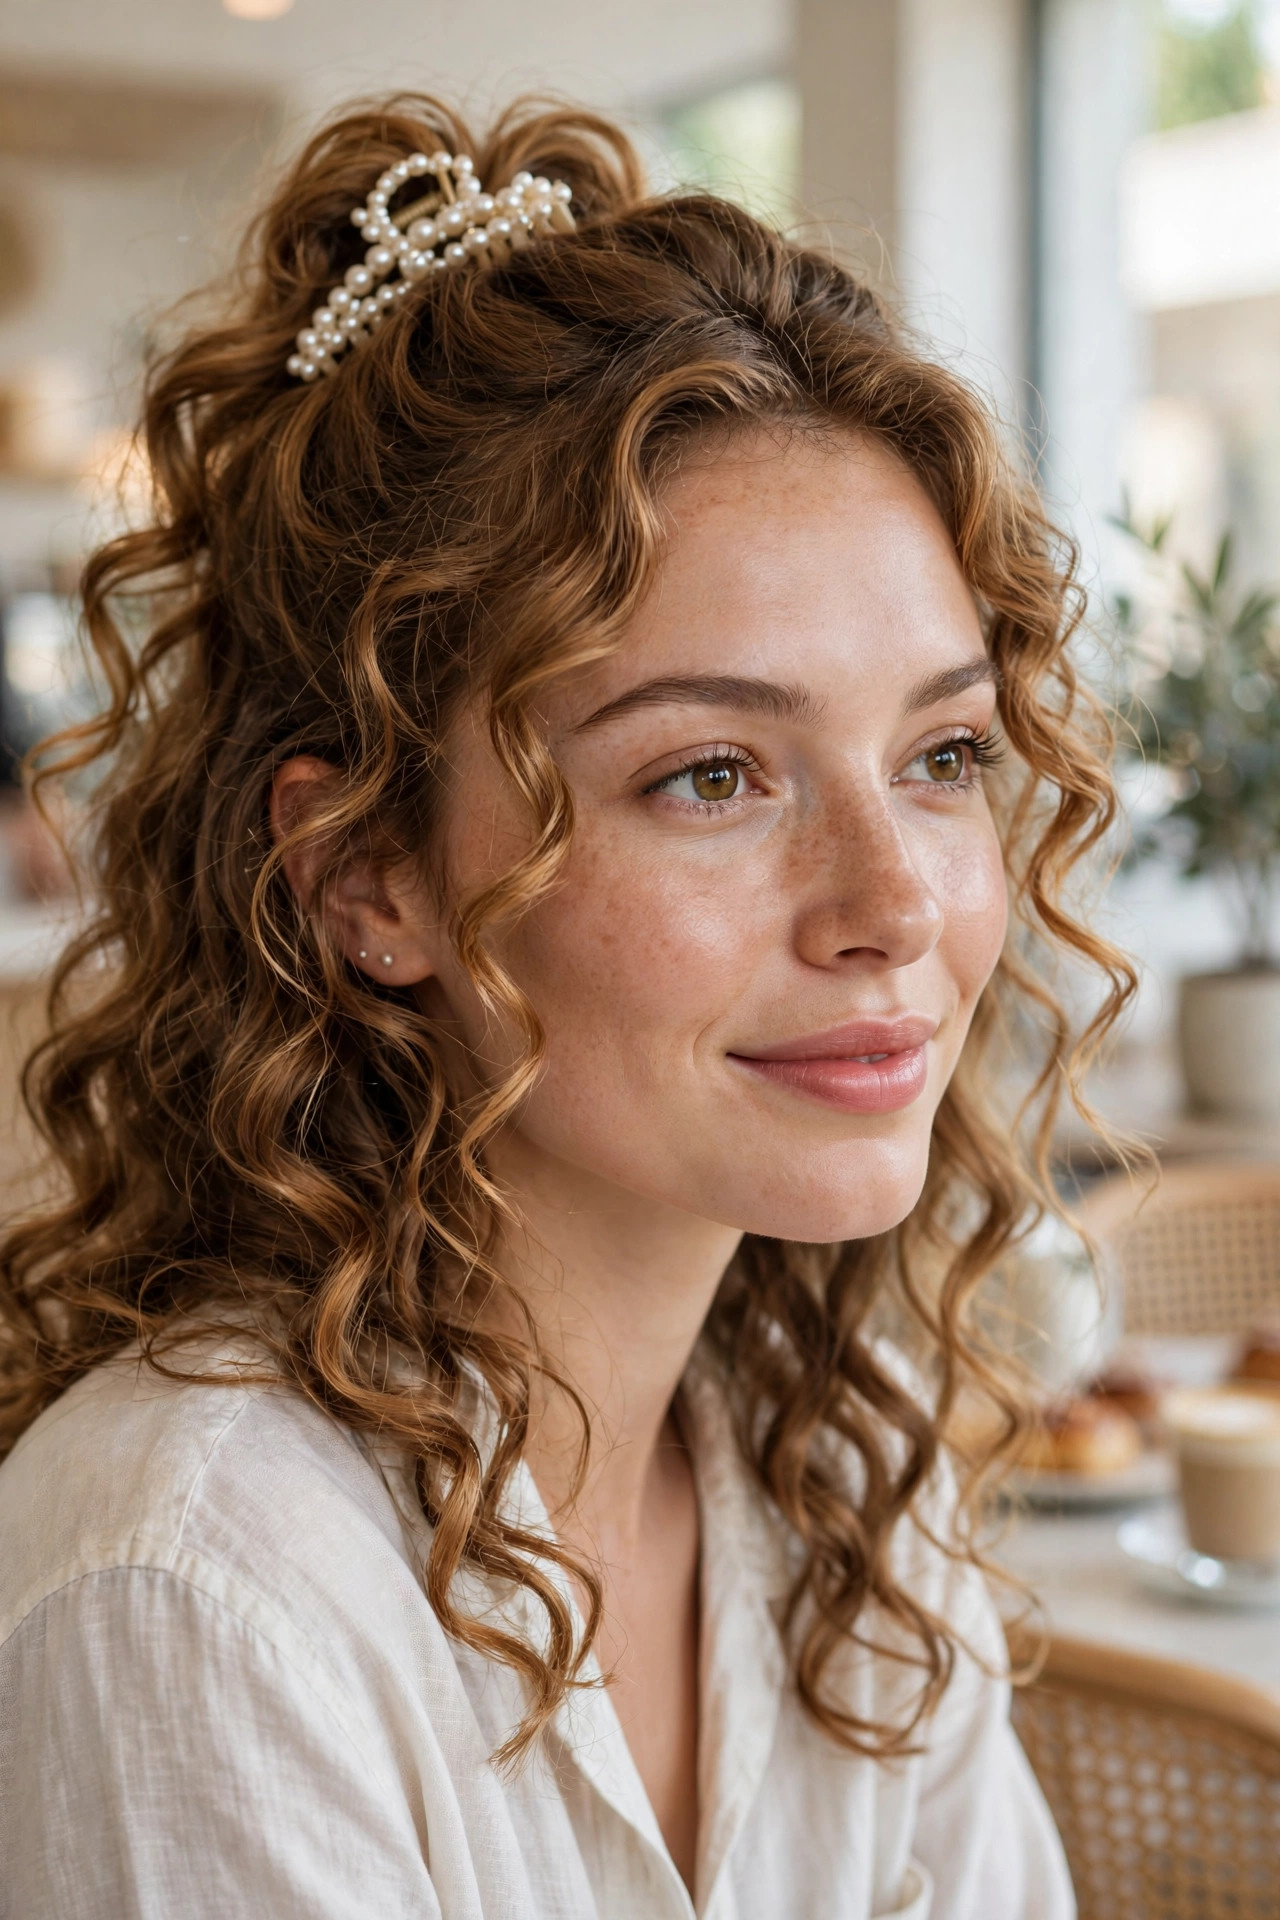
- Gather the top section loosely and twist it once
- Secure the twist with a decorative pearl claw clip
- Pull out a few face-framing curls for softness
- Fluff the lower curls with your fingers for movement
A pearl claw clip is the fastest route to looking polished, turning an ordinary half-up look into something quietly luxurious in under a minute. The pearls catch the light beautifully against dark or golden curls, and the clip holds the top section securely without denting the curl pattern. It is perfect for office days, brunches, and video calls, when you want to look intentional without spending twenty minutes in front of the mirror. It also works beautifully on second-day curls, giving them a fresh, intentional shape with almost no effort at all.
Choose a clip size that matches your hair thickness, since a small clip will slip on thick curls and a large one can overwhelm fine hair. Twist the top section only once before clipping, so the style keeps a relaxed, undone feeling rather than looking overly tight. If your curls tend to escape, add two hidden pins behind the clip for extra security. This is one of the easiest styles to refresh between meetings. Keep a spare clip in your bag, since swapping a tired clip for a fresh one instantly revives the whole look.
Golden Twisted Crown
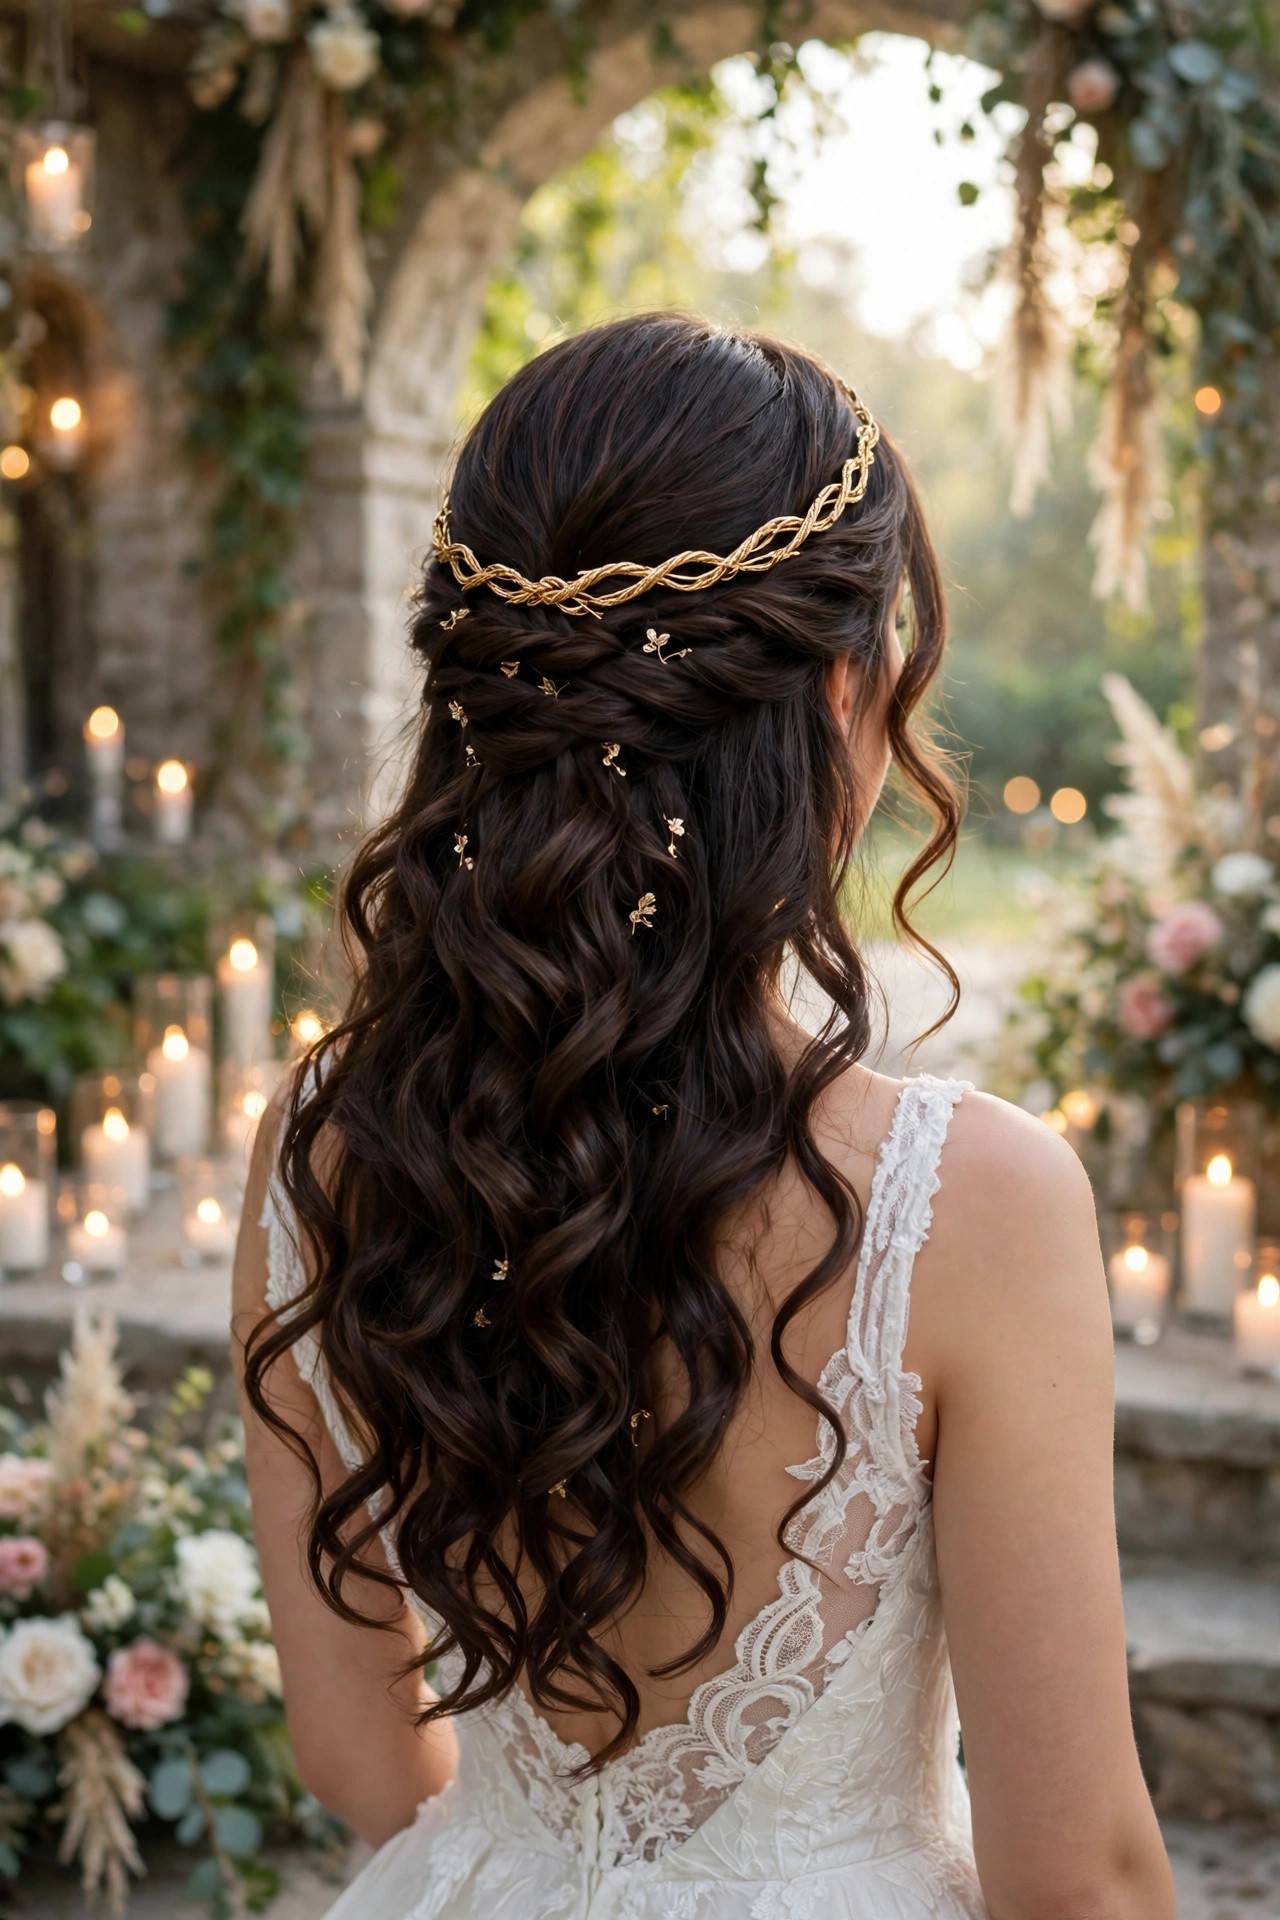
- Twist two front sections back and cross them at the crown
- Weave small gold pins along the twists for sparkle
- Leave the lower curls long, loose, and well defined
- Finish with a light shine mist for a luminous glow
A golden twisted crown feels made for celebrations, with shimmering pins woven through soft twists above a cascade of glossy curls. The gold catches candlelight and camera flashes beautifully, which makes this style a favourite for weddings, engagements, and milestone birthdays. It flatters warm skin tones especially well, and the twists add just enough structure to keep the look elegant from the first photo to the last dance. It also photographs gorgeously in low light, where the gold accents glow warmly against dark, glossy curls all evening long without fading.
To keep the gold accents looking refined rather than busy, use three to five pins at most and space them evenly along the twists. Start with well-moisturised curls so the twists sit smoothly, and secure each twist with a pin that matches your hair colour before adding the decorative ones. A flexible-hold spray protects the style through long celebrations without making the curls stiff or crunchy to touch. Choose pins that match your jewellery tone, so the gold reads as one cohesive detail rather than a collection of separate sparkles.
Soft Face Framing Tendrils
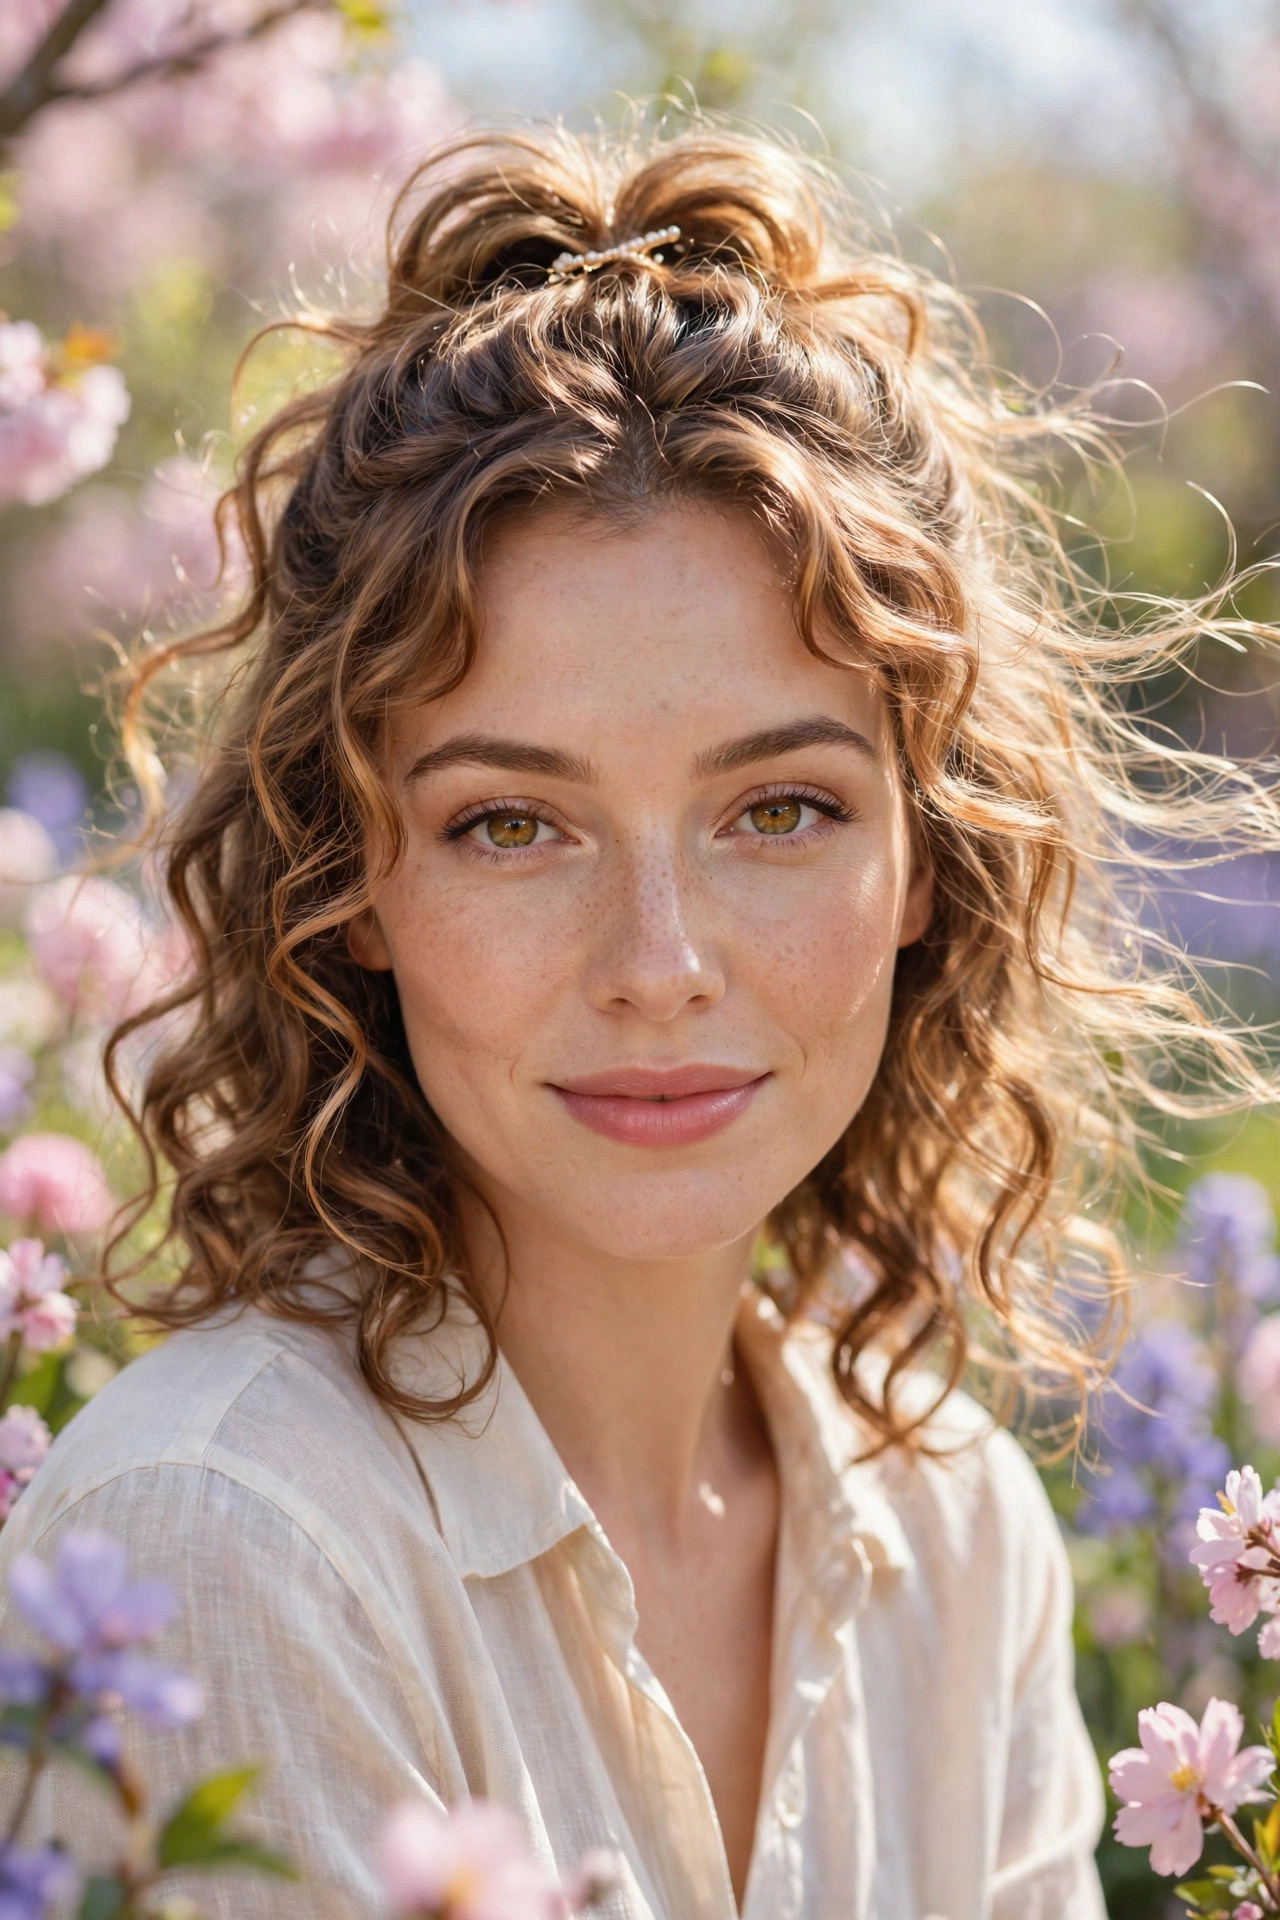
- Pin the top section back loosely with small pins
- Release two thin tendrils on each side of the face
- Curl the tendrils lightly with a small barrel iron
- Set the tendrils with a tiny amount of styling cream
Soft face-framing tendrils are the secret ingredient that turns a simple pinned-back style into something gentle and romantic. The loose pieces soften strong jawlines, balance wider foreheads, and draw attention to the eyes and cheekbones without any complicated technique. This detail works on every curl type, from loose waves to tight coils, and it is especially flattering in photographs, where the tendrils add movement and softness around the face. They also soften photographs beautifully, adding gentle movement around the face that makes every snapshot feel warmer and more romantic instantly.
The key is restraint, since too many loose pieces can quickly look messy rather than romantic. Release just two thin sections on each side, and keep them shorter than chin length so they frame rather than cover the face. A tiny amount of cream on the tendrils stops them frizzing in humidity. If your hair is very curly, stretch the tendrils gently while drying so they fall gracefully instead of springing upward. If a tendril springs up stubbornly, wrap it briefly around your finger with a little cream until it settles into place.
Messy Top Knot
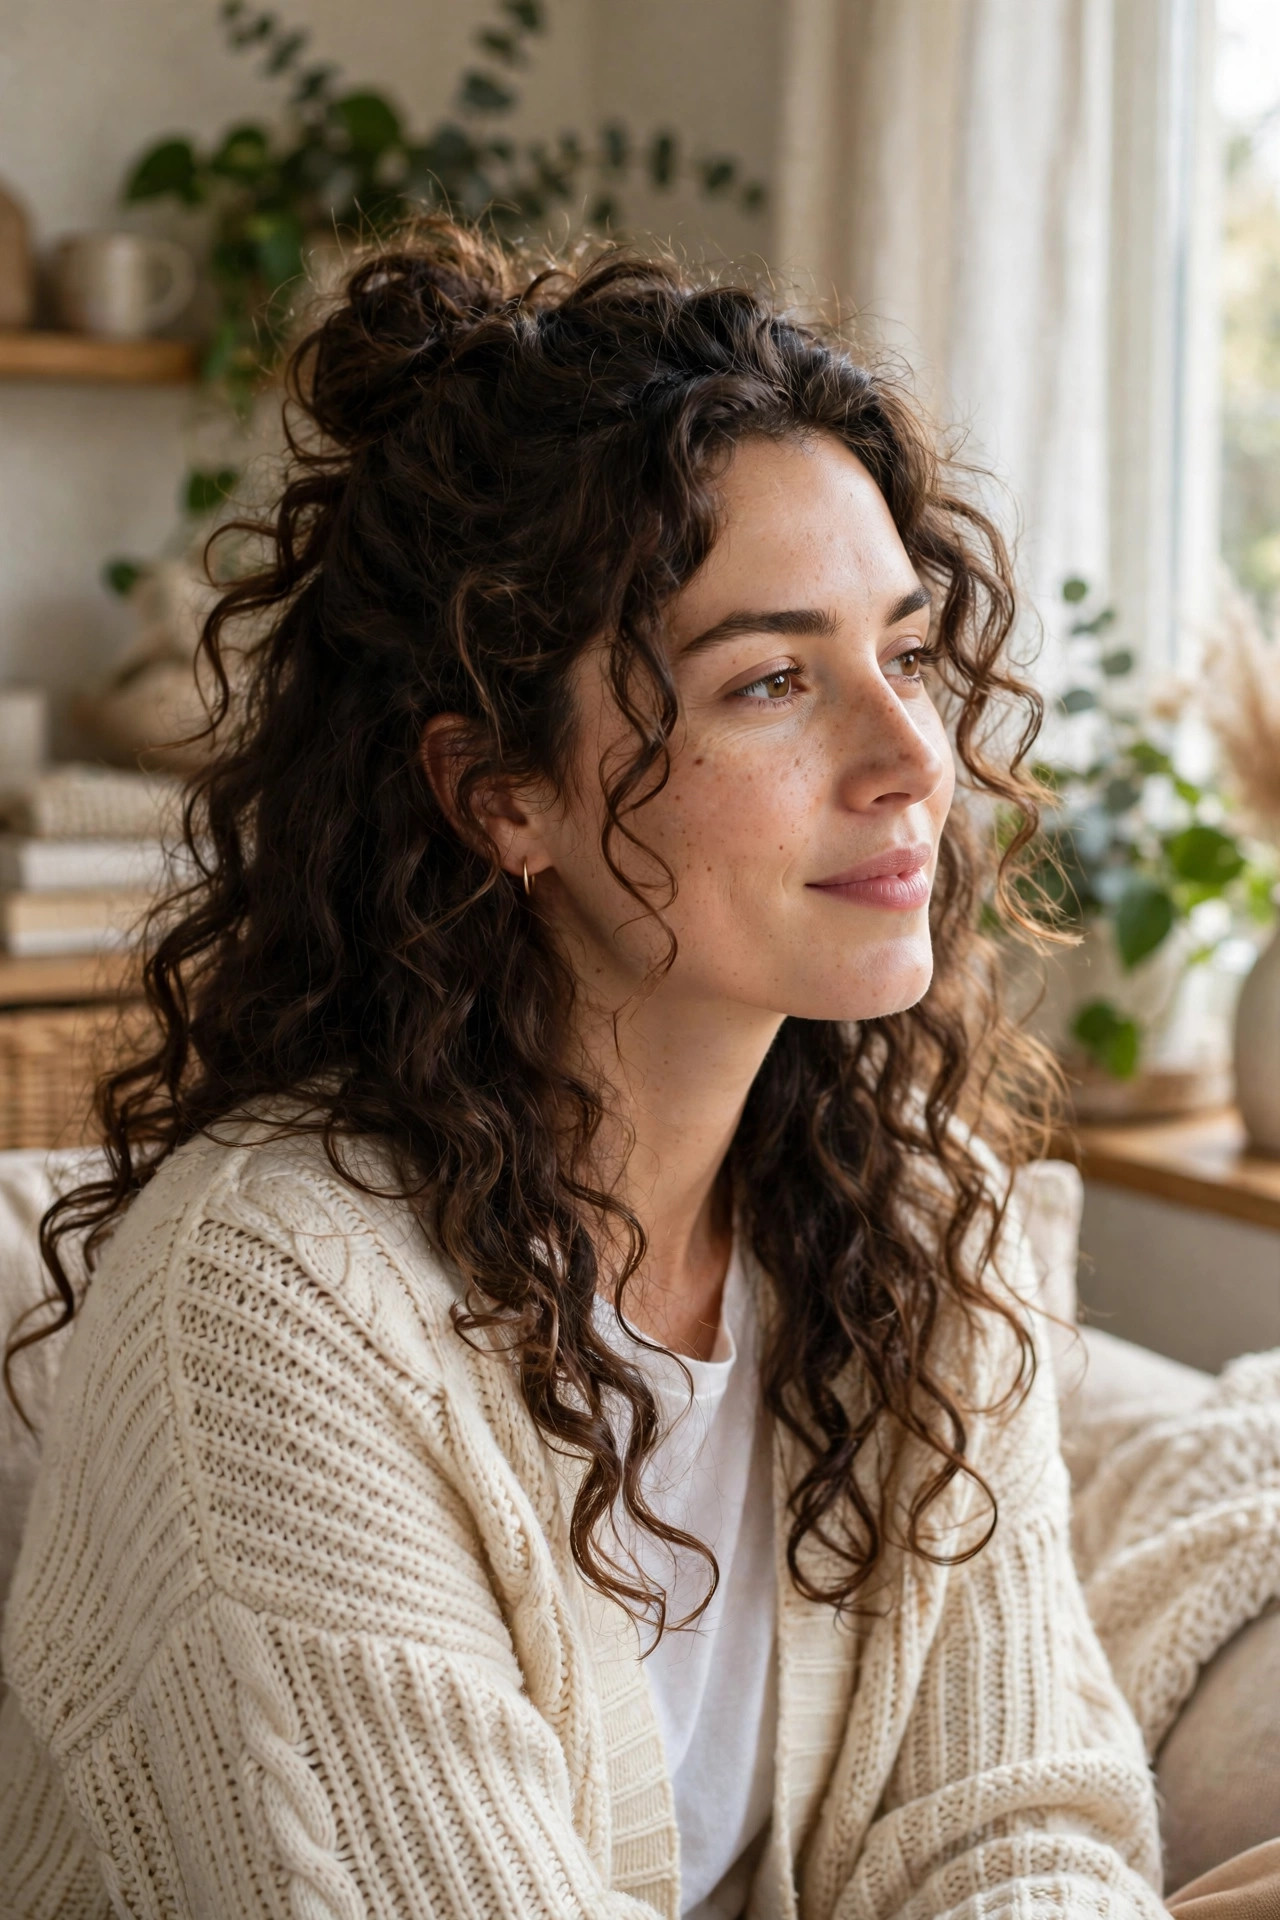
- Gather the top section high on the crown
- Twist it loosely into a small knot and pin it
- Pull a few curls out of the knot for texture
- Leave the bottom curls loose and slightly tousled
The messy top knot is the ultimate off-duty style, giving you the comfort of hair pulled back with the beauty of curls left flowing underneath. It takes barely five minutes, hides a multitude of bad hair days, and still looks deliberately stylish rather than rushed. The knot adds height and personality at the crown, while the loose length keeps the look feminine and soft, making it ideal for weekends, errands, and relaxed gatherings. It also hides unwashed roots cleverly, since the knot draws the eye upward while the loose curls distract from the crown.
To avoid a knot that looks too neat or too chaotic, twist the top section loosely and secure it with pins rather than pulling it tight with an elastic. Pulling a few curls free around the knot creates that effortless, lived-in texture everyone loves. If your hair is heavy, use two pins crossed in an X shape for a grip that lasts all day. This style also works beautifully as a quick gym-to-brunch transition. For a dressier version, smooth the knot slightly and add a decorative pin, turning a casual style into something party-ready.
Fishtail Braid Accent
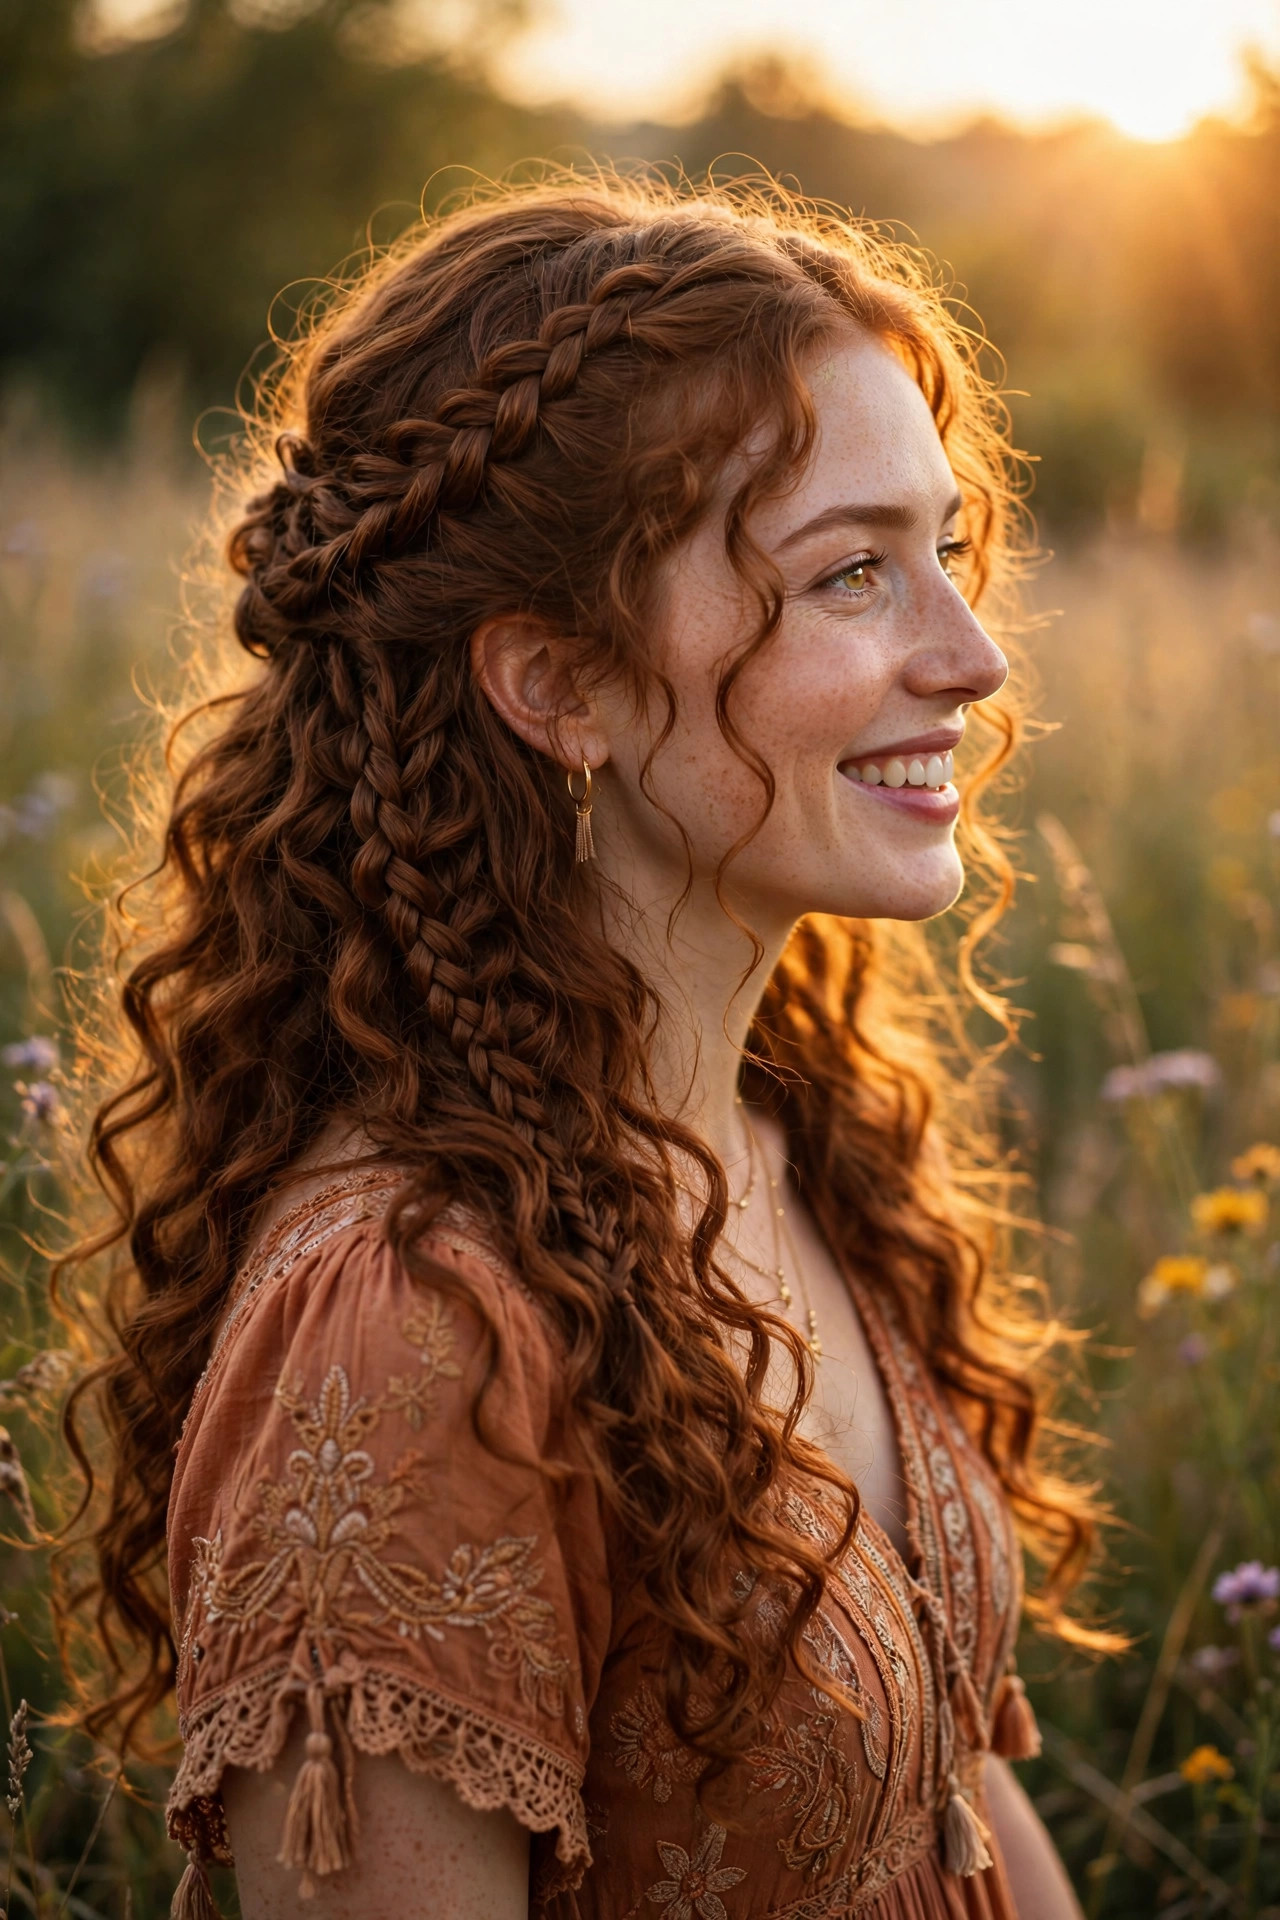
- Braid a small fishtail section from one temple backward
- Secure the braid end with a clear elastic and pin it
- Gently loosen the fishtail loops for a fuller look
- Let the remaining curls fall freely over the shoulders
A fishtail braid accent adds intricate detail without overwhelming your natural curls, weaving a delicate pattern along one side before disappearing into the loose length. It looks far more complicated than it actually is, which makes it a wonderful conversation starter at parties and weddings. The fishtail texture contrasts beautifully with soft curls, giving the style a handcrafted, bohemian feeling that photographs exceptionally well from the side. It also adds beautiful texture contrast, since the neat, woven braid sits gracefully against soft, unstructured curls falling freely below in every direction.
If fishtails feel tricky at first, practise on a small section before styling day, since the two-strand technique becomes intuitive after a few tries. Keep the braid slightly loose so it sits comfortably against the curls, and pancake the loops gently for width. A clear elastic and one hidden pin keep the accent secure without distracting from the braid itself. This detail also works beautifully paired with a second small braid. Practise the fishtail twice on damp hair, and the rhythm quickly becomes second nature even for complete beginners at home.
Floral Bridal Crown
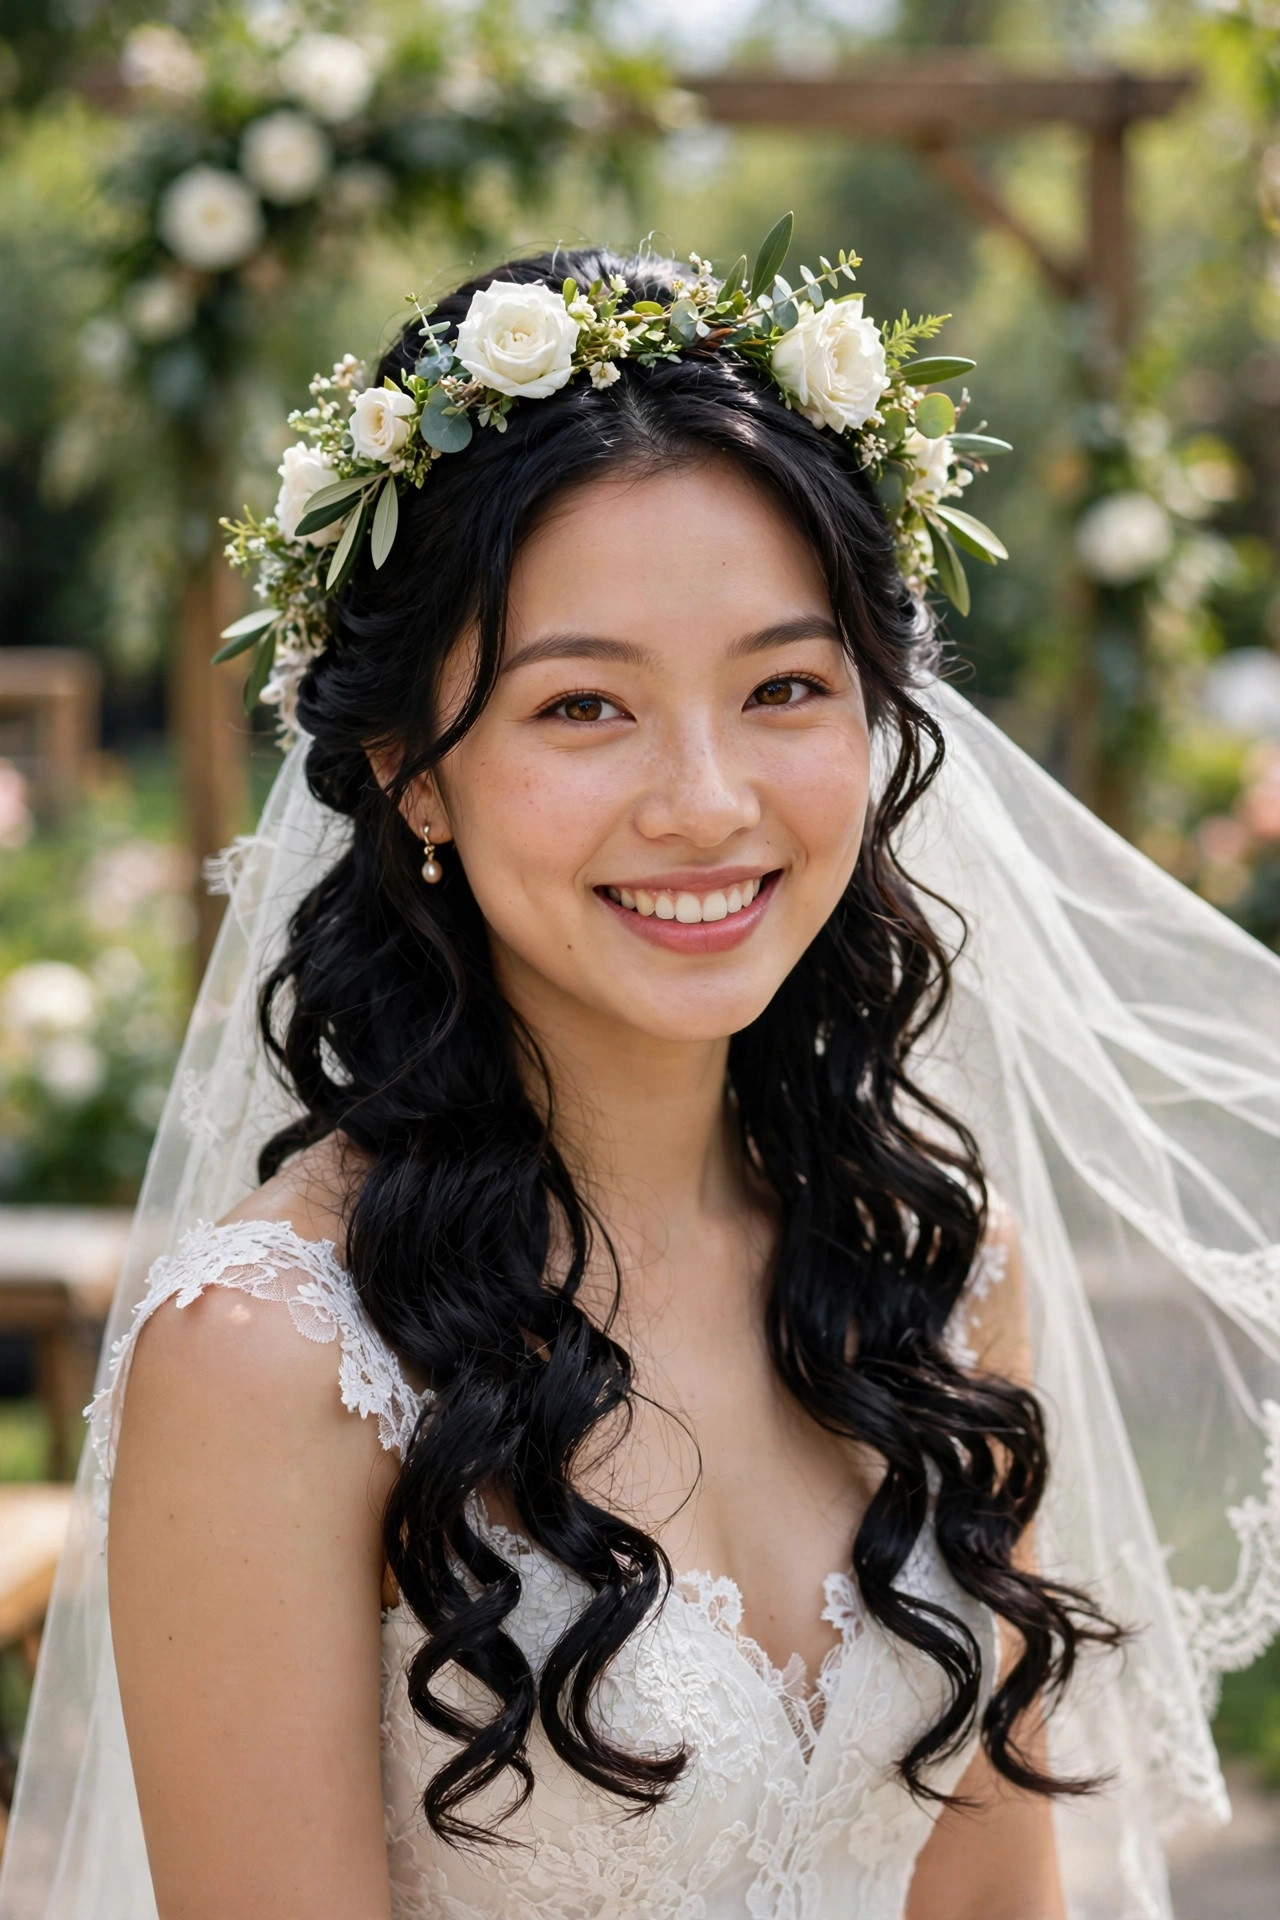
- Pin the top section back softly, keeping volume at the crown
- Place the floral crown just behind the hairline
- Secure the crown with pins hidden beneath the flowers
- Leave the curls long, glossy, and gently defined
A floral bridal crown transforms a half-up style into a fairytale, with fresh blooms resting above soft, flowing curls for a look that feels both timeless and joyful. Brides love this style because it keeps hair away from the face during the ceremony while still showing off length and texture in photographs. Choose flowers that match your bouquet for a cohesive look, and ask your florist for lightweight blooms that will not weigh the crown down. Ask your florist about seasonal blooms, since in-season flowers look fresher and usually cost considerably less than imported varieties.
Fresh flowers last longest when the crown is assembled on the morning of the wedding and kept cool until the ceremony begins. Pin the crown through the stems rather than the petals, using pins that slide into the pinned top section for a secure anchor. If you prefer a longer-lasting option, high-quality silk flowers look remarkably realistic and survive dancing, humidity, and happy tears without wilting at all. Silk flowers also photograph beautifully, and guests rarely notice the difference once the crown is nestled among real curls and soft lighting.
Swoop Bangs Glam
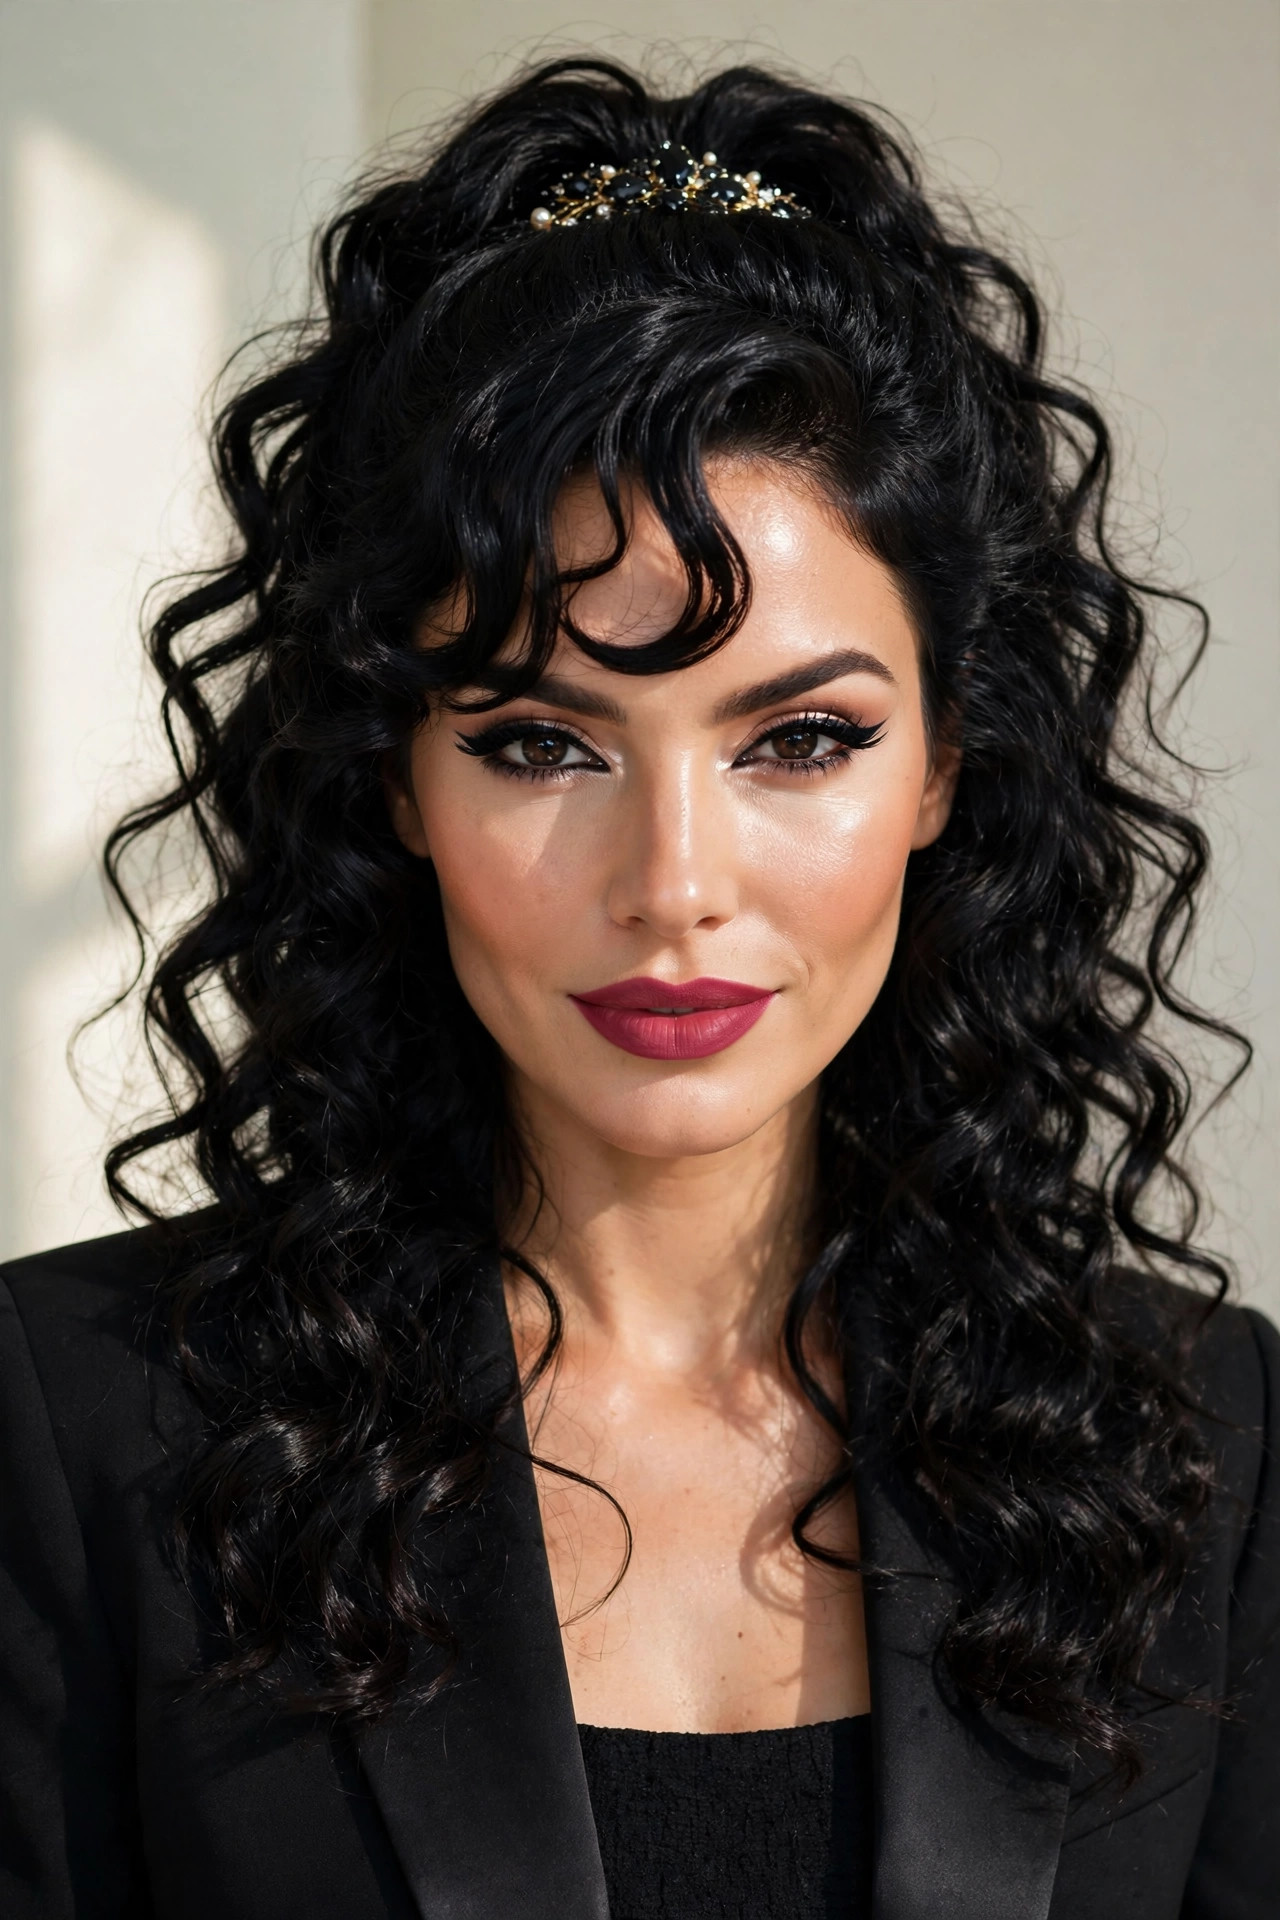
- Smooth the front section into a deep side swoop
- Pin the swoop at the temple with flat pins
- Gather the top section back and secure it neatly
- Define the lower curls with cream for bounce
Swoop bangs glam brings drama to the forehead, with a sweeping fringe that frames the eyes while the pinned top keeps everything polished and secure. This look suits women who love a bold, confident silhouette and want their hairstyle to make a statement before they even speak. The swoop softens a high forehead, adds vintage-inspired charm, and pairs beautifully with winged eyeliner and a strong lip colour for evening events. It also pairs perfectly with statement earrings, since the swept fringe leaves one side of the face beautifully open and visible.
The swoop holds best when the front section is blow-dried smoothly with a round brush before pinning, since curly texture can spring back against the sweep. Use flat pins placed horizontally at the temple, and hide them beneath a curl for a seamless finish. A light mist of strong-hold spray over the swoop only keeps it in place without stiffening the rest of the hair. Practise the angle once or twice to find your most flattering sweep. Check the swoop from both sides in a mirror, adjusting the angle until it frames your eyes most flatteringly.
Double Dutch Braids
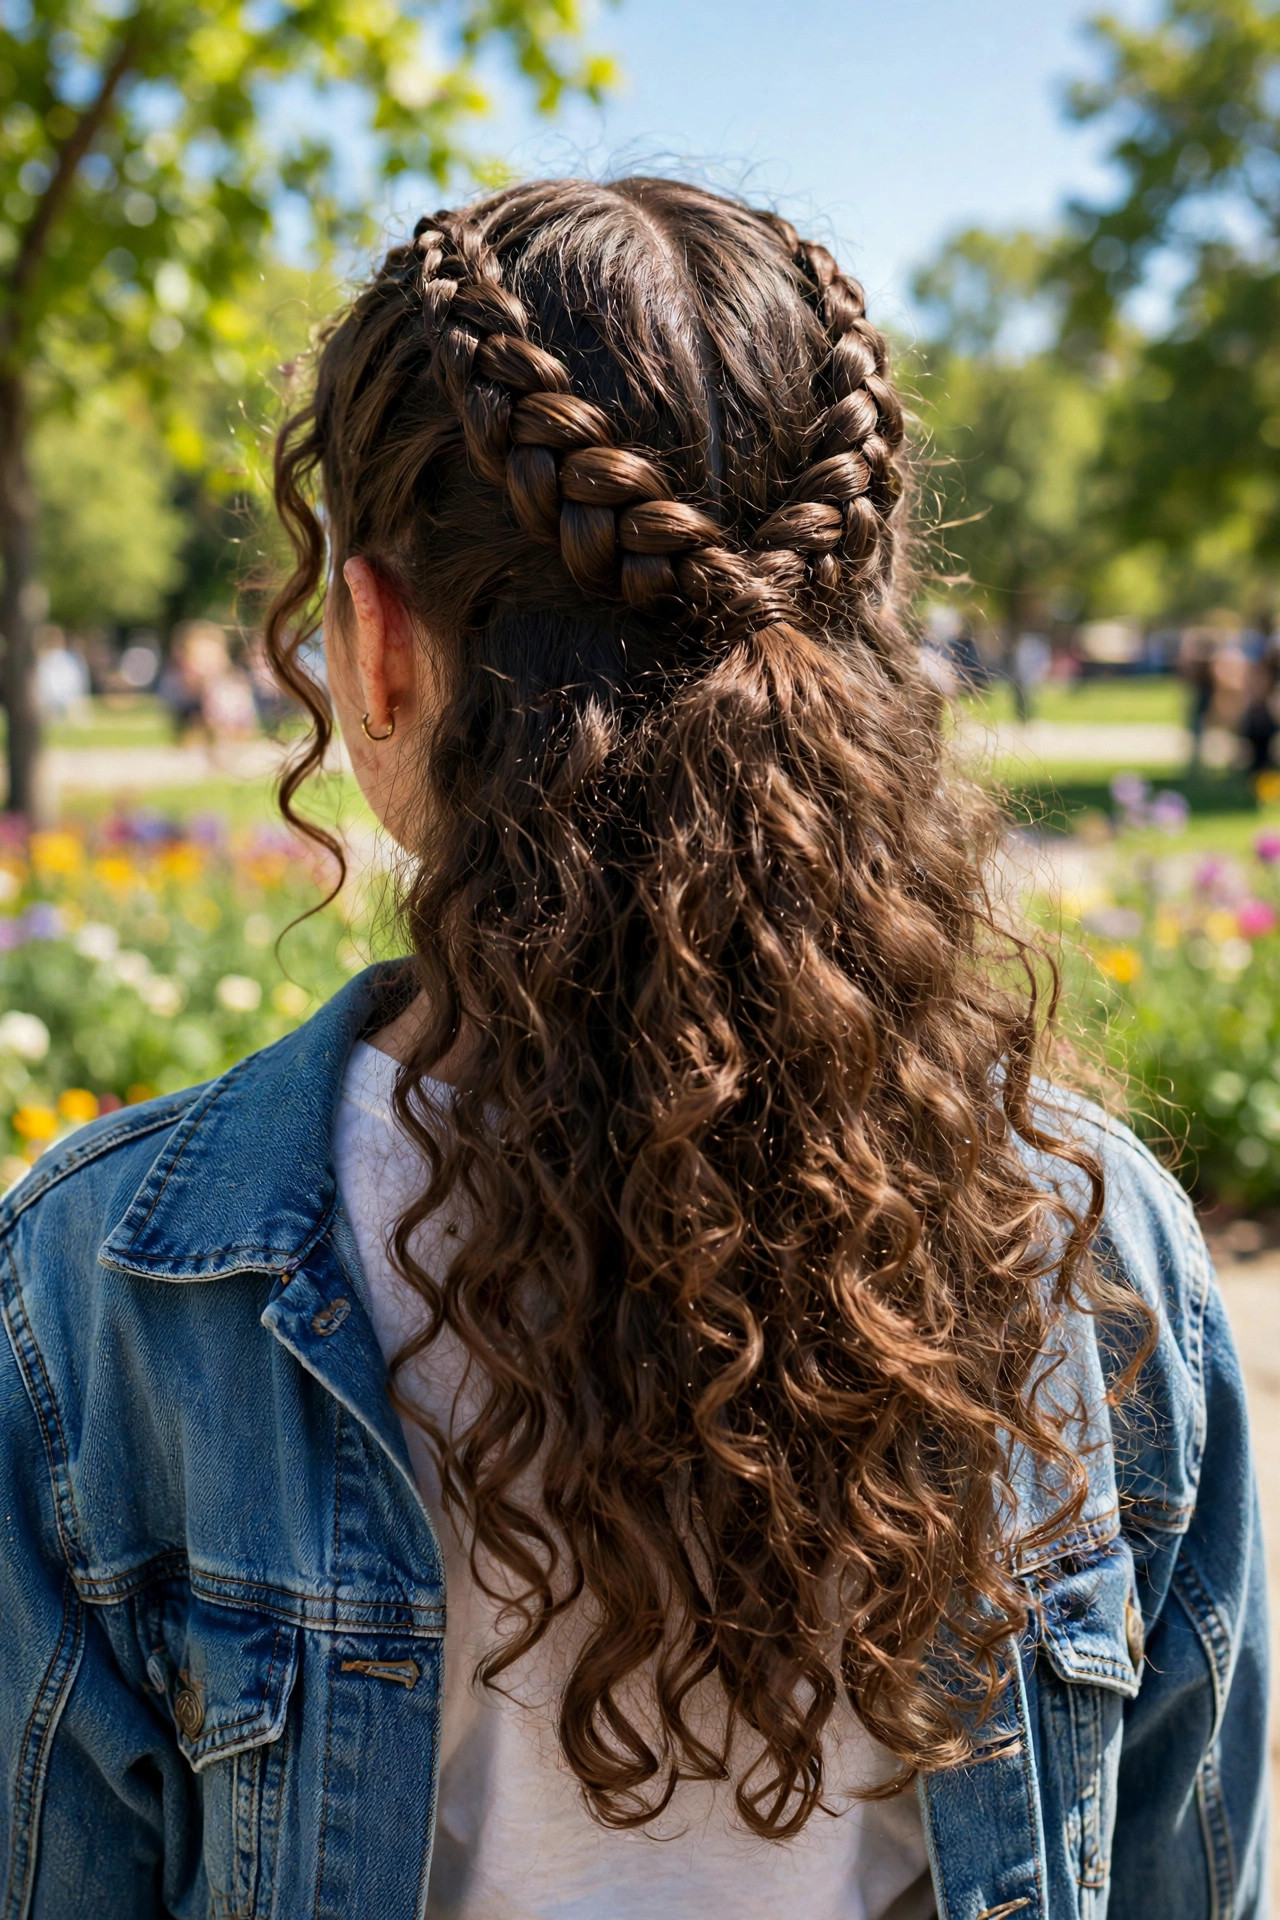
- Part the top section down the middle evenly
- Dutch braid each side from the hairline backward
- Secure both braids where they meet at the back
- Release the lower curls and fluff them gently
Double Dutch braids give a sporty, youthful twist to the half-up silhouette, with raised braids running neatly back from the hairline before melting into free-flowing curls. The style stays secure through dancing, workouts, and long festival days, which makes it as practical as it is pretty. It also looks fantastic on thick hair, where the braids have real presence, and it keeps the front completely tidy without sacrificing any of the curl volume below. It also keeps every strand neatly controlled, which makes it a smart choice for active days and outdoor celebrations alike.
For braids that stay put, start with slightly damp hair and a little styling cream for grip, since freshly washed curls can be slippery. Fans of braided hairstyles for curly hair know that keeping even tension matters more than speed, so braid slowly and check your part in a mirror. If the braids feel tight, loosen the loops gently once they are pinned. This look also works wonderfully on kids and teens. Work slowly through each braid, and the finished result will look neat, even, and professionally done from every angle.
Low Twisted Bun
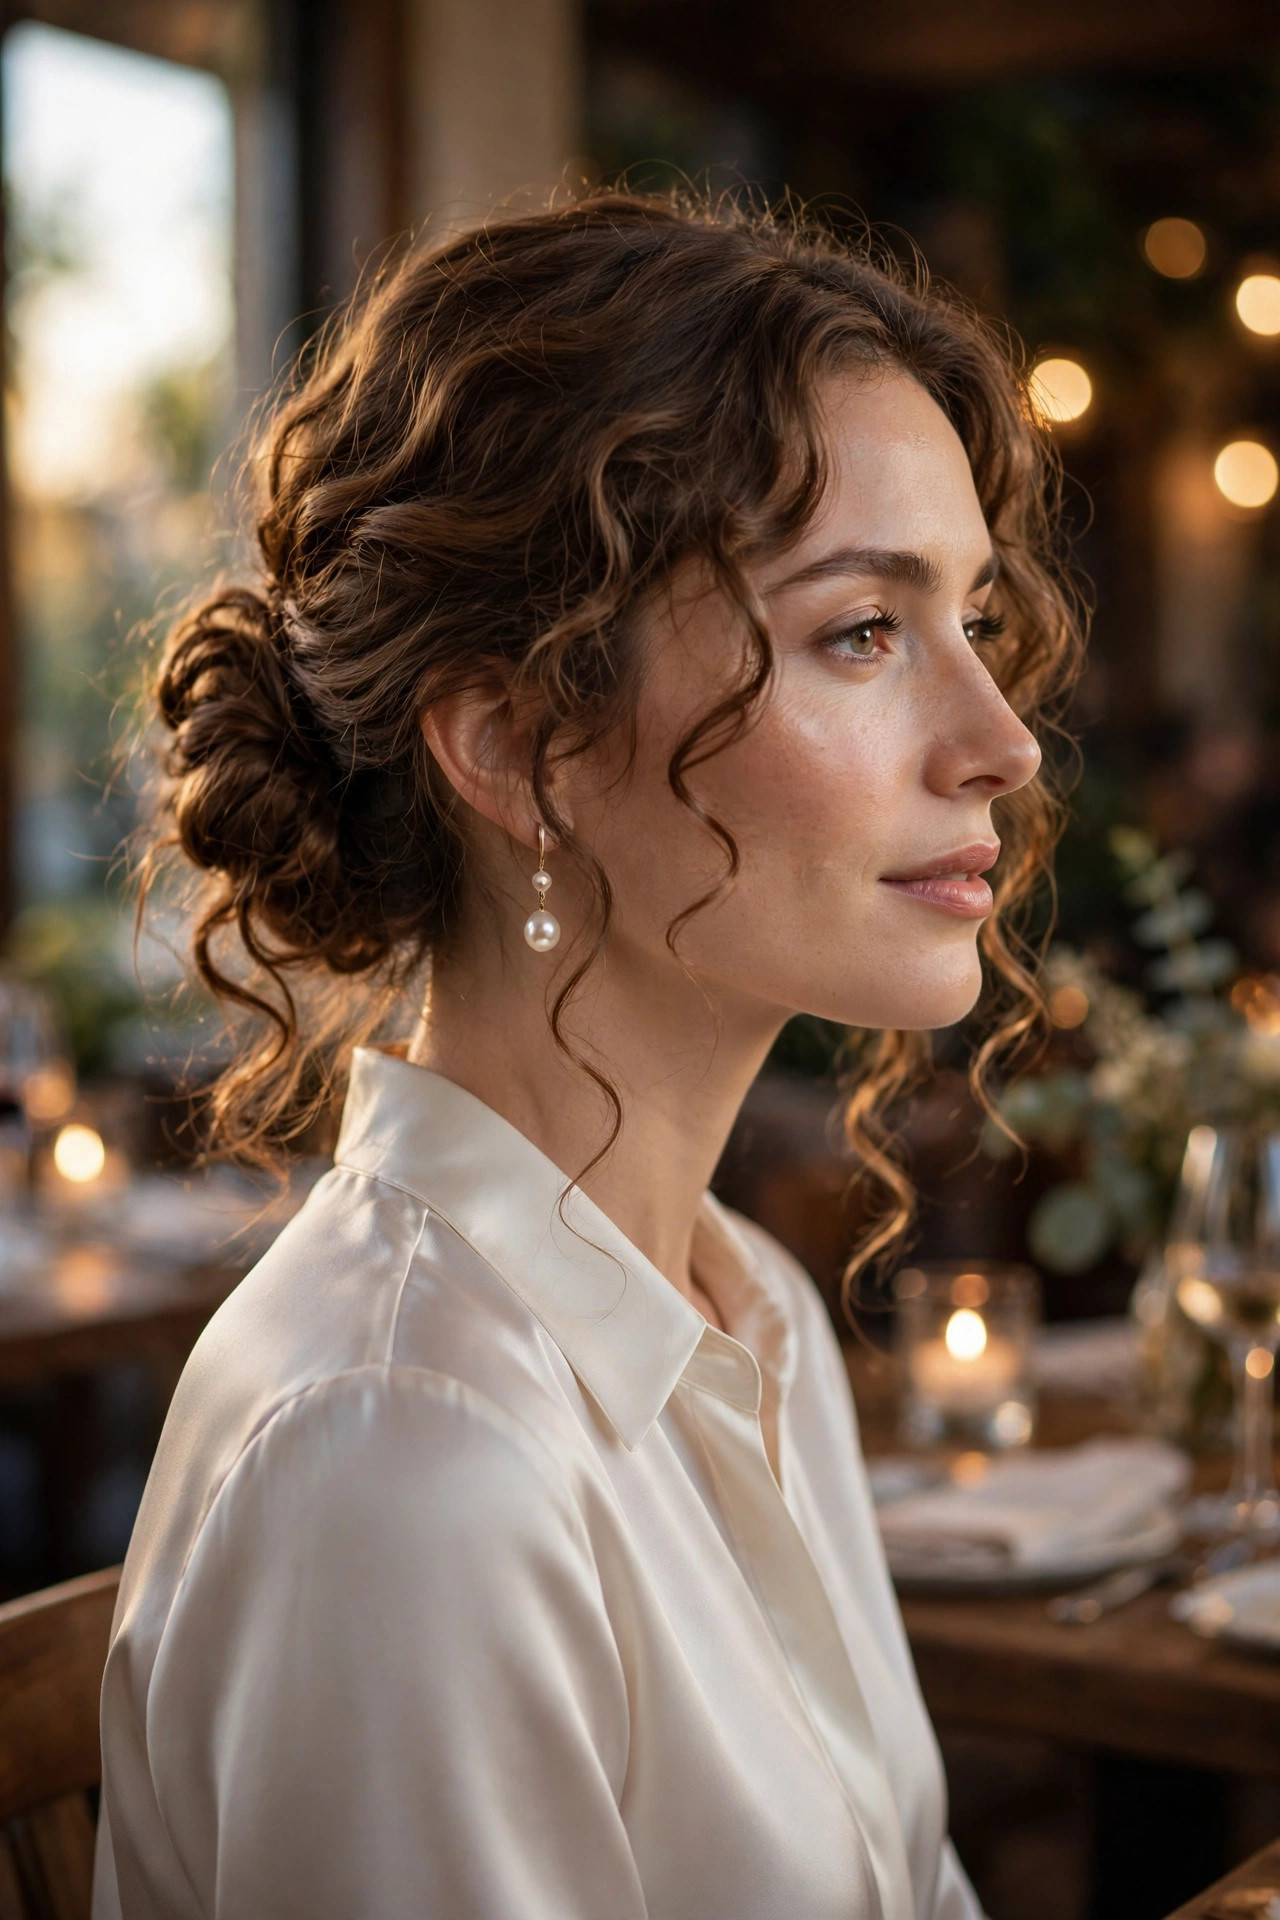
- Twist the top section back and down toward the nape
- Coil the twist into a small low bun and pin it
- Leave soft curls loose below and around the face
- Smooth flyaways with a touch of serum
A low twisted bun offers quiet elegance, sitting gracefully at the nape while soft curls frame the face and fall gently below. It is a favourite for dinner parties, work events, and weddings where you want to look refined without a severe, scraped-back finish. The low placement flatters longer necks and shows off earrings beautifully, while the twists add just enough detail to keep the style interesting from behind as well as from the front. It also suits every age beautifully, from young professionals to grandmothers, because its quiet elegance never tries too hard.
The bun holds best when the twist is coiled loosely rather than wound tightly, since a relaxed coil blends more naturally with the curls underneath. Secure it with pins inserted in several directions, and finish with a drop of serum smoothed over flyaways for polish. If your hair is fine, tease the twist lightly before coiling to give the bun believable fullness. This timeless style transitions effortlessly from office hours to evening celebrations. Add a single pearl pin above the bun, and the whole style instantly feels more bridal without any extra effort.
Spiral Cascading Curls
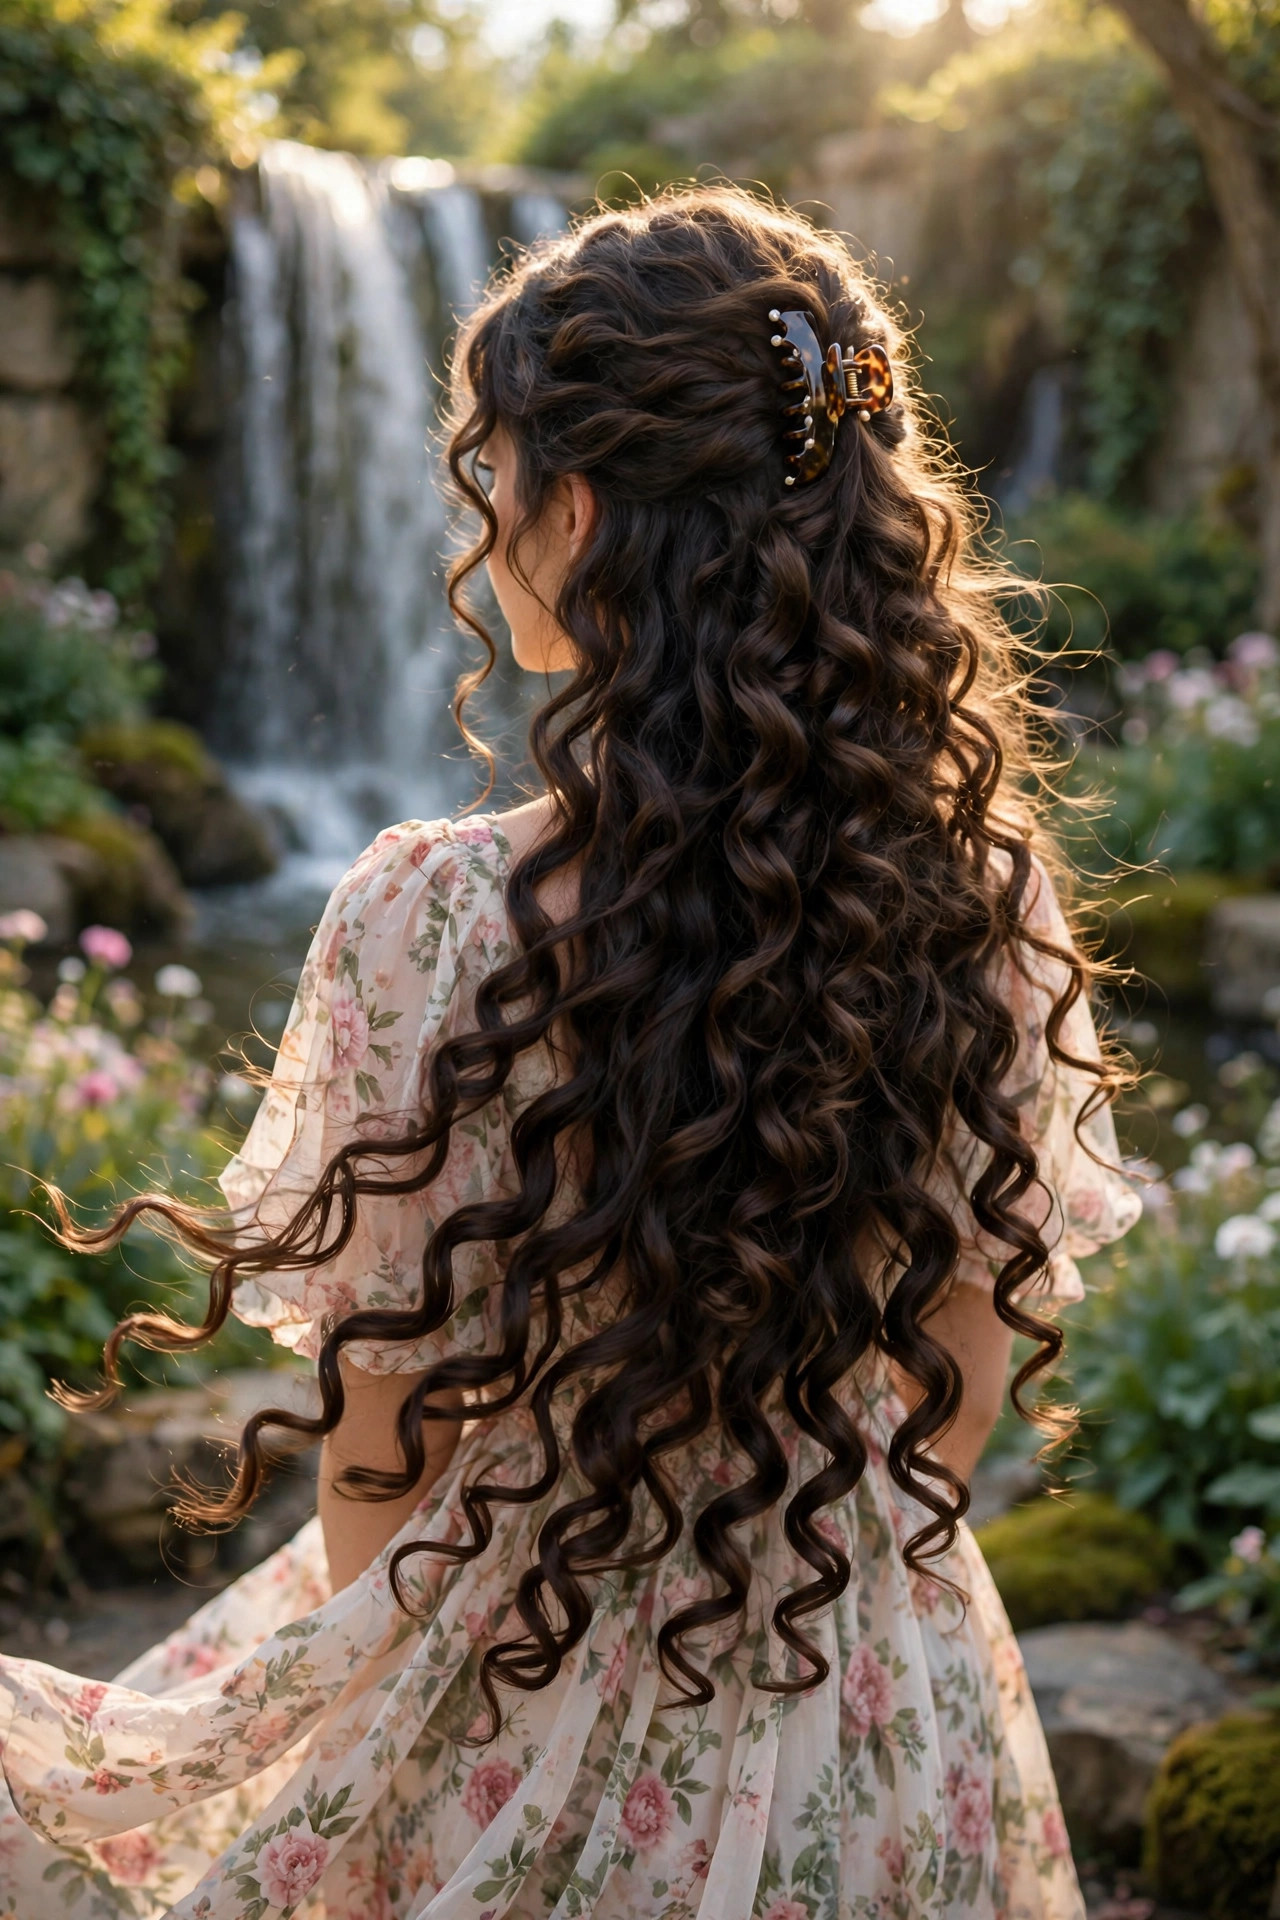
- Define the curls with cream and diffuse until dry
- Lift the top section and pin it at the crown
- Separate the ringlets gently for fullness and movement
- Mist lightly with shine spray for a glossy finish
Spiral cascading curls are all about celebrating length, with defined ringlets falling like a waterfall beneath a softly lifted top section. This look is breathtaking on long hair, where each spiral catches the light differently and creates constant movement as you walk. It suits romantic occasions beautifully, from garden parties to engagement photos, and it lets your natural curl pattern do most of the talking without complicated braiding or twisting techniques. It also moves beautifully in the breeze, with each spiral catching light differently as you walk, dance, or turn your head.
Definition is everything here, so apply curl cream to soaking-wet hair and avoid touching the curls while they dry. Diffusing on low heat preserves the spiral shape, and separating the ringlets only once they are fully dry prevents frizz. A shine mist over the finished style adds a healthy glow that photographs beautifully. For extra staying power, pin the top section with two crossed pins rather than a single elastic. Refresh the curls the next morning with a light water mist, scrunching gently to revive definition without starting over completely.
Chunky Pull Through Braid
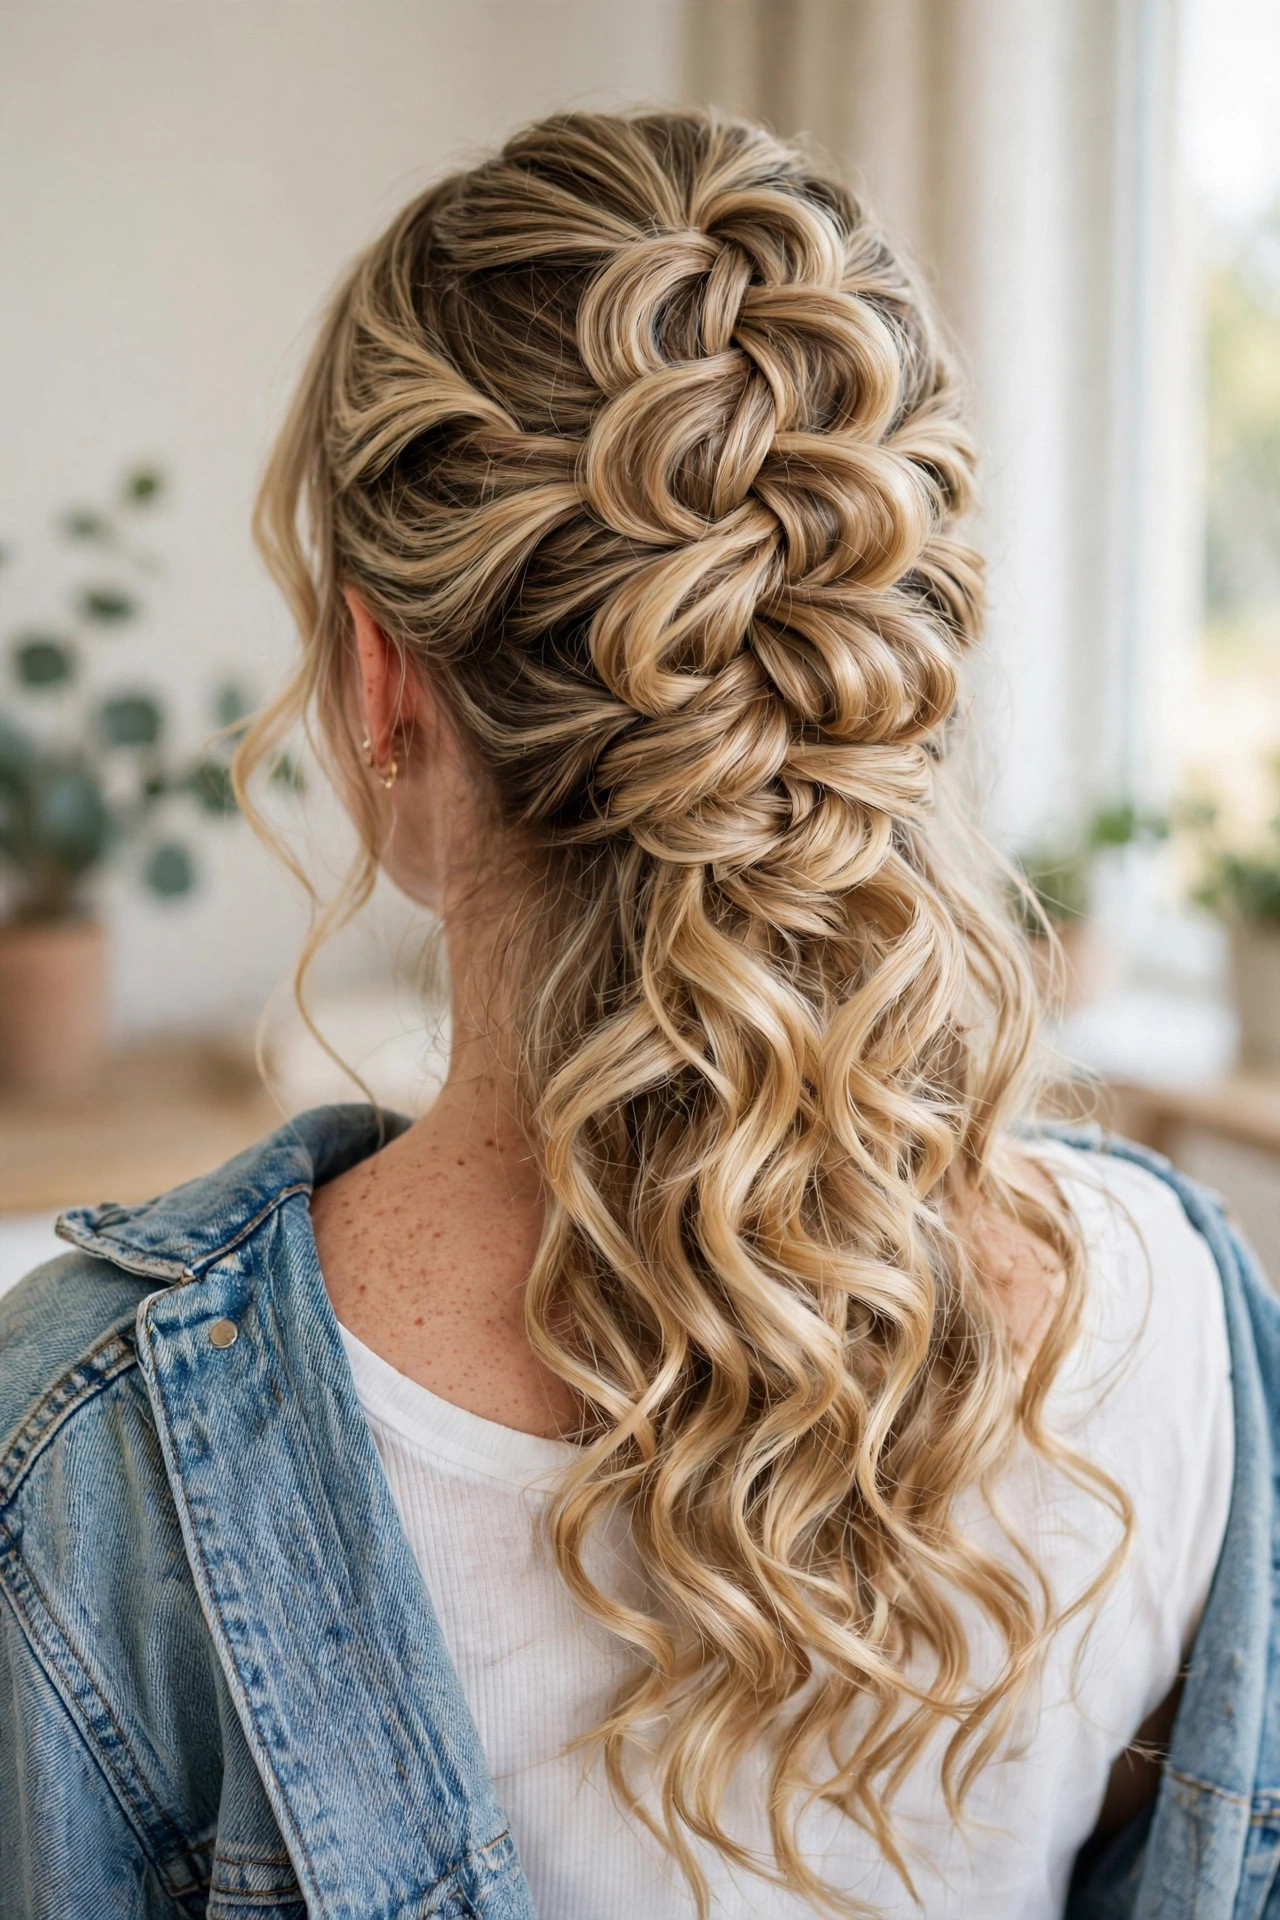
- Tie the top section into a small ponytail first
- Loop small side sections through it repeatedly downward
- Pull each loop outward to create chunky volume
- Leave the lower curls loose and lightly tousled
A chunky pull-through braid looks impressively intricate but uses only elastics and loops, making it one of the most rewarding styles for beginners who love a wow factor. The braid runs down the centre of the top section like a thick rope, adding texture and dimension above soft, flowing curls. It works especially well on highlighted hair, where the loops show off different tones, and it stays secure for hours without constant readjusting or pinning. It also stays put through long events, since the elastics anchor each loop securely against the rest of the hair.
The secret to a chunky braid is pulling each loop wide and even, since narrow loops disappear into curly texture. Work from the top down, checking the shape in a mirror after every second loop, and use clear elastics so nothing distracts from the braid itself. A little texturising powder at the roots gives grip and volume. This style is a brilliant choice for proms, parties, and photoshoots alike. Use clear elastics throughout, so nothing distracts from the braid itself, and the chunky loops remain the clear focal point of the style.
Satin Bow Charm
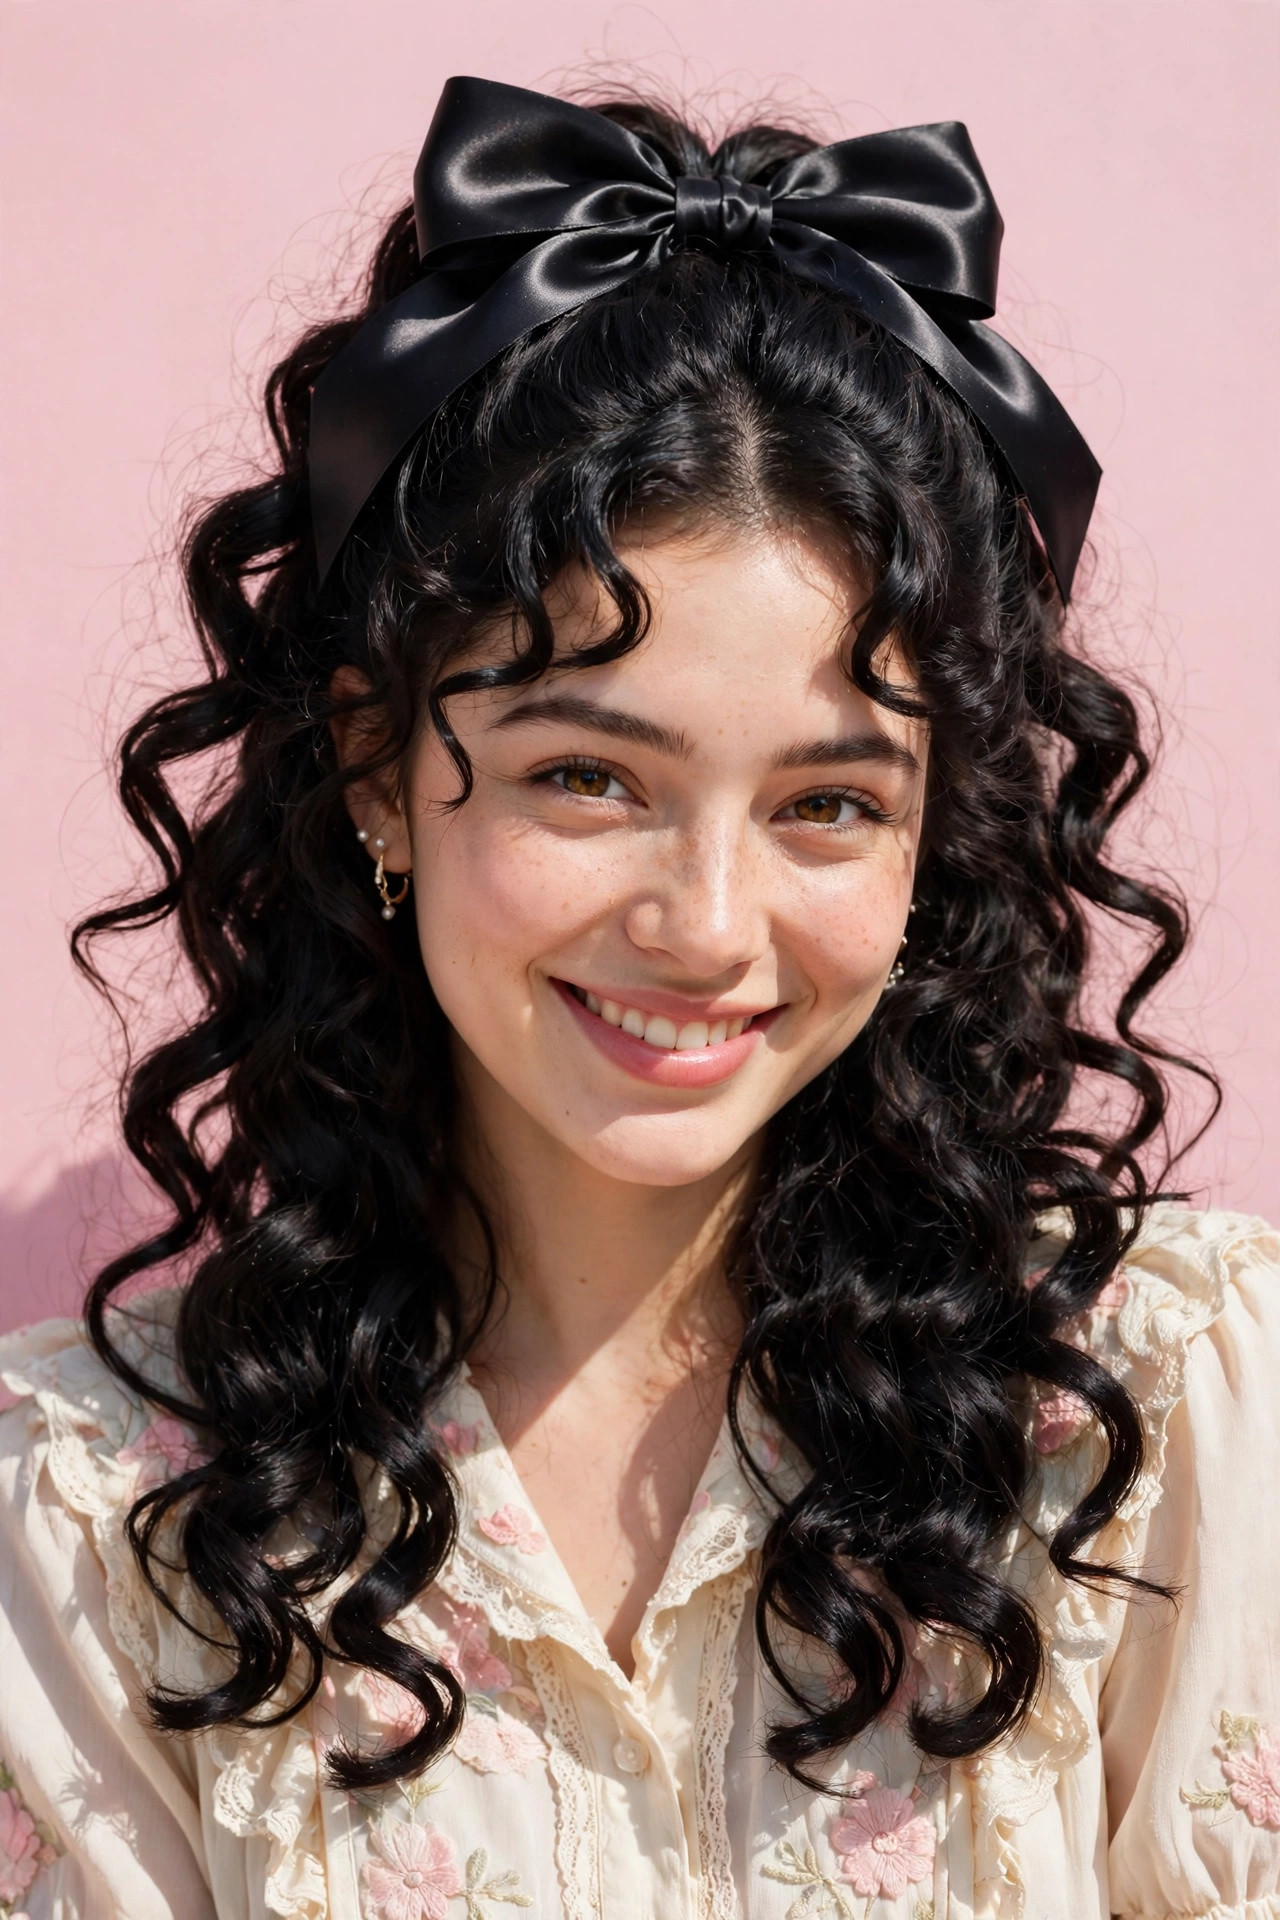
- Gather the top section and tie it with a satin bow
- Position the bow slightly off-centre for charm
- Fluff the lower curls for bounce and movement
- Keep a few tendrils loose around the face
A satin bow adds instant sweetness to any half-up look, turning a simple pinned top into a charming, vintage-inspired statement in seconds. The soft fabric contrasts beautifully with bouncy ringlets, and the bow becomes a focal point that elevates even the simplest outfit. It is perfect for birthdays, baby showers, and spring celebrations, and it works on all ages, from little girls to women who love a playful, feminine touch in their styling. It also works beautifully for photographs, since the bow adds a charming focal point that draws the eye instantly.
Choose a bow size that suits your hair volume, since an oversized bow can overwhelm fine curls while a tiny one disappears into thick hair. Satin and velvet bows grip better than silk, which tends to slide, so attach the bow over a small elastic for security. Position it slightly off-centre for a modern feel, or dead centre for classic charm. Keep the rest of the styling simple so the bow stays the star. Store satin bows flat in a drawer, since creases in the fabric can spoil the smooth, polished look of the finished bow.
Side Part Elegance
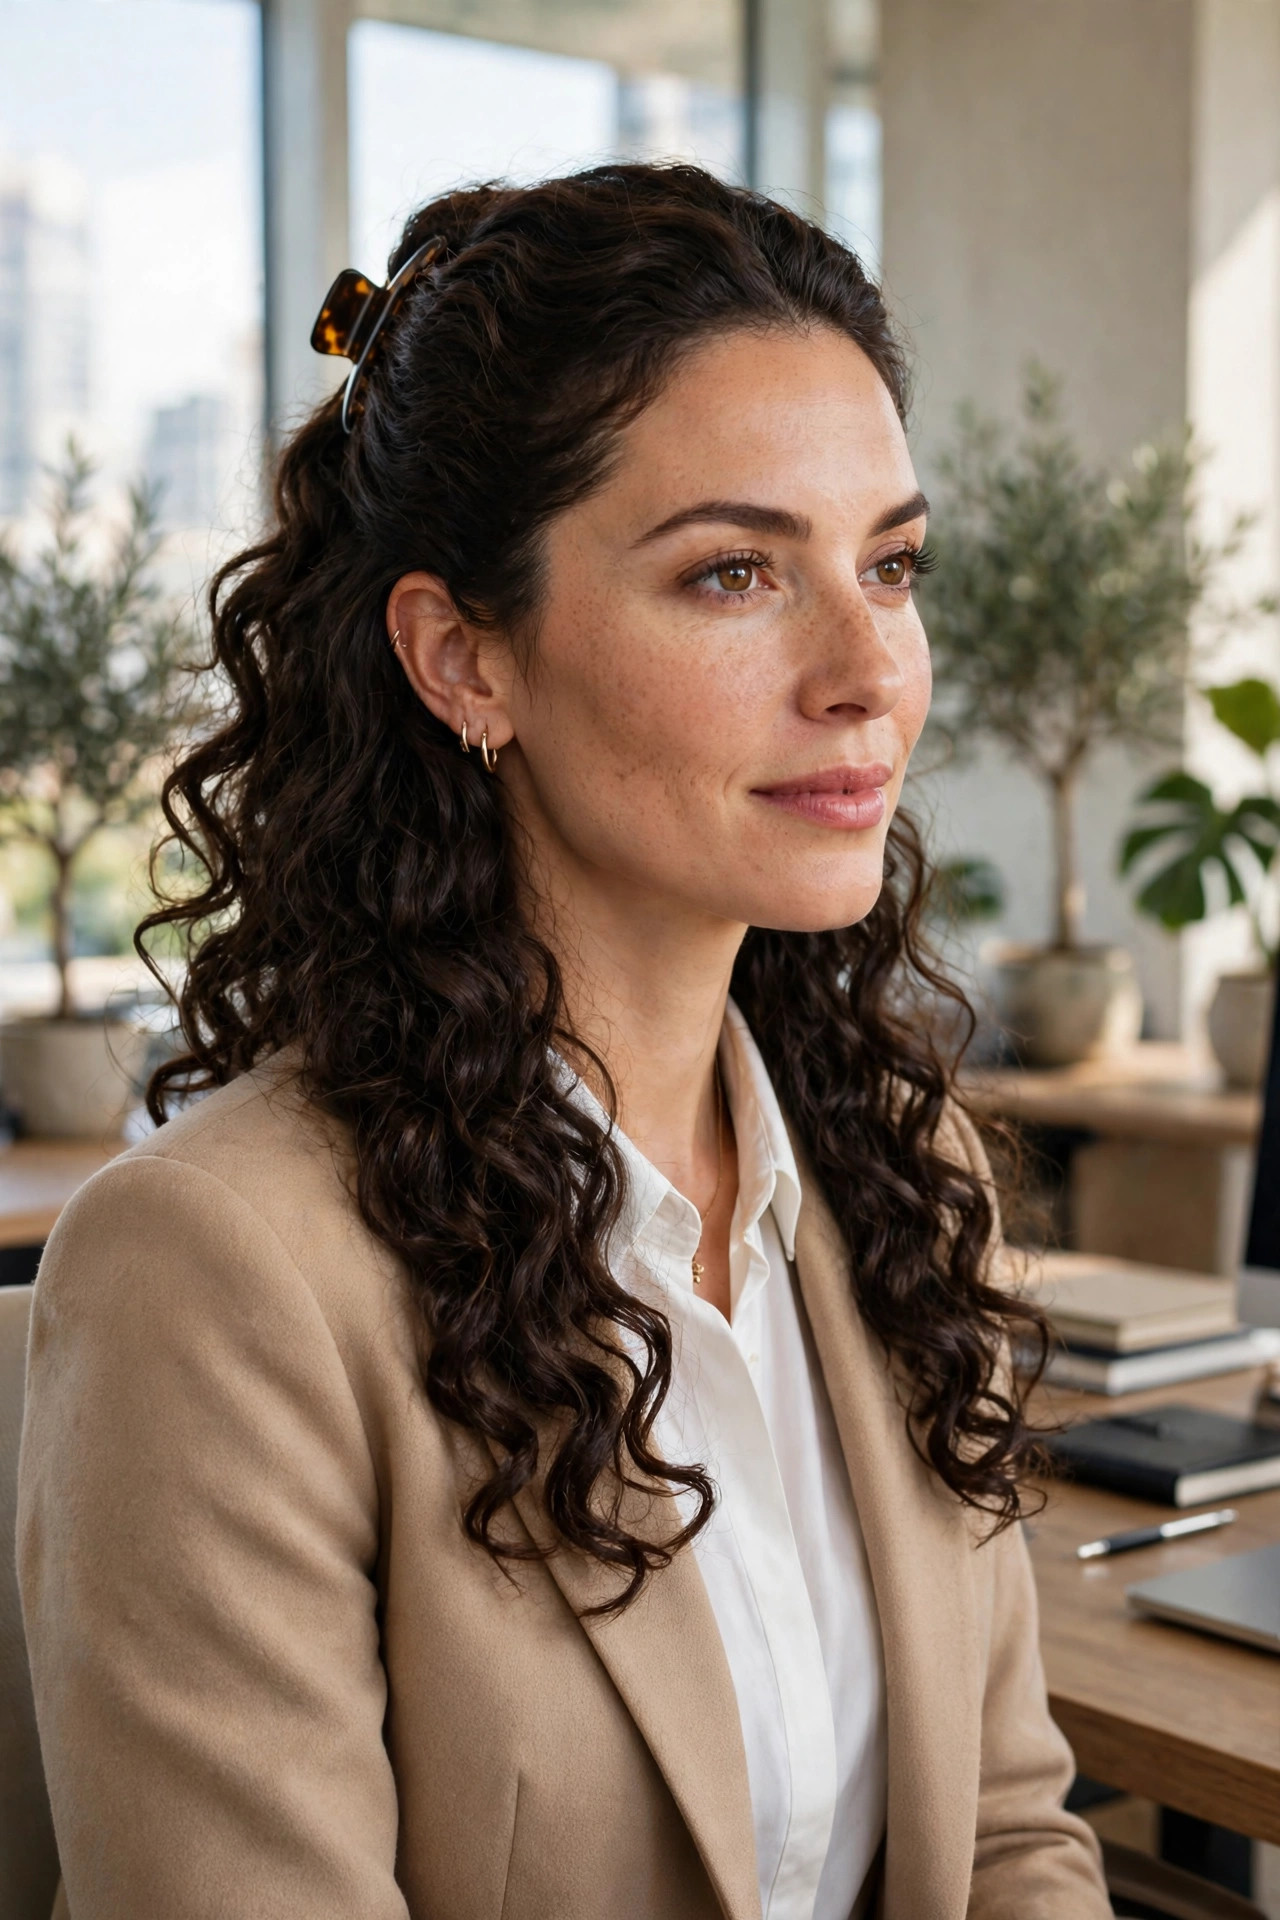
- Create a clean deep side part with a tail comb
- Pin the smaller side back flat against the head
- Let the larger side fall in defined, glossy curls
- Finish with a light-hold spray for polish
Side part elegance proves that simplicity can be the most sophisticated choice, with a clean deep part and a smoothly pinned smaller side balancing a fall of defined curls. This look works beautifully in professional settings, where it reads polished and intentional without demanding much morning effort. The asymmetry flatters most face shapes, and the deep part creates natural volume at the roots that makes fine hair look noticeably fuller and more glamorous. It also creates lovely natural volume at the roots, which helps thinner hair appear thicker without any heavy styling products.
A tail comb is essential for a crisp part line, so part the hair while it is damp and let it set in that direction while drying. Smooth the smaller side with a little gel, pinning it flat behind the ear for a sleek contrast against the curls. If your part tends to drift, a single flat pin placed along the part line keeps it anchored all day. This timeless style pairs perfectly with tailored outfits and minimal jewellery. A quick shine mist over the finished style adds polish and keeps flyaways smooth throughout the working day.
Glittering Hair Pin Accent
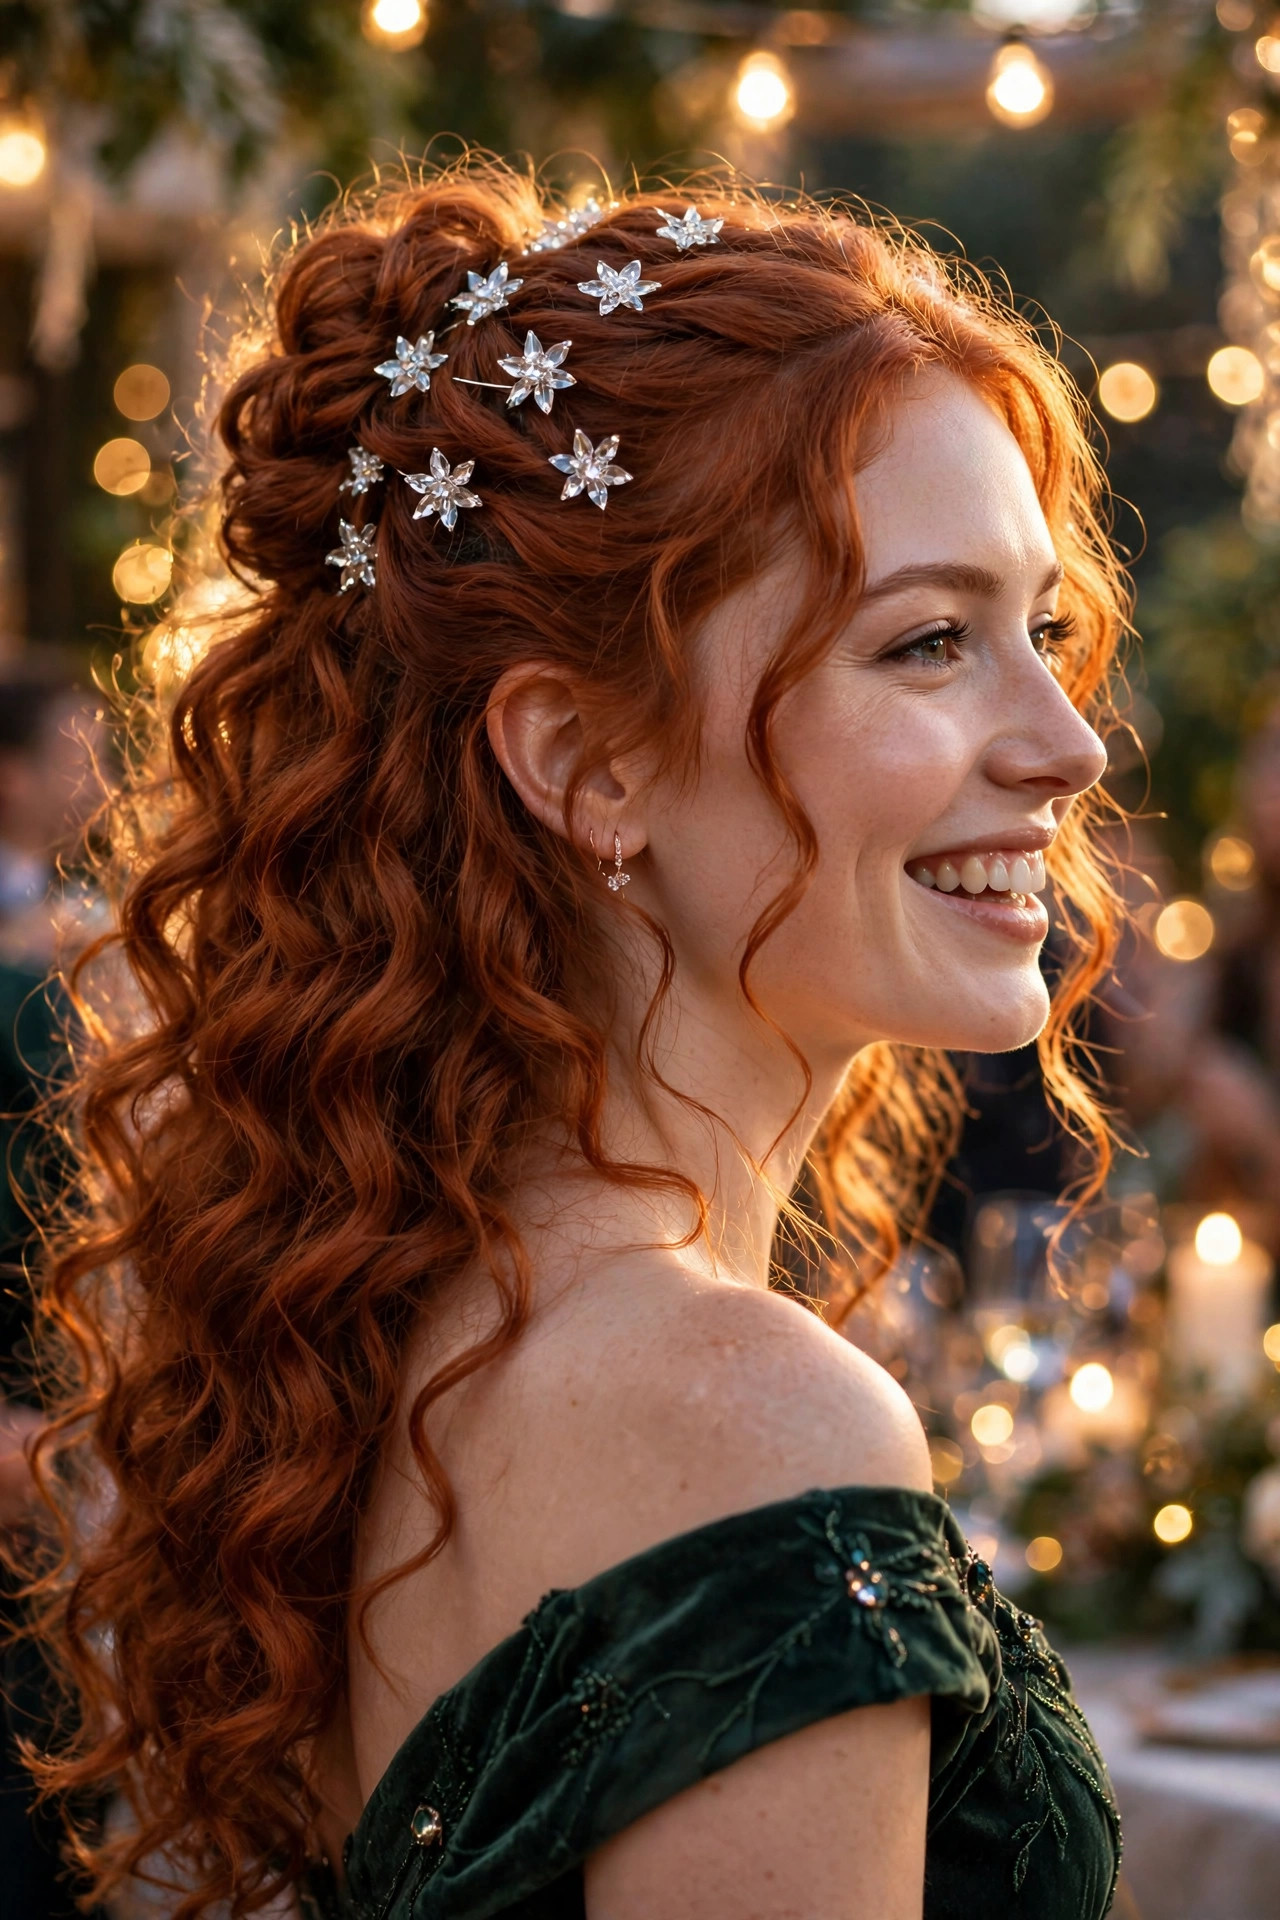
- Pin the top section back loosely with plain pins
- Add crystal pins along the pinned section sparingly
- Space the pins unevenly for a natural scattered effect
- Leave the lower curls loose, glossy, and defined
Glittering hair pins are the easiest way to dress up a half-up style for a celebration, scattering sparkle through the pinned section like stars against your curls. They catch light with every movement, which makes them perfect for New Year parties, festive dinners, and evening weddings. Because the pins do the decorating, the rest of the styling can stay simple, and you can add or remove pins to match the formality of any event in moments. They also suit every hair colour beautifully, sparkling brightest against deep brunette and black tones in evening light.
Less is more with crystal pins, so start with three and add more only if the look still feels understated. Scatter them unevenly rather than in a straight line, since a natural arrangement looks more expensive and intentional. Anchor each decorative pin over a plain pin for security, especially if you plan to dance. This sparkling detail works on every curl colour, though it shines brightest against darker hair tones. Carry two spare pins in your clutch, since a lost crystal can be replaced in seconds without disturbing the rest of the style.
Cornrow Crown Detail
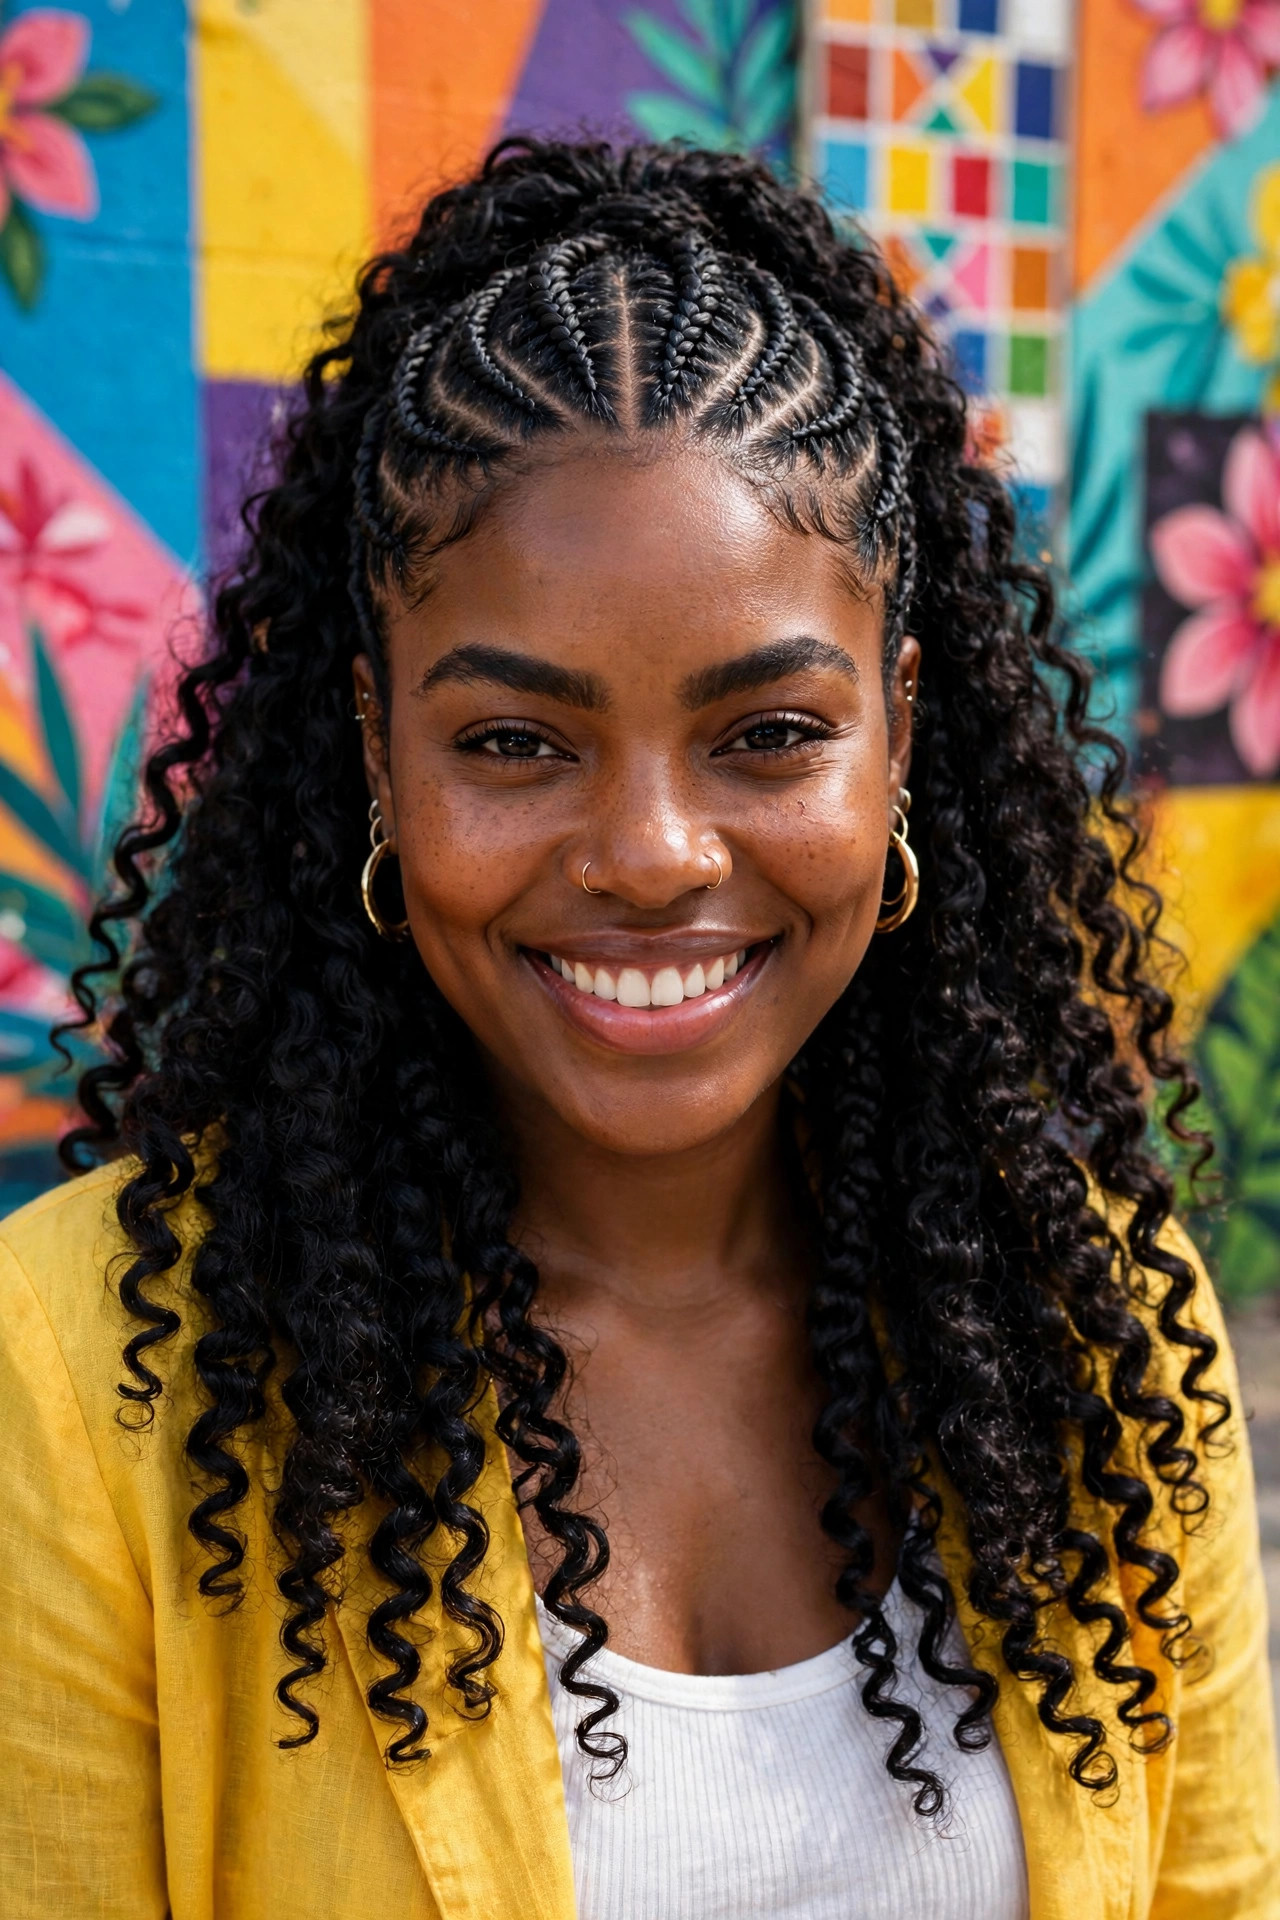
- Cornrow the front and crown sections neatly backward
- Stop the cornrows at the crown and pin them down
- Release the remaining hair into full, defined curls
- Moisturise the scalp and edges for a healthy finish
A cornrow crown detail combines protective styling with show-stopping beauty, braiding the front and crown neatly before releasing the rest into full, glorious curls. This look celebrates coily and kinky textures beautifully, keeping the hairline tidy and protected while the length stays free and voluminous. It lasts for days with minimal upkeep, which makes it ideal for holidays, busy weeks, and anyone who wants a style that works as hard as they do. It also protects the hairline beautifully, giving delicate edges a welcome rest from daily heat and tension.
Neat parts make all the difference with cornrows, so take your time sectioning with a tail comb and keep the tension comfortable rather than tight. Stylists at Byrdie often recommend moisturising the scalp before braiding to keep protective styles healthy. Once the crown is braided, define the loose curls with cream and let them air-dry for the softest finish. Sleep with a satin scarf to preserve both the braids and the curl pattern. Refresh the loose curls between washes with a moisturising mist, scrunching gently to restore bounce without disturbing the braids.
Retro Hollywood Waves
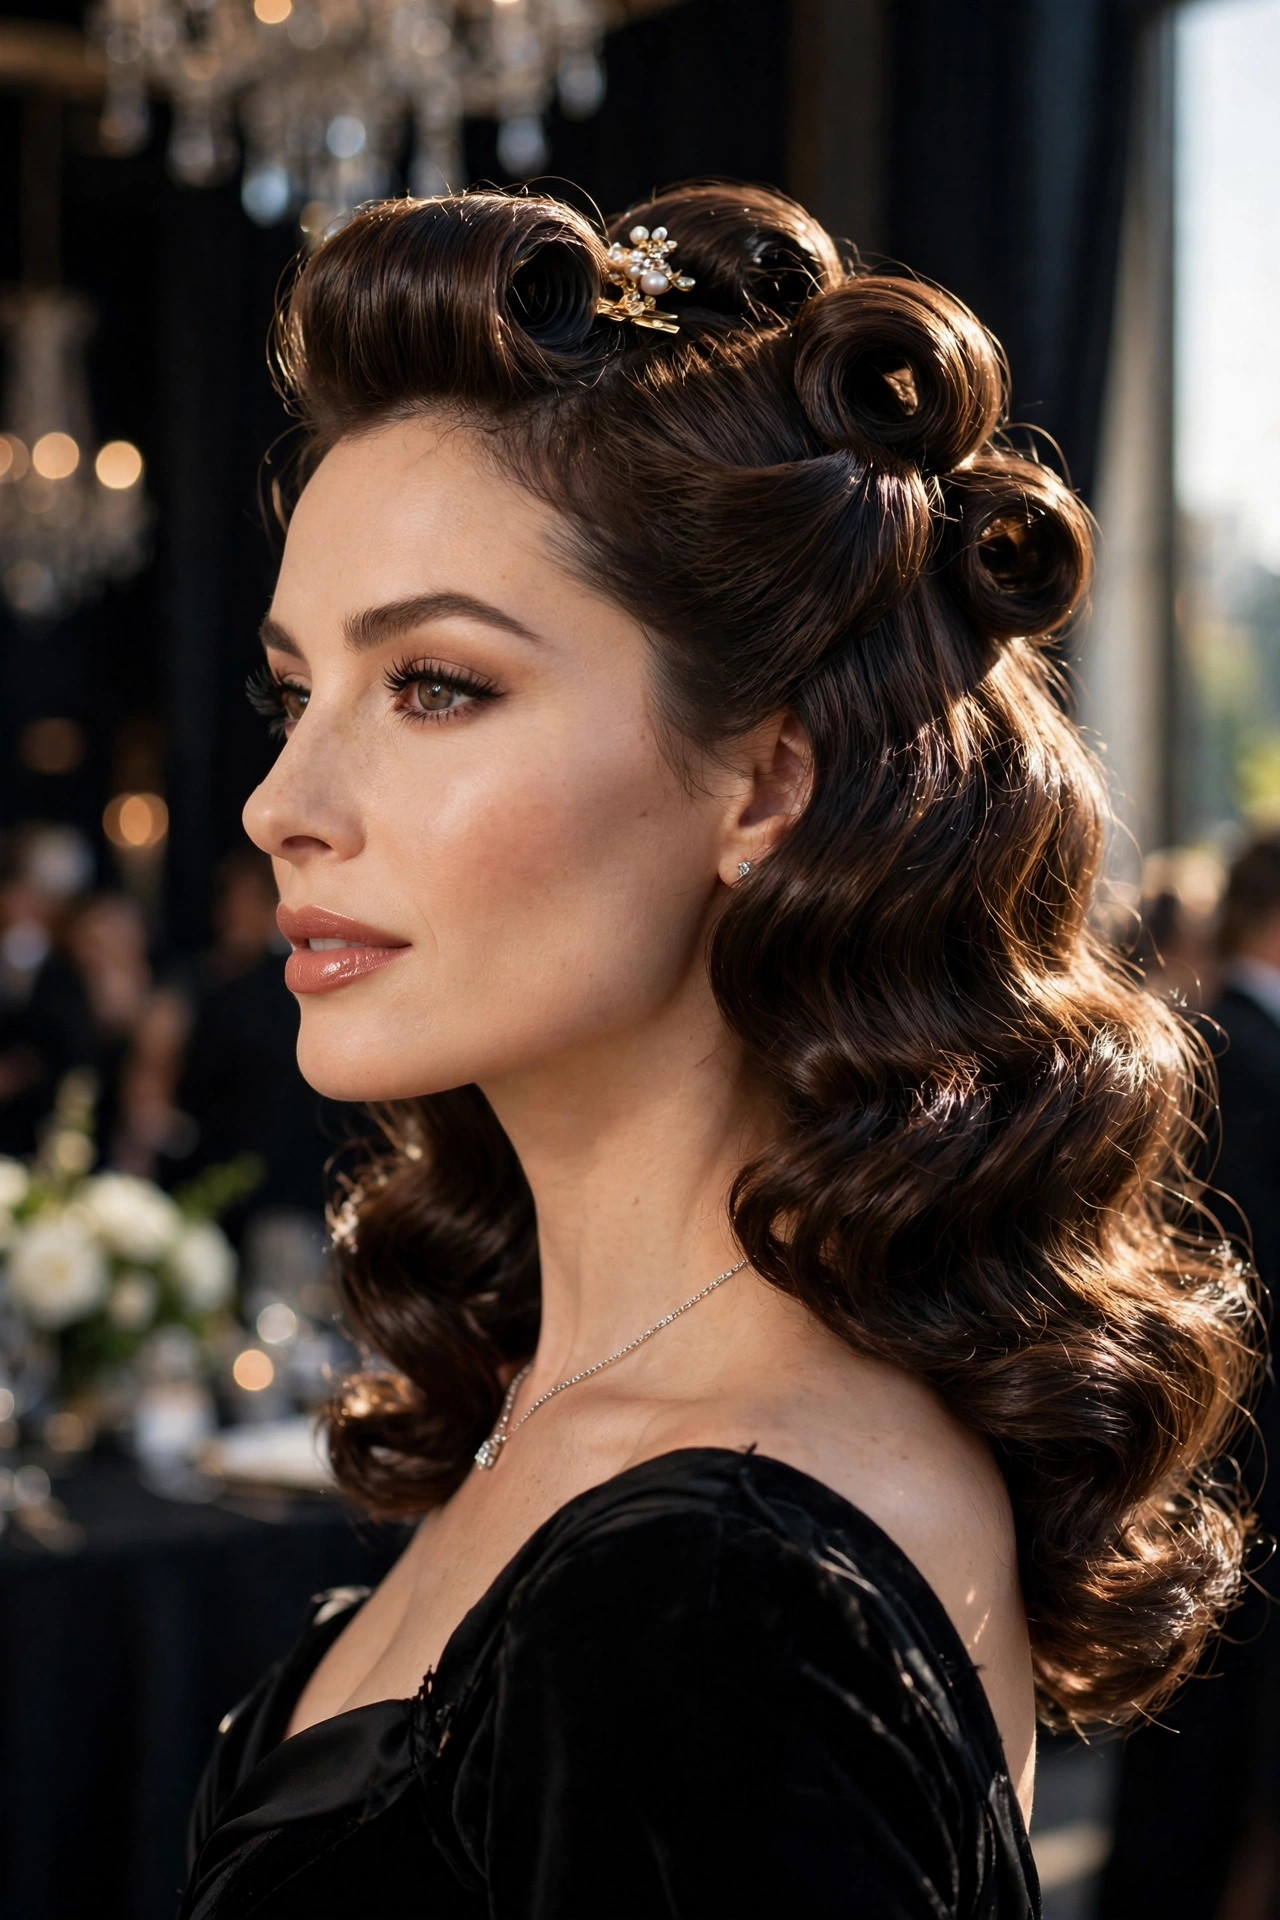
- Set the waves with large rollers or a wide iron
- Brush the waves gently into smooth, sculpted shapes
- Pin the top section back in classic style
- Mist with strong-hold spray for lasting sculpted shape
Retro Hollywood waves bring silver-screen glamour to the half-up silhouette, with sculpted, glossy waves falling in perfect formation beneath a smoothly pinned top. This look is made for black-tie events, galas, and milestone celebrations where timeless elegance matters more than trends. The waves frame the face beautifully and photograph like a dream, giving every picture a polished, cinematic quality that feels both nostalgic and completely current at once. It also flatters every dress neckline beautifully, from strapless gowns to high collars, because the waves frame the shoulders so gracefully and elegantly.
Sculpted waves need patience, so set the hair with large rollers or a wide-barrel iron and let each section cool completely before brushing it out. Brushing with a soft bristle brush merges the curls into those signature smooth waves, while a strong-hold spray locks the shape without dulling the shine. Keep the pinned top sleek so the waves stay the star. This style rewards careful preparation with a truly unforgettable finish. Allow plenty of time for setting, since rushing the cooling stage is the quickest way to lose that smooth, sculpted wave shape.
Beachy Textured Waves
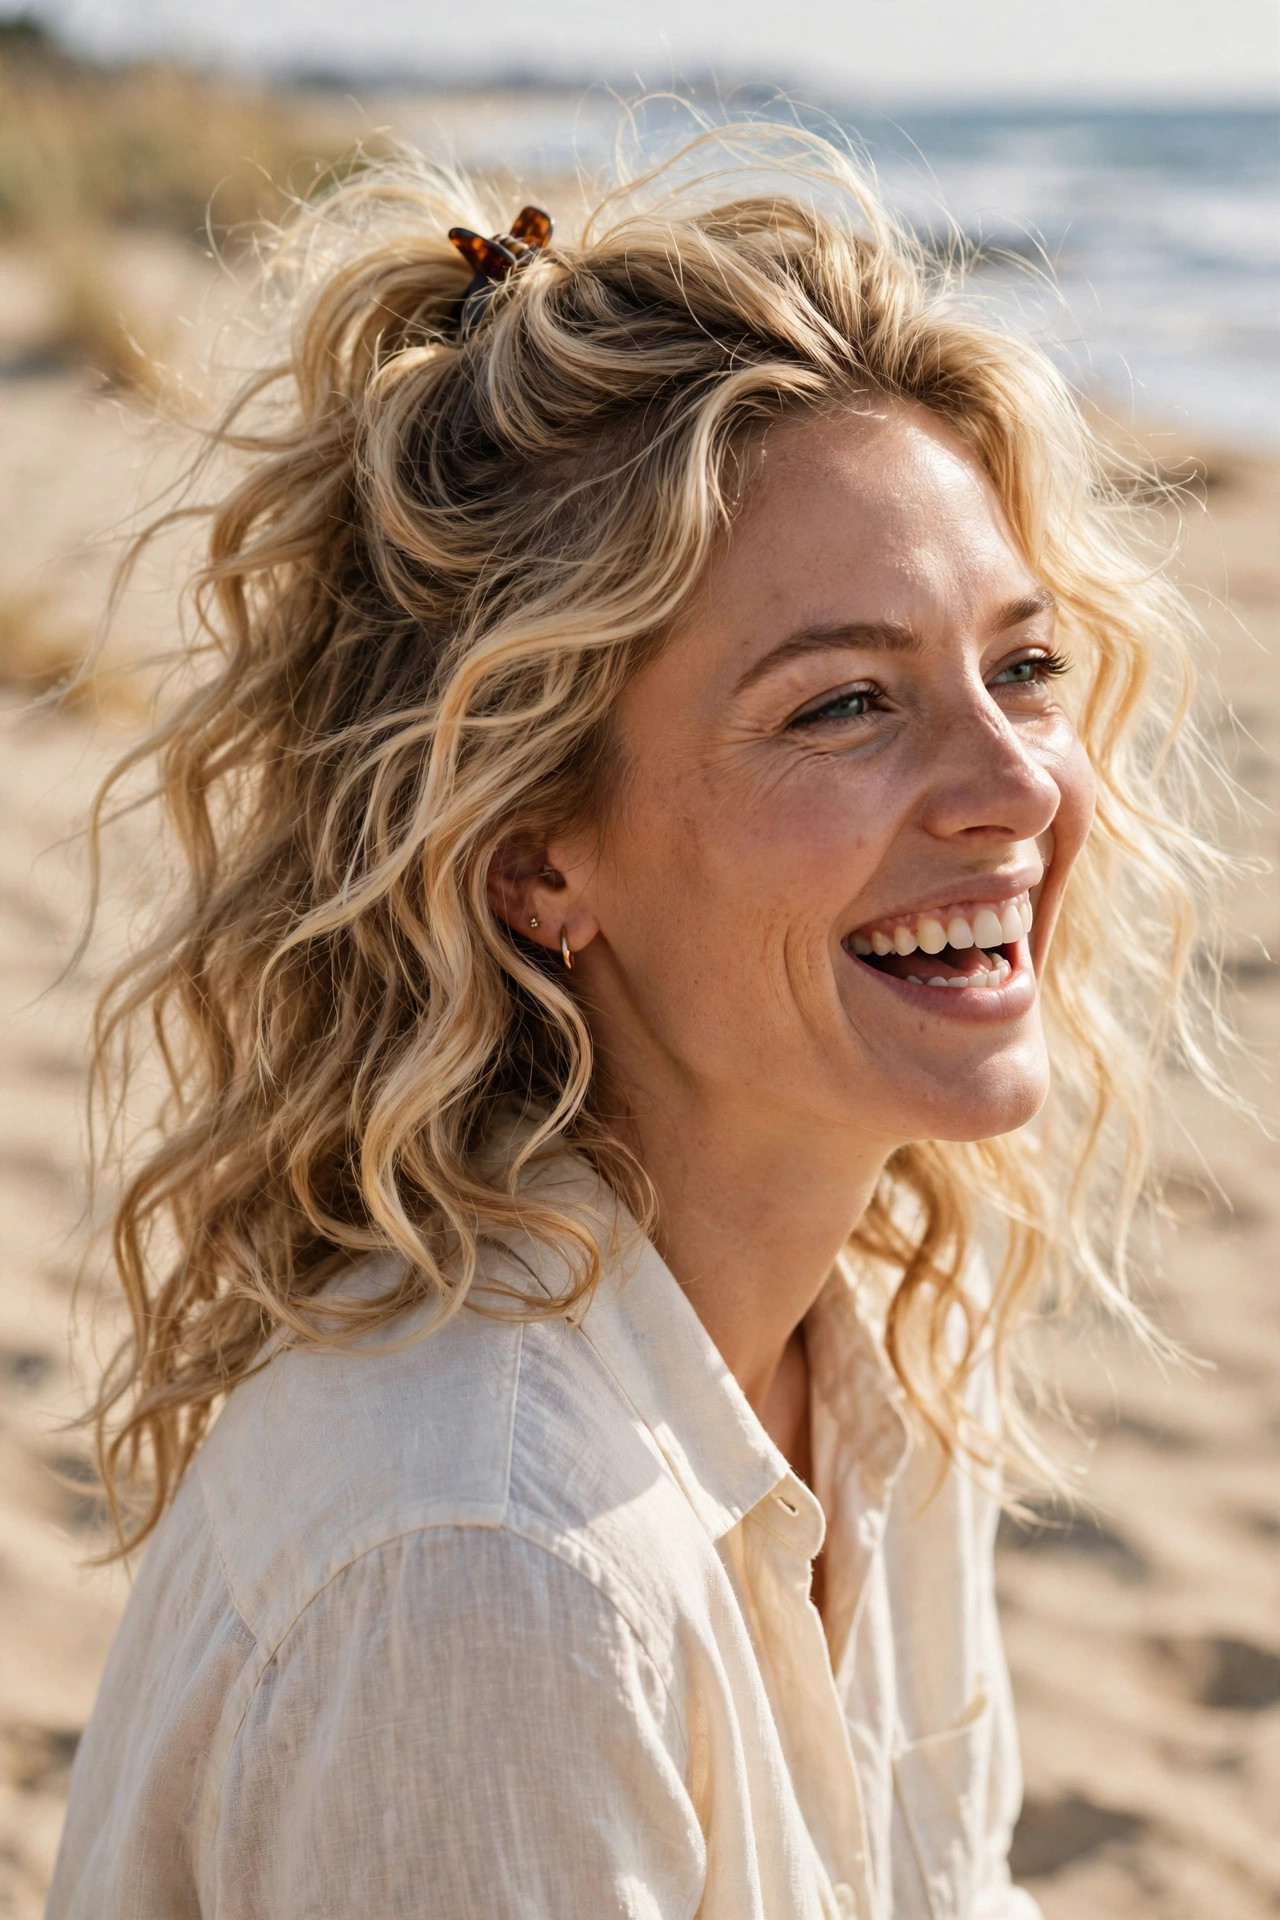
- Apply sea salt spray to damp hair generously
- Scrunch the lengths upward and air-dry naturally
- Pin the top section back loosely and casually
- Tousle the waves with fingers for a beachy finish
Beachy textured waves capture that just-back-from-the-seaside feeling, with tousled, salt-kissed texture falling beneath a casually pinned top section. This is the ultimate holiday hairstyle, looking better the more relaxed it becomes, and it suits every length from a bob to waist-length curls. The loose pinning keeps hair out of your face in the breeze while the textured lengths stay wild and free, which makes it perfect for beach weddings, coastal dinners, and summer festivals. It also looks better as the day goes on, since the texture relaxes naturally into an even more effortless, lived-in finish.
Sea salt spray is the hero product here, giving straight or loosely curled hair the grit and texture it needs to hold a wave. Scrunch upward while the hair is damp, then leave it alone to air-dry for the most natural result. Resist the urge to brush the finished waves, since brushing turns texture into frizz. A final scrunch with a drop of oil on the ends keeps the look touchable and sun-kissed rather than dry. A wide-tooth comb used gently on wet hair is the only detangling tool you need for this relaxed, beachy texture.
Velvet Scrunchie Style
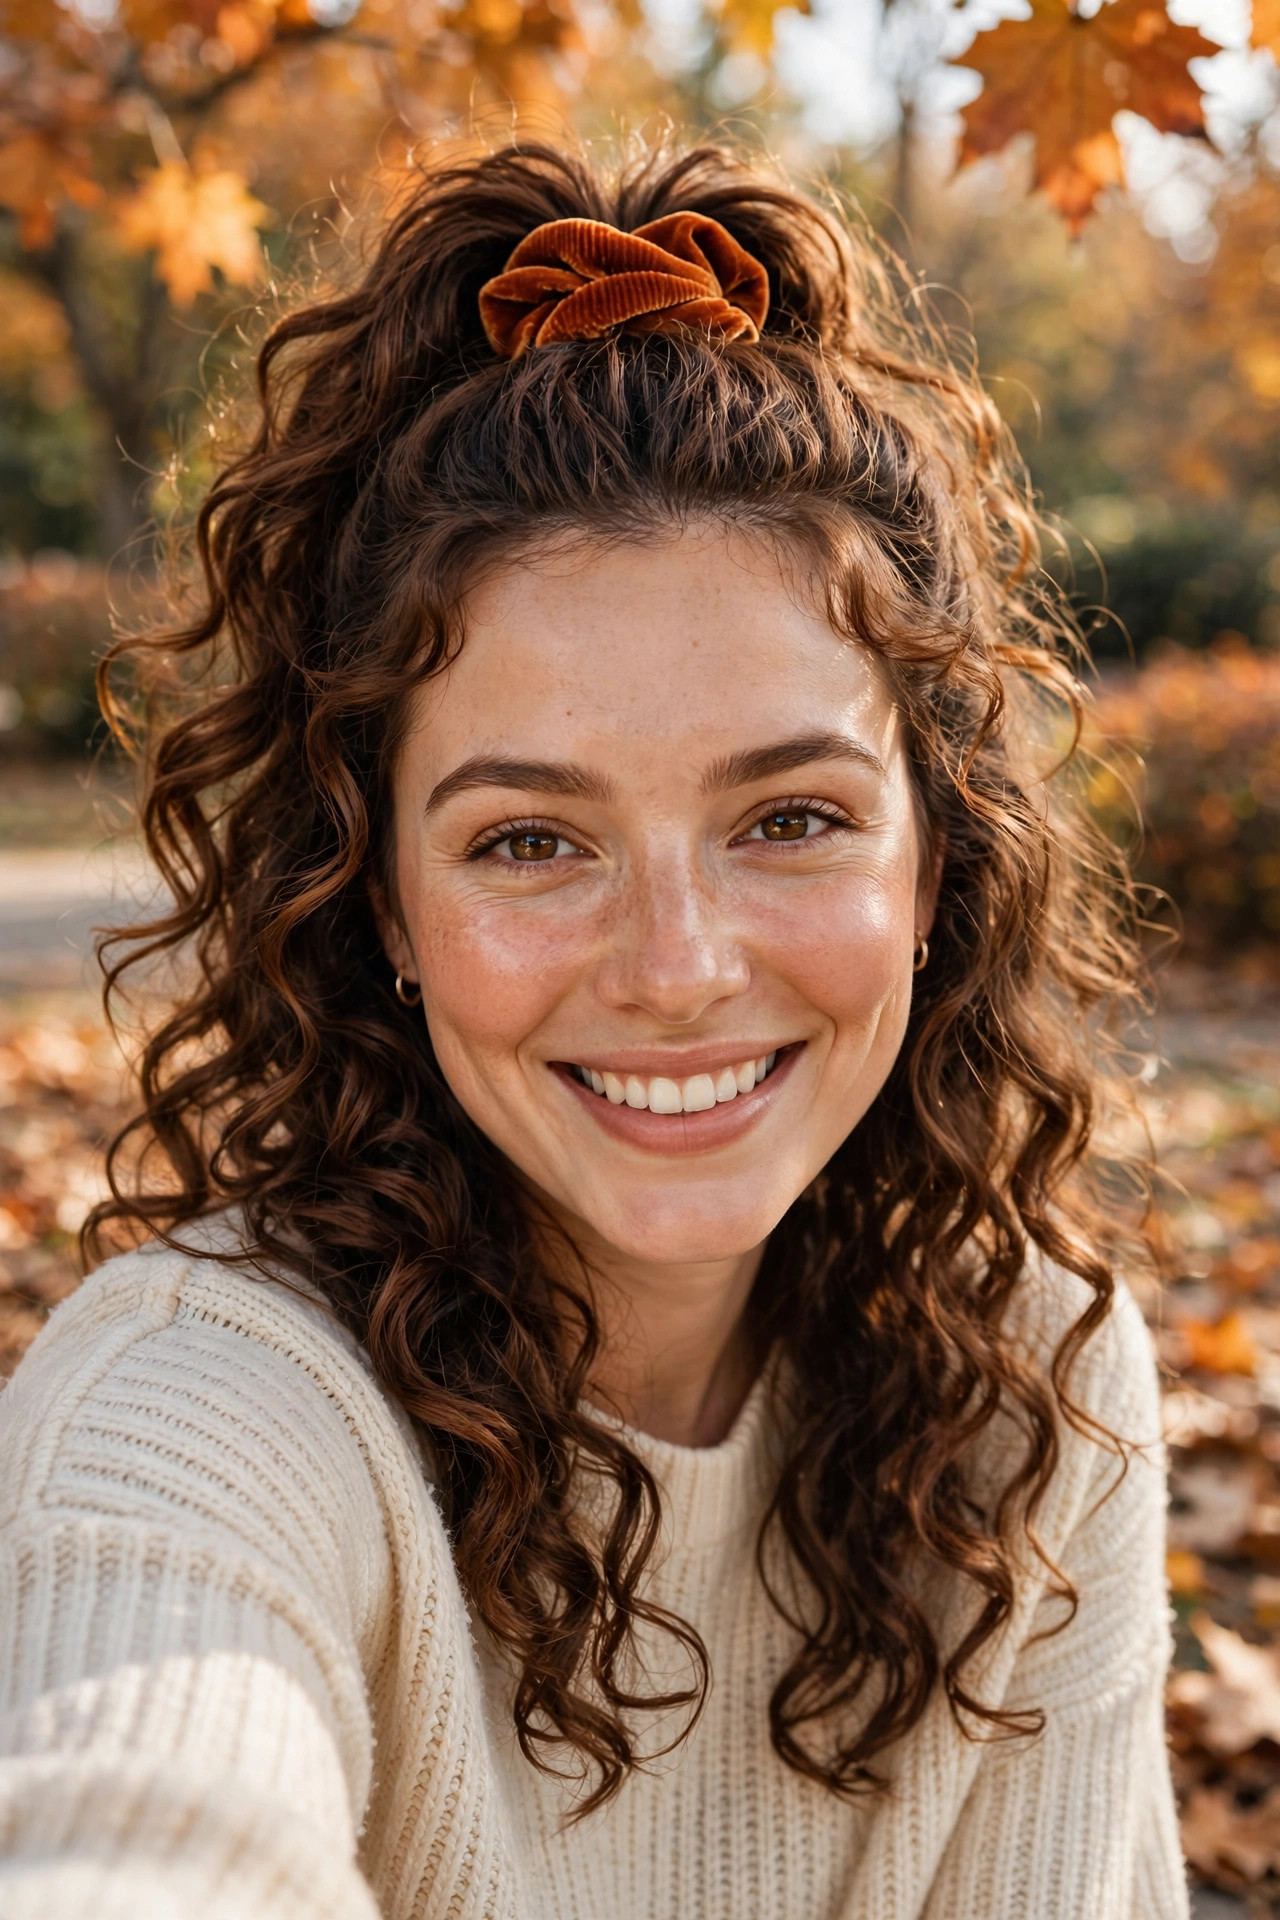
- Gather the top section loosely at the crown
- Wrap a velvet scrunchie around it twice
- Pull a few curls loose for softness
- Fluff the lower curls for bounce and shape
A velvet scrunchie brings cosy, nostalgic charm to the half-up look, holding the top section gently without denting curls or causing breakage. Unlike tight elastics, the soft fabric protects delicate curl patterns, which makes this style a favourite for everyday wear and for anyone growing out their hair. The scrunchie adds a pop of colour and texture, turning a five-minute style into something that looks thoughtfully put together and seasonally on trend. It also makes a thoughtful gift idea, since pretty scrunchies in seasonal colours are always welcome in a stocking or gift bag.
Velvet scrunchies come in endless colours, so choose one that complements your outfit or adds a deliberate contrast for a fashion-forward touch. Wrap it only twice around the top section to keep the hold relaxed, and pull a few curls free around the face for softness. Editors at Allure have long praised scrunchies as a gentler alternative to elastics for textured hair. This easy style is perfect for school runs, office days, and casual weekends alike. Match the scrunchie to your outfit for a coordinated look, or choose a bold contrast colour to make it pop.
From romantic braids to playful bows, this collection proves that curly half up half down hairstyles can suit every mood, occasion, and curl pattern imaginable. The real secret is working with your natural texture rather than fighting it, using creams, gentle pinning, and a little patience to let your curls shine. Save your favourite ideas, practise the techniques that excite you most, and do not be afraid to mix details from different looks. With the right finish, your half-up style will turn heads wherever you go. Try two or three favourites this week, and keep notes on which pins, products, and techniques worked best for your curls.
FAQ
How long do these half-up styles usually last?
Most half-up styles last a full day with the right preparation, and many survive into a second day with a satin scarf overnight. Strong pins, a light-hold spray, and curl cream applied to damp hair all help the pinned section stay secure. Looser romantic styles may need a quick touch-up by evening, especially in humidity.
Are half-up looks good for thin or fine curly hair?
Yes, they flatter fine curls beautifully because lifting the top section creates instant volume at the crown. Teasing the roots lightly, using a root-lifting spray, and separating the ringlets gently all make fine hair look fuller. Avoid heavy products that weigh curls down, and choose smaller accessories so they do not overwhelm delicate texture.
How do I stop frizz in a half-up style?
Frizz control starts in the shower with a moisturising conditioner and a microfibre towel instead of rough terry cloth. Apply curl cream to soaking-wet hair, diffuse on low heat, and avoid touching curls while they dry. A drop of lightweight oil smoothed over finished curls seals the cuticle and adds shine without heaviness.
Can I wear a half-up style to a wedding or formal event?
Absolutely, half-up styles are a wedding favourite because they balance elegance with natural movement and suit round, oval, heart, and square face shapes. Add braids, twists, pearl pins, or fresh flowers to elevate the look, and choose a stronger-hold spray so the style survives the ceremony, photographs, and dancing.